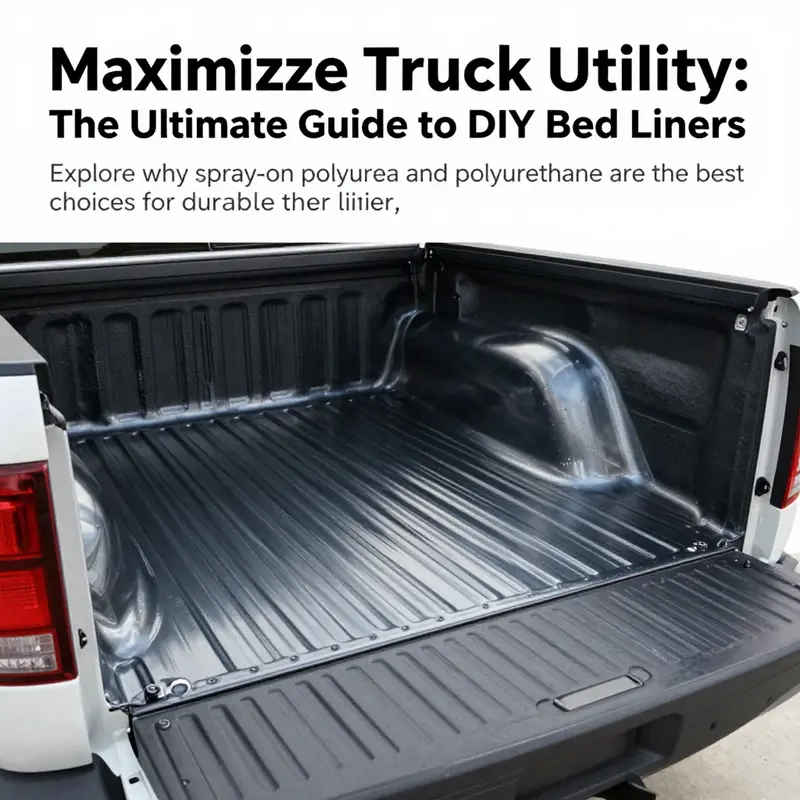
Truck beds are essential for various business operations, transporting goods and equipment and providing a reliable surface for countless applications. One key aspect of maintaining truck longevity is protecting the bed from wear and tear. The best DIY truck bed liner options, especially spray-on polyurea and polyurethane coatings, offer superior durability and seamless protection. This guide delves into five critical areas—performance features, protection qualities, DIY feasibility, material choices, and comparative advantages—to equip business owners with insights to make informed decisions for their truck bed liner needs.
The Best DIY Truck Bed Liner: A Practical Guide to Spray-On Polyurea and Polyurethane Performance
Choosing the right DIY truck bed liner is more nuanced than picking the most affordable spray can or the easiest do-it-yourself kit. It hinges on a balance between performance, longevity, and the level of effort you’re willing to invest in surface preparation and application. In the world of spray-on bed liners, two dominant chemistries shape that balance: polyurea and polyurethane. Both can be applied by a determined DIYer, but they behave differently under the hood, and those differences translate into real-world outcomes for tools, weather, and cargo. Understanding how each performs is the first step toward a choice you won’t regret when the truck bed takes its daily pounding—pulling, sliding, dropping, and sealing out moisture year after year. The practical reality is that most homeowners aren’t chasing a laboratory-grade coating; they want a coating that cures quickly, adheres reliably to bare metal or a slightly compromised surface, resists scuffing, and stays intact from winter ice to mid-summer sun. Modern spray-on systems deliver that, but they do so with distinct personalities. Polyurea stands out for durability and long-term protection. It cures in minutes, which means you can move the truck back into service sooner and reduce the risk of dust or debris marring the surface during curing. Its abrasion resistance outperforms many rubber-based liners, and its flexibility remains reliable at extreme temperatures. When the weather swings toward -40 degrees Fahrenheit, polyurea holds up without becoming brittle, a critical trait for vehicles used in northern climates or at altitude where sudden temperature drops are normal. If UV stability is a priority, aliphatic polyurea formulations offer strong resistance to sun-induced chalking and yellowing, preserving the bed’s appearance without the chalky fade that plagues cheaper coatings. This is not just about looks; UV stability preserves the seal and prevents micro-cracking that can invite moisture back into the metal substrate over time. Polyurethane, by contrast, provides a compelling middle ground. It is generally easier to apply, especially for hands-on DIYers who are newer to coatings or who are working on a tight schedule. Polyurethane coatings offer robust impact resistance and good flex, which helps accommodate the dynamic stresses a truck bed experiences as loads shift or shake during transit. The trade-off is UV stability. Over long exposures to sun, polyurethane can yellow or degrade more noticeably than polyurea, particularly if the formulation leans toward cheaper, more budget-friendly options. For many DIY projects, polyurethane delivers a sturdy, long-lasting liner without the higher cost or specialized equipment that polyurea often demands. The practical takeaway for most home use is that polyurethane remains a sensible default if you want a strong, cost-conscious option and you’re comfortable with occasional re-coating or maintenance to preserve appearance under direct sun. If maximum performance and weather resilience are non-negotiable, and you don’t mind investing more time and money, polyurea is the gold standard. The evolution of DIY-friendly kits has closed much of the gap between professional-grade and at-home capabilities. Modern kits that incorporate polyurea technology can yield results that approach professional levels when you follow the preparation and application steps with rigor. The key, as many pros will tell you, is preparation: thorough cleaning, rust removal as needed, and profile sanding to create that tooth-like surface the coating can bite into. Contaminants—oil residues, waxes, or old coatings—are the enemy of adhesion. The bed must be clean, dry, and properly etched so the coating can form a strong, durable bond with the metal. This prep work is not glamorous, but it is essential. It’s the difference between a coating that lives up to its promise and one that peels or dulls its shine within the first season. When you break down the choice by use case, the decision becomes clearer. For trucks that endure constant heavy loads, frequent tool drops, or work in environments where abrasion is relentless, a polyurea-based system offers the best long-term protection and the most resilient performance envelope. The quick cure time reduces downtime and minimizes dust contamination, making it easier to complete the job in a day. For those doing lighter-duty work in temperate climates, polyurethane can be a smart, practical path. It reduces the learning curve, lowers upfront costs, and still delivers a tough, waterproof barrier that resists chipping and corrosion. The durability isn’t sacrificed; it’s simply stretched differently. The broader context for DIY bed liners also matters. Drop-in liners, while convenient for removal and replacement, often trap moisture and can shift with temperature changes, creating micro-movements that promote rust under the liner. Carpet liners, while comfortable, aren’t built for heavy-duty use and don’t offer the same level of protection against abrasion or chemical spills. A well-applied spray-on coating, however, bonds directly to the metal bed, creating a continuous layer that reduces moisture traps and potential corrosion sites. That seamless, permanent protection is at the heart of the DIY appeal: a single application can extend the bed’s life and maintain resale value by keeping the surface uniform and sealed. DIY feasibility hinges on careful surface prep and the right technique. Even the best coating will underperform if the bed isn’t properly prepared. Scrupulous cleaning, rust remediation when necessary, and profile sanding—removing sharp edges and creating a micro-rough surface—are essential steps. The application process then becomes a careful dance of timing, temperature, and technique. Temperature and humidity influence pot life and cure times, while spray equipment choices—hand-pump ratios versus professional-grade spray gear—determine how evenly you can lay down material and how well you can maintain a uniform thickness. For the DIYer, following the manufacturer’s instructions to the letter is not just prudent; it’s essential to achieving a durable, long-lasting finish. In short, the best DIY bed-liner choice is not a one-size-fits-all verdict. It is a decision that reflects how much you value peak performance versus ease of use and budget. Polyurea earns its place as the top option when longevity and extreme conditions are non-negotiable. Polyurethane earns its place when you want a straightforward, cost-effective solution with solid durability and simpler application. And for those who want to explore both paths, modern DIY kits have made it feasible to experiment with a layered approach, starting with a polyurethane base coat and topping with a polyurea seal for enhanced abrasion resistance and UV stability. The real-world impact of this choice shows up in the way a truck ages. A bed that resists scratching from dropped tools, resists moisture infiltration, and doesn’t discolor under sun exposure is a bed that stays functional and attractive longer. The benefits compound over time: less maintenance, fewer rust-prone areas, and less downtime when the vehicle is needed for work or recreation. For the DIYer who wants confidence, a pragmatic approach is to plan the project around a few key questions. How heavy will my loads be? Will the bed be exposed to direct sun for long periods or subjected to harsh winter conditions? Do I need a coating that cures quickly to minimize downtime, or is meticulous, slower work acceptable if it yields a longer-lasting result? How important is UV stability to the final appearance? The answers will steer you toward polyurea for maximum performance or polyurethane for practical flexibility and affordability. If you’re leaning into research and want a reliable, up-to-date comparison, the literature emphasizes that the fundamental difference lies in cure time, abrasion resistance, temperature tolerance, and UV stability. Contemporary DIY kits make sophisticated chemistry accessible to non-professionals, provided you stick to the steps and respect the surface. The value proposition is clear: invest a little more in prep and material quality and you gain a bed liner that stands up to real-world abuse for years to come. If you’re looking to broaden your approach beyond the liner itself, consider how bed protection integrates with other components of your truck’s exterior and cargo setup. A well-protected bed pairs well with accessories designed to shield the sides and tailgate, and even with under-bed storage solutions that keep tools and chemicals from direct contact with the liner. When I think about the entire protective ecosystem of a pickup, the liner is the centerpiece that determines long-term maintenance costs and the vehicle’s utility value. It’s worth taking the extra time to choose wisely and to apply with care. For readers who want to explore related considerations in a broader DIY context, the topic of bed protection links naturally to other protective upgrades and accessories that help you get the most from the truck without compromising the bed’s integrity. A quick jump to the Accessories section can offer ideas for complementary upgrades that fit with the liner approach, and you can explore practical components that partner well with a spray-on system. Accessories. For those who want deeper, external validation of the science behind polyurea and polyurethane bed liners, a trusted external resource that breaks down the differences and summarizes performance considerations is available. The discussion there aligns with the real-world conclusions shared here and provides a clear framework for deciding which coating type suits your climate, workload, and budget: https://www.sprayon.com/blog/polyurea-vs-polyurethane-truck-bed-liner.
Seamless, Permanent Armor: Crafting a DIY Truck Bed Liner That Stands Up to Every Load
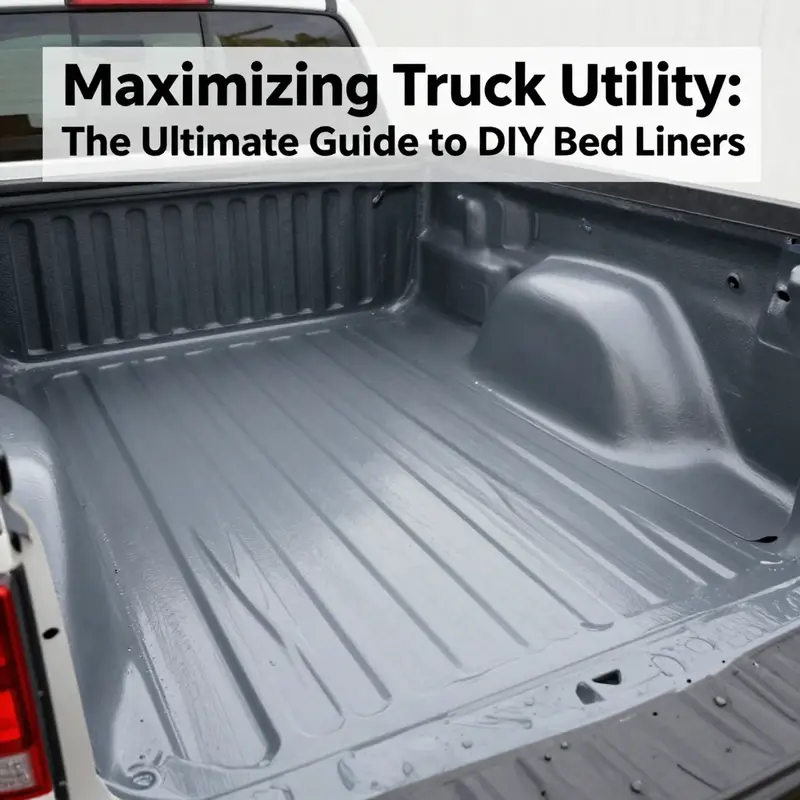
The appeal of a truck bed liner that feels like a second skin is simple and compelling: protection that doesn’t rattle, shift, or trap moisture, but rather bonds to the metal bed and endures the realities of cargo, weather, and road. When a DIY approach is paired with a modern spray-on coating, the result can look and act almost professional—a seamless shield that fends off scratches, chips, and the kind of abuse that comes with tools, payloads, and rough terrain. The conversation about the best DIY option often lands on a spray-on coating made from polyurea or polyurethane, especially the aliphatic variants that resist UV degradation while staying flexible in extreme temperatures. In practice, that choice translates into a coating that behaves like a single, custom-fitted layer rather than a separate, removable insert. The bed becomes a unified surface, and water, salt, and grime have nowhere to creep under a seam or corner where corrosion could begin. It’s the kind of robustness that makes the dream of long-term protection feel tangible rather than aspirational, and it’s precisely what DIY enthusiasts can achieve with careful planning, the right materials, and disciplined technique.
The route to seamlessness starts long before the spray gun fires. It begins with a plan that respects the bed’s unique geometry and the practical realities of a vehicle that travels through seasons and workdays alike. A truck bed is not a perfect rectangle; it carries bed rails, corner radii, wheel wells, and drainage channels that create abrupt transitions. A successful DIY coating must embrace those contours rather than fight them. The measurement phase is more than jotting down numbers. It’s about creating a precise map of length, width, and depth, noting irregularities, and visualizing how the coating will coat the entire interior without thin spots or gaps. The process can be as simple as laying down a large sheet of paper or plastic wrap to trace the bed floor, then transferring those traced dimensions to the preparation pattern. The critical insight is that any inaccuracy becomes a weak point in the future, a place where moisture can collect or adhesion can fail. In a well-executed plan, those margins are trimmed and tuned until the pattern glides smoothly over every contour, a template that translates into a uniform, edge-to-edge bond once the coating cures.
Choosing the right materials for a DIY spray-on approach means balancing toughness, ease of use, and cost. Polyurethanes, particularly those designed for rugged, flexing applications, offer a workable blend of durability and user-friendliness. For enthusiasts chasing the highest performance and UV resistance, an aliphatic polyurea can be the gold standard, maintaining its clarity and color while shrugging off sunlight that would chalk cheaper coatings. Yet the practical reality for many DIY projects is to start with a high-quality polyurethane formula that’s forgiving enough for a first-time or weekend warrior to handle, while still delivering a strong, seamless layer. The beauty of a spray-on approach is that, with proper surface preparation, adhesion becomes less of a gamble and more of a guarantee. There’s a simple, stubborn truth here: the bond is only as strong as the surface it clings to. That means the bed must be clean, dry, and abraded to create a “tooth” for the coating to grab onto. Prep becomes the event that decides whether the coat remains a faithful ally or becomes a flaky afterthought.
In some DIY paths, the bed is prepared not for a single, seamless spray but for a layered solution that combines cushioning with a robust outer layer. The idea is to cushion heavy items with a flexible core while the outer layer provides abrasion resistance and spill containment. This approach requires selecting a durable, closed-cell foam that can compress under load without losing its protective function, paired with a rugged outer liner that resists tears and moisture. The foam is cut to the exact traced shape, snug but not crammed, to avoid deformation when cargo sits on it. The outer fabric or liner is cut slightly larger than the foam to provide seam allowances, then sewn with a careful stitch that won’t unravel under vibration. This method, while not yielding a perfectly seamless metal bond, can still deliver impressive resistance to scuffs and dents and can be a compelling alternative if a pure spray-on remains out of reach due to equipment or environmental constraints.
For those pursuing the truly permanent, the strongest path is a liquid bed liner that cures into a single, rubberized layer directly bonded to the bed. A two-part epoxy resin or a specialized liquid liner can be poured or sprayed to form a continuous film that adheres chemically to the metal, creating a watertight, abrasion-resistant surface. This route demands meticulous surface prep and strict adherence to cure times and mixing ratios, but the payoff is a bond with no seams for moisture to creep under, no overlaps that could chip, and a finish that shrugs off the scratches and spills of daily use. The decision between a polyurea or polyurethane spray, a liquid bed liner, or a foam-backed fabric liner hinges on personal tolerance for complexity, budget, and the long-term vision for the truck. Each path shares a common core: preparation, precision, and patience. They diverge primarily in how they handle the bed’s contours, how they react to temperature and time, and how they respond to the inevitable wear that comes from rugged use.
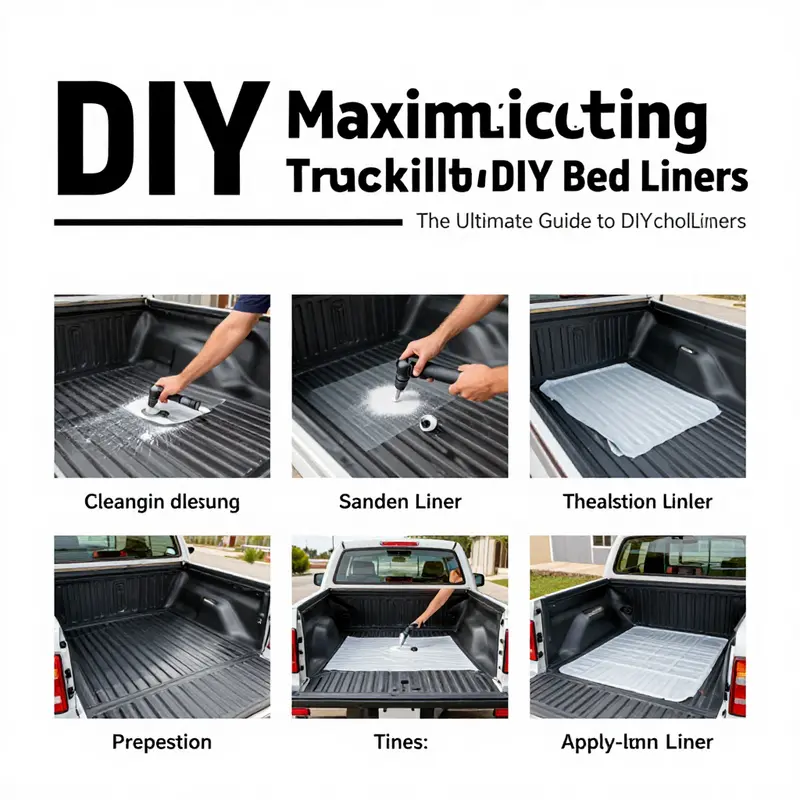
Preparation is the hinge on which any DIY liner turns. It begins with a thorough cleaning to remove oils, waxes, and old coatings. Rust issues should be addressed, not ignored, because even the slightest pitting can be a starting point for future corrosion beneath a coating. Once the bed is clean, a mechanical abrasion often follows. A profile-friendly scratch helps the coating bite in; too much aggression, and one risks micro-damage that can propagate later. The goal is to create a surface with enough texture to hold fast without compromising the metal’s integrity or changing the bed’s dimensions in a way that would undermine the liner’s fit. Masking edges, rails, and any attachments is essential so that the coating only terminates where you want it to, preserving the metal’s lines and ensuring that the final result looks professional rather than improvised. Temperature and humidity play surprising roles, too. Most spray systems like to operate within a comfortable window where the material remains within its working pot life and the bed is not subject to rapid shifts in moisture. A rushed or sloppy environment invites blips in the finish, solvent entrapment, or uneven curing. Treat the workspace as a critical part of the project: controlled, clean, and calm.
With the bed prepped, the application phase unfolds as a careful sequence rather than a single dramatic swoop. If you’re using a spray-on system, the coating is mixed and applied in coats that build the film gradually. Each layer must cure enough to tolerate handling before the next goes on, with careful attention paid to avoiding runs, sags, or thin spots that would undermine the seamless aesthetic you’re seeking. In practice, this means maintaining a steady, even motion with the spray gun and monitoring the bed’s shape so that corners and contours don’t trap air or create pockets of uneven thickness. If you choose the liquid bed liner route, the process is similar in its demand for even distribution and complete, thorough coverage, but compounded by the need to ensure a solid chemical bond with the metal and the absence of contaminants that could interrupt curing. In either case, the rule remains the same: preparation defines adhesion, adhesion defines durability, and durability defines the lifetime of your investment. A well-prepared bed will reward you with a finish that resists chips from dropped tools, stays flexible in cold weather, and remains easy to clean after muddy days or rainy commutes.
The final texture you see—whether a smooth, glossy layer from a polyurethane spray or a rugged, uniform rubber-like film from a liquid liner—speaks to the alignment of your expectations with the realities of DIY linings. A seamless bond, in particular, rejects the notion of hard-to-clean seams or water traps that invite rust. It is the difference between a surface that simply sits over metal and a coating that becomes part of the metal itself. The more you invest in the meticulous steps of measurement, material choice, and patient application, the more you will see the payoff in a bed liner that feels permanent, unlike removable inserts that shift and create gaps over time. Even if you end up choosing a layered liner rather than a true spray, you can still achieve a remarkable level of protection by prioritizing fit, coverage, and the durability of the outer materials.
For readers seeking further ideas on how to tailor the project to their vehicle and usage, the Accessories page offers a broad collection of related components and enhancements that can complement a bed liner, from edge protection to cargo management solutions. This integrated approach helps ensure your DIY liner does not stand alone but anchors a broader strategy of protecting and organizing your truck’s interior space. See the linked page for ideas you can borrow to extend the life of your investment and keep your truck ready for whatever work or adventure lies ahead. Accessories
As with any substantial DIY project, the payoff is not only the finished surface but the confidence you gain when the plan aligns with the work. The goal here is to move beyond the hope of a durable liner and toward the certainty of a seamless, permanent shield that you applied with your own hands. By embracing thorough measurement, disciplined prep, and the right material system for your goals, you can create a bed that behaves as a single, cohesive unit—resisting abrasion and water, enduring temperature swings, and staying clean and serviceable through years of use. If there is a single guiding principle for this journey, it is the conviction that a bed liner, done right, is not merely a surface. It is a statement of intent—a boundary that teams, tools, and cargo cannot cross unprotected. A well-executed DIY bed liner is not just armor; it is the quiet reliability behind every mile you travel in your truck.
External resource: https://www.amazon.com/dp/B001K8C4ZG
null
null
Material Choices in the Best DIY Truck Bed Liners: Polyurea vs. Polyurethane
Choosing the right material for a DIY spray-on truck bed liner is more than a simple shopping decision. It is a strategic choice about how you intend to use the truck, where you operate it, and how much time you are willing to invest in prep, mixing, and curing. When you read about the best DIY options, two chemistries stand out as the primary contenders: polyurea and polyurethane. Each has a distinctive personality, a specific set of strengths, and a few hard trade-offs. Understanding those differences helps you align your project with real-world needs, from the rough-and-tumble conditions of a worksite to the sunlit heat of a desert job site, or the damp, salty environments that threaten metal beds across seasons. In practice, the decision comes down to a balancing act between durability, ease of use, cost, and long-term appearance. The modern DIY landscape has evolved to offer formulations that bring professional-grade results within reach, but the chemistry remains the north star guiding the decision. Polyurea tends to dominate discussions of longevity and resistance, while polyurethane often wins favor with ease of application and budget-friendly practicality. The choice, then, becomes a question of which priorities you want to foreground without compromising the bed’s future reliability. It is not unusual for a DIYer to start with polyurethane as a stepping stone, then graduate to a polyurea system if the demands of the job grow harsher or the vehicle is exposed to more sun and moisture over time. This progression mirrors a general truth about bed liners: the bed is a harsh, unforgiving environment. It endures abrasion from tools and cargo, exposure to spills and solvents, and cycles of heat and cold that stress any coating. Each material responds to those stressors differently, and the differences show up in how the coating wears, how it resists cracking or peeling, and how well it resists UV degradation. Polyurea’s appeal rests on a combination of rapid cure, tough surface, and superb adhesion. When properly applied, polyurea forms a seamless, monolithic layer that bonds directly to the metal bed. There are no loose edges or gaps that can trap moisture and begin the slow process of rust from underneath. This seamless bond is a crucial advantage in the context of a DIY project, where even small missteps can create valleys for moisture to gather. In contrast, polyurethane coatings, while offering impressive flexibility and impact resistance, tend to be more forgiving during application and often come with a lower upfront cost. They can flex with the metal as temperatures swing and can cushion impacts from dropped hardware or freight, which helps prevent chipping around high-use areas. The flexibility is a genuine asset, particularly in beds that see heavy tool use or frequent loading and unloading. Yet flexibility comes with a caveat: UV exposure can take a toll over time. Polyurethane coatings, especially the standard, more economical formulations, are more prone to chalking or color changes after months of direct sun. For some builders, that means a bed liner that remains functional but develops a more weathered appearance, which might be perfectly acceptable in a work truck. For others, maintaining a pristine look is important, and that is where the aliphatic variants of polyurethane enter the conversation. These versions are designed to resist UV degradation much better than their aromatic cousins, preserving color and gloss even when the sun is relentless. Nevertheless, the additional cost and sometimes more intricate application requirements can shift the calculus away from the budget-centric DIYer who is chasing a quick, simple finish. If you read a few DIY guides, you’ll notice a recurring emphasis on the application process itself. In either material family, preparation is everything. The bed must be thoroughly cleaned to remove oil, grease, and any loose debris that could act as a bond breaker. This is the moment where many projects falter, because the bond strength hinges on a clean surface, and contaminants will compromise adhesion. Surface profiling—carefully sanding or scoring the metal to provide tooth for the coating to grab onto—further strengthens the bond. In a DIY context, this prep work is often the most critical single step. It determines whether the coat adheres uniformly and whether it remains bonded under daily use. In practice, a common tip among seasoned DIYers is to combine a meticulous clean with deliberate profiling, then all but resist the impulse to rush the spray when the bed is not perfectly prepared. The actual coating step then becomes the moment of truth. Polyurea systems tend to be more sensitive to the conditions in which you apply them. They often require more precise mixing ratios and careful control of curing temperatures and humidity. This sensitivity is one reason some DIY kits are perceived as challenging. Yet the payoff is significant: when the ratios are correct and the temperature and humidity cooperate, polyurea cures to a hard, abrasion-resistant surface that can shrug off impact and resist chemical attack. The result is a finish that remains tough in the face of dropped tools, heavy cargo, and scuffed grooves along the bed floor. Polyurethane, on the other hand, generally offers a broader margin for DIY success. It tends to be more forgiving in how you mix extra hardeners or adjust pot life, and it often cures at a wider range of temperatures. This makes it a practical entry point for a first-time spray-on liner, especially if you are balancing time, cost, and learning curves. The user experience matters because, in a DIY setting, the best material is the one you can apply consistently with predictable results. UV stability is one of the most consequential differentiators between the two. Aliphatic polyurea, a subtype that delivers exceptional UV resistance, helps the coating resist chalking and color fading when the sun’s rays beat down on the truck bed day after day. For caravan trucks, fleet vehicles, or work trucks stationed in deserts or at the equator, this UV resilience translates to a longer-lasting finish that maintains its appearance and protective properties. Polyurethanes can reach acceptable UV performance with the right formulation, particularly when an aliphatic topcoat or UV-stable pigments are included. Still, those enhancements add to the cost and can complicate the DIY process. On balance, if your priorities include long-term appearance in a sun-drenched environment and maximum environmental resistance, polyurea—especially the UV-stable, aliphatic versions—offers the strongest case. If your primary goals are ease of application, lower upfront cost, and quick turnarounds, polyurethane is a solid, practical choice that can still deliver robust protection for many typical use cases. One practical approach to a successful DIY outcome is to tailor your choice to your use case. If your bed sees light to moderate use, occasional hauling, and you want a simpler process, polyurethane may be the sensible path. If your truck lives in a harsh climate, carries corrosive cargo, or endures frequent high-stress loading where long-term durability matters most, polyurea deserves serious consideration. This balancing act is exactly what makes the topic compelling: the best DIY truck bed liner isn’t a one-size-fits-all solution but a thoughtful pairing of material properties with your real-world needs. To navigate the decision, it helps to consider not only the material itself but the entire workflow surrounding its application. The most durable material in the world will underperform if the bed is not properly prepared or if the coating is applied under suboptimal conditions. The bond will fail, chips may form, or moisture could become trapped, inviting rust from below. Conversely, a well-prepared bed with a correctly mixed and applied coating will reveal how much a good DIY liner can resist time, weather, and wear. For the DIYer, this means cultivating patience in the prep stage, choosing a chemistry that aligns with your climate and usage, and embracing a plan that accounts for the entire lifecycle of the bed liner—from surface to seal to finish. It also suggests a practical mindset: you should project not only how the liner will look in the first weeks but how it will age over seasons and miles. If your project is driven by a need for maximum longevity and aesthetics in bright sun, polyurea emerges as the more resilient partner. If you are guided by budget, a gentler learning curve, and a robust result that can stand up to standard use, polyurethane remains an attractive starting point that often exceeds expectations for many DIY enthusiasts. The discussion is not merely academic. It has real-world implications for how you plan the project schedule, what tools you gather, and how you stage the work area to minimize dust and moisture. It influences how you manage curing times, how you protect the coating during the early stages, and how you monitor the bed under heavy loads as the coating settles into its final hardness. In the end, the best DIY bed liner is a product of deliberate choice rather than a default pick. If you are curious to deepen your understanding of how pros vs. DIY approaches compare and how to navigate mixing ratios and curing conditions in a home garage setting, a comprehensive external guide distills the essentials and offers practical insights you can apply to your own project: https://www.autoblog.com/2026/01/26/how-to-choose-and-apply-spray-on-truck-bed-liner-diy-vs-pro/. For readers seeking a tailored exploration that connects with broader truck bed projects—ranging from accessories to storage solutions—there is also a breadth of related content you can explore within the site’s DIY resources. A good starting point for related ideas is the Accessories section, which covers the broader ecosystem you might consider as you plan a liner project and its integration with other bed enhancements: Accessories. This chapter has sketched the core trade-offs with clarity, but it should also be seen as part of a larger conversation about how best to protect and personalize a workhorse bed. The choice between polyurea and polyurethane is not merely about hardness or flexibility; it is about how you want your bed to behave under the daily demands of your routine, how it ages in the sun, and how seamlessly you can complete the project within a DIY workflow. As you move forward, the next steps will involve translating these material properties into an actionable plan: selecting the formulation that matches your climate, executing a rigorous prep and surface-roughening process, and coordinating mixing and curing windows so that you obtain a continuous, defect-free coating. The bed is more than a surface to carry cargo; it is the quiet frontline of your truck’s long-term resilience. When you respect the science behind polyurea and polyurethane and marry it to a thoughtful DIY process, you unlock a coating that not only survives but thrives in the rattle of daily work, the glare of sun, and the inevitability of the next load.
Guarding the Bed: Practical Insights into Spray-On, Drop-In, and Carpet DIY Truck Bed Liners
When you think about a DIY truck bed liner, you’re really considering a small, high-stakes investment in the long-term health of a metal shell that takes a beating every day. The bed endures shifts in temperature, moisture from rain and road grime, and those inevitable tool drops, cargo slides, and punctuation marks in the form of sharp edges and abrasive cargo. The decision you make here isn’t merely about cosmetics or a weekend project. It’s about choosing a layer that defends against corrosion, resists abrasion, and withstands the rigors of real-world use. In practical terms, there are three dominant paths most DIYers consider: spray-on coatings, drop-in trays, and carpet liners. Each has its own logic, its own set of trade-offs, and its own rhythm of maintenance. The best choice hinges on what you value most—permanent protection, ease of install, or economic flexibility—and how you use your truck on a day-to-day basis.
Spray-on liners, especially those based on modern polyurethane or polyurea chemistries, sit at the edge of a portable, professional-grade solution you can tackle at home. When done well, they deliver a seamless, durable shield that bonds directly to the bed metal. The chemistry matters here. The best DIY spray kits leverage two-part systems that cure into a rubbery, yet tough film. The “aliphatic” variants push UV resistance to a higher level, maintaining color and texture far longer than cheaper, aromatic formulations. This is essential if your truck spends significant time in direct sun because the chalky whitening that can plague cheaper coatings isn’t just an aesthetic flaw; it’s an early indicator of degradation that can eventually compromise the surface. In practice, a well-prepped bed—cleaned, degreased, and profile-sanded to promote adhesion—will reward you with a coating that cushions impacts, seals out moisture, and behaves elastically under temperature swings. The impact resistance isn’t just about resisting a dropped breaker bar; it’s about preventing the micro-damage that invites corrosion to start beneath the coating, particularly where the bed’s welds and seams meet the inner walls. DIY spray-on kits can offer a surprisingly professional finish, especially when you follow the recipe and environmental guidelines closely. But the gap between a DIY spray job and a true pro application remains in the controlled environment and the nuanced equipment that sophisticated shops bring to the task. You’ll hear from DIYers who commend the process for its ability to tailor texture and thickness to the bed’s geometry, which—unlike a drop-in tray—minimizes gaps where water can dwell. The trade-off is clarity: UV stability and long-term wear depend heavily on the product grade, surface prep, and the precision of your mix and spray technique. The outcome is worth the effort when you’re aiming for maximum durability and a seamless shield that behaves as an integral part of the bed rather than a separate insert.
Drop-in liners occupy a contrasting space in the DIY spectrum. They are the most straightforward path to immediate bed protection. A molded plastic or copolymer tray drops into the bed with a few minutes of positioning and, in many cases, a couple of strap or clamp tweaks to keep things quiet on the road. The advantages are tangible: installation is quick, removal is simple for cleaning or vehicle resale, and the surface is inherently resistant to abrasion. Integrated features like drainage channels, non-slip textures, and tie-down provisions make drop-ins an appealing option for users who value practical functionality with minimal fuss. Yet the gains come with notable compromises. The sit-and-fit nature of a drop-in leaves edges and gaps around the perimeter where water, dirt, and salt can seep into the bed cavity. Over time, moisture trapped under a tray can contribute to concealed corrosion—especially in climates with freezing cycles or road-salt exposure. The tray can shift under heavy loads or aggressive cornering, creating chatter and noise and occasionally scuffing adjacent vehicle finishes. And while these liners are generally robust against daily wear, they’re not designed to absorb sharp impacts with the same degree of resilience as a sprayed-on coating. The melt-in-the-teeth truth is simple: drop-ins win on convenience and cost, but they concede some long-term protection and a seamless barrier that keeps moisture at bay.
Carpet liners present a different, almost nostalgic branch of the DIY family. They’re usually a low-cost, quick-install option that adds a soft touch to the bed’s surface. The appeal lies in a quiet, grippy feel and a surface that’s gentle on delicate cargo. For moving furniture or hauling lighter loads, a carpet liner can be a reasonable short-term fix. But the reality for anything heavier, more abrasive, or subject to moisture is less forgiving. Carpet liners do little to stop punctures or significant impacts, and moisture can wick through the backing, promoting mold, mildew, and eventually rot—an outcome no truck owner desires. Ultraviolet exposure can degrade the backing or fiber over time, leaving the liner brittle and stained, while the fabric’s texture can trap debris and harbor odors. In short, carpet liners are best viewed as stopgap measures rather than lasting protective solutions. They’re inexpensive and easy, but their usefulness diminishes quickly under the demands of real-world use.
Weighing the trade-offs requires stepping back from individual features and imagining how the bed endures in your routine. Consider the days you spend in snow country, the campsites you reach with dusty gear, or the commercial errands that fill your calendar with repeated heavy hauling. If your priorities include long-term corrosion resistance, minimal water trapping, and a glossy, uniform barrier that bonds to the metal, a high-quality spray-on coating—polyurethane or polyurea—emerges as the most durable path, provided you commit to meticulous surface preparation. The distinction between polyurethane and aliphatic polyurea matters here. Polyurethane offers a compelling balance of toughness, ease of application, and cost. It handles abrasion and minor flexing well enough for many residential and light-commercial applications. Aliphatic polyurea, while pricier, shines in UV stability and color retention. It resists chalking and degradation from sun exposure, which can extend the life of the coating in exposed bed situations. You’ll pay a premium for that extra resilience, but it’s a premium that compounds positively as the bed endures years of use.
That said, the DIY route is more forgiving than it might appear, but it demands discipline. The bed must be thoroughly cleaned; every speck of dust, oil, wax, or old coating must vanish before you mix and apply. You’ll want to sand the surface to create a profile that “grips” the coating, minimizing the hazard of pinholes or uneven thickness. Temperature and humidity aren’t merely background variables; they shape the cure, the sheen, and the final performance. The process is still accessible to a determined DIYer, and the outcome can rival professional results in the right hands. The trick is to treat the prep as the main performance enhancer. The coating itself is a potent protectant, but without flawless adhesion, you’re inviting delamination, bubbling, and moisture ingress that undermine the very goal you set out to achieve.
Beyond the liner itself, a holistic approach to bed protection can elevate your results. A spray-on layer provides a stronger base for the rest of the bed’s accessories and storage solutions. It can integrate with bed rails or tie-down systems in a way that a drop-in tray simply cannot, because the coating follows the contours of the bed and fully seals the corners and ridges. This is not just about protection; it’s about sustaining resale value and extending the life of the truck. For DIYers who value flexibility and the ability to tailor the finish—thickness, texture, and slight color variation—a spray-on approach can be engineered to respond to the owner’s particular needs. The choice becomes not just a matter of initial cost but of long-run maintenance, ease of cleaning, and the way the liner handles routine wear and tear.
If you’re exploring upgrades beyond the liner itself, a thoughtfully chosen set of bed accessories can complement the coating and enhance versatility. For readers looking to broaden their understanding of bed-related enhancements, this collection of truck bed accessories offers practical ideas that pair well with a sprayed or even a high-quality drop-in liner. See more at this resource focused on truck bed accessories, which showcases a range of compatible ideas and practical tips for optimizing bed space and protection: https://trucksdiy.com/blog/accessories/.
As you weigh your options, remember that the best DIY liner for you isn’t simply a function of cost or ease. It’s the solution that aligns with how you use your truck, how much time you’re willing to invest in prep and finish, and how much long-term value you expect to gain from the protection. For those who want maximum protection with a seamless barrier that resists UV degradation and heavy use, the spray-on route—particularly aliphatic polyurea or polyurethane systems—offers the strongest case. For owners who prize quick, removable protection and straightforward maintenance, a high-quality drop-in liner remains a valid, if not optimal, compromise. And for the occasional mover with light-duty needs, carpet liners still fit a niche, though they should be chosen with clear limits in mind.
If you’re hungry for a deeper dive into the spray-on vs. drop-in debate and want to compare real-world performances, a detailed guide to spray-on DIY versus pro applications can offer valuable context and practical checklists that mirror the experiences of seasoned DIYers. External resources on this topic provide careful, step-by-step considerations that help bridge the gap between expectation and outcome. For an in-depth look at how these coatings perform in practice and what to expect from a DIY spray-on project, consult the detailed guide linked in this chapter’s discussion of DIY vs pro spray-on liners. External resource: https://www.autoblog.com/2026/01/26/spray-on-truck-bed-liner-diy-vs-pro
Final thoughts
Selecting the best DIY truck bed liner is crucial for business owners looking to enhance the functionality and lifespan of their trucks. By opting for high-quality spray-on polyurea or polyurethane liners, you ensure your truck bed remains protected against the elements and daily wear. Understanding the performance characteristics and preparation techniques will facilitate effective application, leading to seamless, lasting protection. In a landscape filled with various options, informed decisions based on reliable comparisons will empower you to choose the best solution tailored to your business needs.