For business owners looking to protect their trucks from wear and tear, understanding the costs of LINE-X coatings is crucial. This article delves into various options available for DIY projects, highlighting pricing for both DIY kits and professional-grade materials. The first chapter explores DIY LINE-X kits, focusing on budgeting for effective choices. Next, we’ll analyze the costs and features of professional-grade LINE-X products for those considering a high-performance finish. Finally, we’ll compare DIY and professional applications to help you make an informed decision that aligns with your business needs.
Planning Your Budget for a DIY Truck Bed Coating: Kits, Costs, and Smart Choices
When you decide to coat a truck bed yourself, the budget is more than a price tag. It shapes what you can buy, the quality you’ll achieve, and how long the results will last. This chapter walks through the real costs of DIY bed-coating kits, the trade-offs between economy and professional-grade materials, and practical steps to get professional-looking results without overspending. The aim is to give you a clear, usable plan so you can budget confidently and avoid the most common mistakes.
Start by separating costs into clear buckets: the kit or materials, the tools and safety gear, surface preparation, and follow-up supplies. Kits marketed for home users vary widely. At the low end, you’ll find simple economy kits. They include a small volume of pre-mixed resin and basic application tools. These kits may be tempting because of their low price. They are fine for small repairs or partial coverage. Expect to pay very little for them. However, they also demand more from your technique and will usually fall short of long-term durability expected from commercial-grade coatings.
Mid- to high-end DIY kits are where the budget balances cost and performance. These kits include higher molecular weight resins, better hardeners, and more suitable spray equipment. They often supply a specialized spray gun, hoses, mixing accessories, and protective gear. The bigger kits usually contain enough material to coat a full-size truck bed once or provide generous coverage for midsize trucks. While pricier up front, they reproduce the characteristics of contractor-grade coatings much more closely. For most DIYers aiming for long-term value, a mid-high kit is the smarter investment.
When you price a kit, check the stated coverage in square feet per gallon. Coverage numbers vary with material viscosity and the target film thickness. A heavy-duty bed coating is applied thicker than a typical paint, so a gallon will cover less surface. For budgeting, assume one to one and a half gallons for a standard full-size bed if you want a robust, textured finish. Smaller trucks and short beds will need less material. If a kit lists coverage without clarifying film thickness, budget for the higher end. Running out mid-job pushes costs and complicates matching color and texture.
Tools and safety gear form the next essential piece of the budget. Some kits bundle a decent spray gun and respirator. Others include only the minimum. If your kit omits quality application tools, buy them separately. A reliable spray gun compatible with the coating viscosity will improve finish uniformity. Hoses, mixing paddles, drop cloths, and ventilation fans are inexpensive but necessary. Never skimp on protective equipment. Respirators rated for solvent and particulate protection, chemical-resistant gloves, and eye protection are non-negotiable. Safety gear is a modest cost compared to the consequences of exposure.
Surface preparation is where many DIY projects fail. Proper prep determines adhesion and longevity. That means cleaning, degreasing, sanding or scuffing, and repairing any rust or dents. For trucks with heavy corrosion, you may need to replace metal or treat it with corrosion inhibitors. Expect to allocate time and money for sandpaper, wire brushes, chemical cleaners, and rust treatment products. A simple but effective prep kit can cost between modest and mid-range amounts. If you skip this step, the coating may peel, or the finish will hide underlying damage rather than stop it.
Labor time is another overlooked budget item. Even if you do the work yourself, plan for a full weekend or more. Each coat needs time to dry between passes. Temperature and humidity affect cure times. Rushing the job leads to poor adhesion and visible defects. If you need to use your truck while the liner cures, consider renting a second vehicle or planning the work when downtime is acceptable.
Compare DIY total cost to professional installation to decide if DIY makes sense. A typical DIY budget for decent results runs from a few hundred to under a thousand dollars. This includes a mid-range kit, safety gear, and prep supplies. Professional installations, by contrast, often cost several times that. They include factory-grade equipment, surface prep by experienced technicians, and warranties. Professionals apply thicker, more uniform coatings and can color-match more precisely. The value of a professional job is real for trucks that face heavy commercial use or require guaranteed protection.
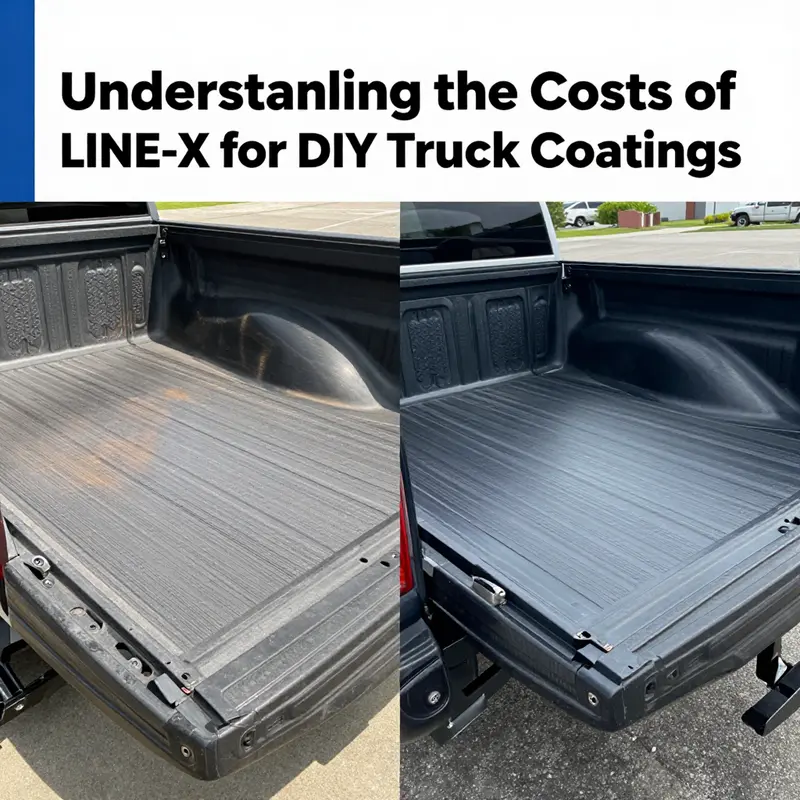
Beyond initial costs, think about long-term value. A higher-quality DIY kit applied correctly can protect your bed for many years. It resists scratches, chips, and corrosion. Cheap kits might save money now, but they can require touch-ups and repairs shortly after. Over time, the cost of repeated repairs erodes the initial savings. When budgeting, weigh the upfront price against expected lifespan. For many owners, investing more initially reduces lifetime maintenance costs.
Color and finish choices affect the price in two ways. First, some kits offer color options at an extra cost. Second, achieving a consistent color and texture requires enough material and attention during application. If you need an exact color match, budget for a professional solution. DIY kits can approach truck color but rarely achieve factory-level matching. For a practical approach, pick a textured black or dark gray if you want a uniform, durable finish without spending too much on custom color matching.
A few smart cost-saving measures will stretch your budget without sacrificing quality. First, learn the mixing and spraying technique before you touch your truck. Practice on scrap metal or plywood until you produce a consistent spray pattern. This reduces waste and prevents costly mistakes. Second, buy a kit sized appropriately for your bed. Overspending on unused material is wasteful. Third, buy tools that you can reuse for other projects. A good quality spray gun pays off beyond one coating job. Fourth, shop authorized dealers when possible. They may offer technical support and replacement parts. That support can save time and money.
Be wary of imitation products that mimic the look of proven bed liners. These knockoffs often cut corners on resin quality and hardeners. They may advertise low prices and high coverage, but the long-term performance drops sharply. If you plan to resell the truck later, a poorly performing coat can reduce resale value. Buying through a verified channel reduces the risk of receiving inferior materials and may include technical advice and better documentation.
Shipping and regional availability can influence your final price. Some high-performance materials are sold primarily through authorized dealers. That can mean higher prices in certain regions or shipping delays. Plan for delivery time and potential freight costs. If you find a local distributor, you may save on shipping and gain access to in-person advice. Local distributors also sometimes offer training or demonstration sessions.
Warranties and technical support matter. Some DIY kits include limited warranties or product guarantees. Others do not. If you value after-sale support for troubleshooting, budget for a kit that includes manufacturer assistance. Even if the warranty is limited, access to technical help can reduce the cost of fixing application errors.
Know when to call a professional. If your truck has severe rust, structural damage, or a complex bed configuration, professional application is often the right choice. Professionals have spray rigs and booths that control temperature and humidity. They can also apply multiple coats with consistent thickness. For a truck that works in harsh conditions or is used commercially, the higher professional price can be justified by longer life and less downtime.
Finally, track your project costs carefully. Create a simple spreadsheet that lists material costs, tool purchases, and consumables. Include an entry for your time if you want to compare DIY to professional labor. This record helps you evaluate whether the DIY route delivered the value you expected. It also helps when planning future maintenance or resale.
To summarize the budgeting approach in a single, practical plan: choose a mid-high quality kit sized for your bed, allocate money for a quality spray gun and PPE, set aside funds for thorough surface preparation, and reserve time for practice and cure cycles. Avoid the cheapest kits if you want lasting protection. Buy from verified sellers and factor shipping into the final cost. If your pickup sees heavy duty use, weigh a professional installation to secure a warranty and possibly lower lifetime costs. For more guidance on useful truck accessories and related upgrades that pair well with a bed coating, see this truck bed accessories resource.
When you’re ready to buy, review coverage charts carefully. Confirm film thickness and calculate the square footage of the surfaces you plan to coat. Add at least ten percent to your material estimate to cover overspray and touch-ups. Assemble all tools and test equipment before starting. Keep a dedicated workspace for curing and avoid extreme temperatures while the coating cures.
Budgeting for a DIY truck bed coating is about more than the sticker price. It is about matching expectations to materials and method. A modest increase in upfront spending on a better kit and tools often delivers greater resilience. That resilience pays out over time with fewer repairs, lower maintenance, and better resale value. Make your plan, buy wisely, practice application, and protect yourself with proper safety gear. That combination yields the best results for most owners.
External reference: https://www.line-x.com/
Internal resource: For related truck accessory ideas and fitment tips, consult the truck bed accessories page: https://trucksdiy.com/blog/accessories/
What Professional-Grade Spray-On Bed Liners Cost for a DIY Truck Project
Understanding professional-grade spray-on bed liners and their real costs for DIY truck projects
When weighing whether to tackle a spray-on bed liner yourself, the numbers matter. These coatings differ sharply from roll-on paints and drop-in mats. They use industrial urethane or polyurea chemistries applied with spray equipment. That difference affects price, tools, prep time, and final durability. This chapter walks through the costs and features of professional-grade materials aimed at DIYers. It explains what you buy, how much you need, and when a pro might make more sense. The goal is to give a single, practical picture you can use to plan a project and budget accurately.
Professional-grade materials are sold in several forms. You can buy small, user-friendly kits that include the coating and a dedicated sprayer. Alternately, you can source larger quantities of the same commercial formulations through authorized dealers. The core product is a high-performance urethane or polyurea. These coatings cure into a tough, flexible skin. They resist abrasion, chemicals, and weather. They adhere to rough or previously damaged surfaces, making them ideal for truck beds and heavy use.
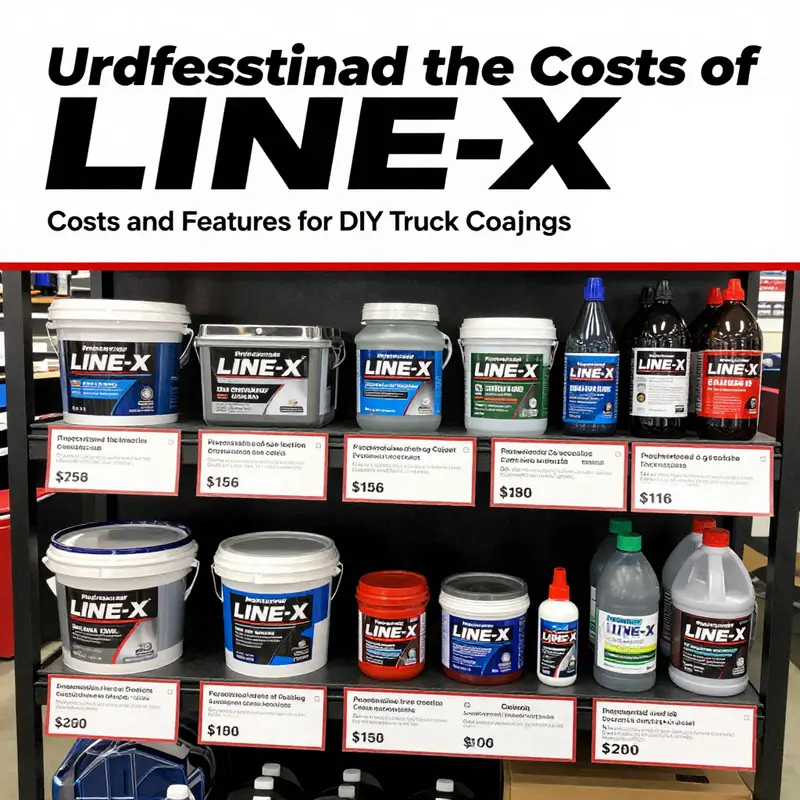
Price signals tell you what you get. Small one-gallon kits designed for DIY use often cost more per gallon than professional bulk purchases. Those kits focus on convenience. They include pre-measured components, a matched spray gun, and safety gear. Expect kit prices to land in the low hundreds for a single gallon. When you move into dealer-sold, professional-grade materials, the per-gallon cost rises. Professionals pay for specialized blends, higher-performance chemistry, and that premium shows in the sticker price. Figures vary by region and product line, but professional products often command mid-to-high three figures per gallon.
Understanding coverage and how it translates to cost is vital. A single gallon of professional urethane will typically cover between 50 and 70 square feet at thin film thickness. For thick, durable bed-liner textures, expect less coverage. Real-world truck beds require multiple wet passes to achieve the right texture and thickness. A full-size short bed usually needs 1.5 to 2 gallons for base coverage. A long bed can require 2.5 gallons or more, depending on texture preference and how much of the truck you coat. If you plan to coat tailgates, inner wheel wells, and fender tops, add a gallon or two to your estimates. Multiply those gallons by the per-gallon price to reach a base material cost for the job.
Kits aimed at the DIY market simplify estimation. A typical one-gallon user kit is targeted at small to medium applications. It includes the coating, application hardware, and instructions. These kits often cost between two and six hundred dollars, depending on brand and included accessories. They are convenient. They let you control labor costs. But they have limits. One gallon may not be enough for larger beds or full-coverage projects. Also, the formulations in consumer kits can differ from professional blends in their chemical makeup and cure profile.
If you buy professional-grade materials through an authorized dealer, expect to pay more per gallon, but receive higher-performance resin and additives. Dealers supply the same chemistry used by installers. Those formulations can include UV stabilizers, advanced abrasion resistance, and longer shelf life. One gallon from a dealer can exceed the price of a consumer kit, but it also delivers stronger long-term performance. For a DIYer who values longevity, this can be a better value despite the higher initial outlay.
Tools and safety gear add to the tally. Even a turnkey kit includes a spray gun, hoses, and basic protective equipment. But professional applications use larger, heavier spray rigs with heated hoses and specialized regulators. If you intend to scale up or expect to do multiple jobs, consider renting or buying professional spray equipment. Rental rates vary. A weekend rental might double your material cost for the job. Buying high-end equipment is a larger investment but can reduce per-job cost if used repeatedly.
Surface preparation influences both cost and outcome. Properly prepping a bed requires cleaning, sanding, and sometimes rust treatment or filler application. Abrasive blasting is best but not always practical for DIYers. Hand sanding and mechanical abrasion are common and lower cost, but they take time. Skip prep and adhesion problems or premature failure may result. Budget for sandpaper, cleaners, adhesion promoters, and masking supplies. These items add a modest amount to the material cost but can prevent costly rework later.
Labor vs. material cost is central to the DIY calculation. If you do the work yourself, your out-of-pocket spend will center on materials, kit, and tools. A simple, single-gallon kit plus supplies often keeps the job under a thousand dollars. But a professional install bundles warranty, surface prep, and guaranteed finish, which raises the price substantially. Professional installs typically cost from mid four figures to several thousand dollars. The higher cost covers specialized equipment, labor, and post-application inspection. It may also include a warranty, which reduces risk.
Long-term value supports the premium of professional-grade chemistry. These coatings maintain a truck bed’s integrity for years under heavy abuse. That protection helps avoid corrosion, dents, and scratches that reduce resale value. For trucks used in commercial work, the coating pays for itself in reduced maintenance and downtime. For personal trucks, the durable finish keeps the bed usable and attractive for longer. When you consider total cost of ownership, a higher initial material spend can be a sensible decision.
Texture and aesthetics affect how much product you apply and how it looks. A heavy textured finish uses more material than a thin, smooth coat. Many owners prefer a medium texture for slip resistance and durability. Texture choice should influence your material quantity estimates. Remember that multiple passes create the best adhesion and even look. Plan for at least two coats when estimating materials and budget.
Warranty and authenticity matter. Genuine professional-grade products sold through authorized channels come with technical support and, sometimes, limited warranties. These assurances can matter for resale or heavy-duty use. Avoid low-cost imitations. They may look similar initially but often lack the bonding, elasticity, or UV resistance of professional formulations. Spending more for authentic, dealer-supplied materials reduces the chance of early failure and expensive repairs.
Estimating a complete DIY cost for a typical bed is straightforward with a few inputs. Determine bed size and coverage needs. Note whether you’ll coat only the bed floor or the full interior. Decide on texture and desired thickness. Add the per-gallon material cost and multiply by the gallons required. Then add kit hardware, prep supplies, masks, and safety gear. If renting a spray rig, include rental fees. A typical short-bed DIY job with a one-gallon kit and supplies often falls into the low-to-mid hundreds. A more complete, dealer-material-based DIY job usually lands between three and eight hundred dollars for most beds. If you plan to match professional quality and coverage, costs creep higher. Expect to approach the lower end of professional installation prices if you purchase multiple gallons of commercial-grade material.
Safety cannot be an afterthought. These coatings rely on reactive chemistries and can emit hazardous vapors during application. Proper respirators and protective suits are mandatory. Ventilation matters. Heat and humidity affect cure time and handling. Read technical data sheets before you begin. Following manufacturer guidance on pot life, ambient conditions, and recoat windows avoids wasted material and poor adhesion.
Practical tips sharpen your budget planning. Do a small test patch before committing the truck bed. This reveals how the coating behaves on your surface and helps dial in texture. Mask the cab, tailgate, and sensitive areas thoroughly. Over-spray control saves cleanup time and keeps the finish professional-looking. Work with a partner when possible. One person can handle masking while the other sprays, speeding the process.
Consider where to buy. Authorized dealers supply the exact chemistry professionals use. They often offer technical support for DIYers. Online marketplaces list consumer kits that are convenient for one-off projects. Beware of non-branded or ambiguous listings. Read product descriptions carefully and confirm compatibility with your spray equipment. If you plan multiple projects, building a relationship with a dealer can unlock bulk pricing and better support.
When weighing DIY versus pro, consider confidence and timing. A DIY job saves on labor if you have the time and patience. The learning curve can be steep. Mistakes may be costly. Professional installers deliver predictable results faster. They also handle complex prep tasks like corrosion repair and mechanical abrasion. If your truck is a critical work tool, a professional install may minimize downtime and long-term risk.
Finally, think long term. Professional-grade spray-on linings protect assets. They reduce corrosion and surface damage. They can preserve resale value. The choice between a consumer kit and dealer-grade material comes down to priorities. If you want the longest life, go with commercial-grade chemistry purchased through an authorized source. If your aim is a functional, cost-conscious DIY job, a quality one-gallon kit can be a good fit. Either way, plan your materials, tools, and safety equipment before you start to avoid surprises.
For related truck storage and accessory guidance, see this practical resource on truck boxes: truck box.
For additional product details and an example of a one-gallon spray-on kit available to consumers, refer to the product listing here: https://www.amazon.com/dp/B07XZ2VQJF
null
null
Final thoughts
In conclusion, the decision to invest in LINE-X for truck coatings greatly depends on your business needs and budget. For those inclined towards DIY options, there are affordable kits available that can provide a decent protective layer. However, if your focus is on durability and a professional finish, opting for professional-grade coatings could save you money in the long run due to their robust warranties and superior application techniques. Evaluating these options allows business owners to protect their investments effectively and choose the best solution for their specific requirements.