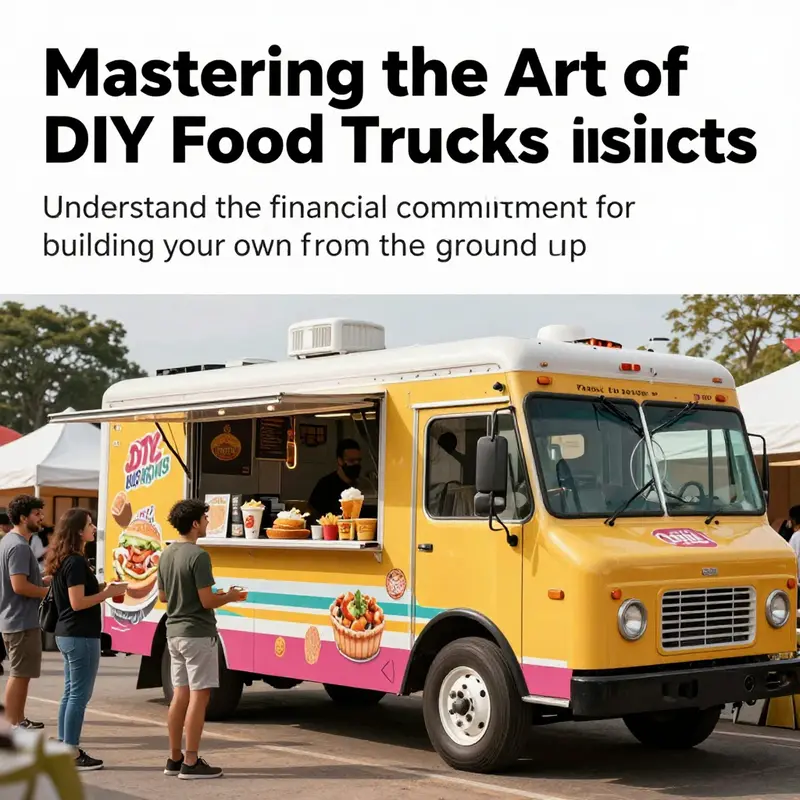
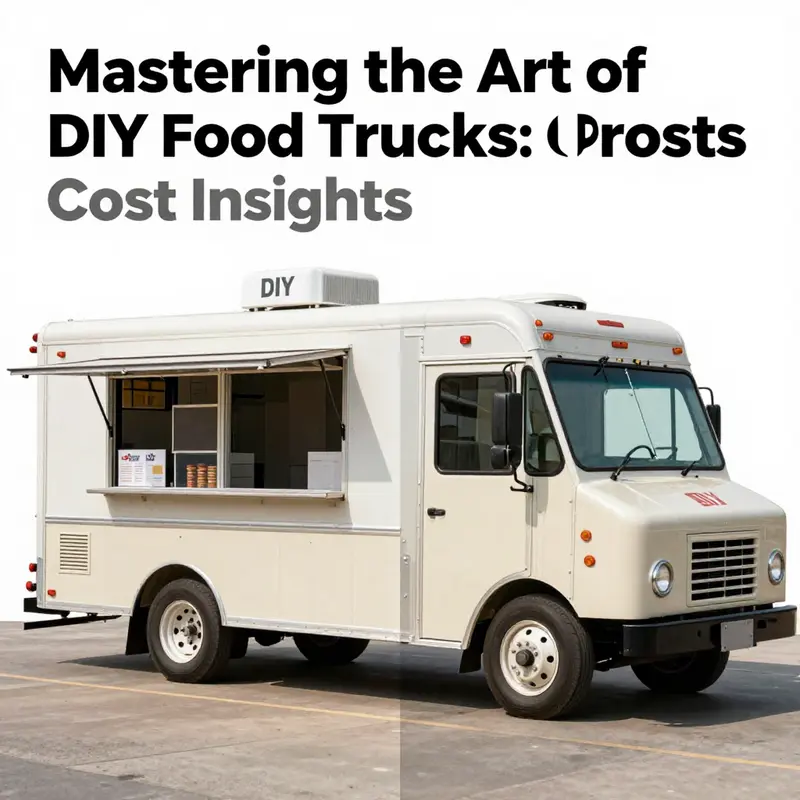
Starting a food truck business is an exciting venture that allows culinary entrepreneurs to share their passion with customers in a unique way. However, the financial aspect of DIYing a food truck can often be daunting. Understanding the costs involved is crucial for business owners who want to manage their budget effectively and ensure their investment pays off. This article provides a comprehensive analysis of the main expenses associated with creating your own food truck, including an in-depth cost breakdown, the necessary permits and licenses, essential equipment expenditures, and a comparison of DIY costs versus professional builds. Each chapter will equip you with the knowledge needed to navigate the financial landscape of food truck ownership.
The Real Cost Map of DIYing a Food Truck: A Practical, No-Nonsense Guide
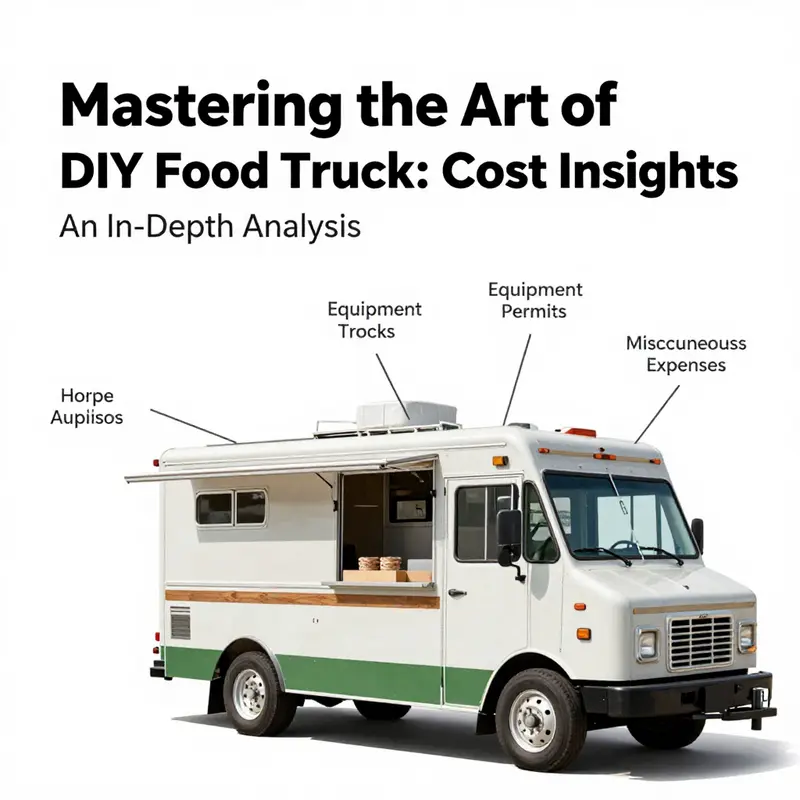
Choosing to DIY a food truck is like mapping a road trip with many potential routes. The lure is tangible: the freedom to design your kitchen, chase a niche, and keep more control of where every dollar goes. Yet the first stop on that trip is always the same question, and it’s not what you’ll cook, but what it will cost to get on the road and stay there. A careful look at the cost structure reveals that the big swings in price come from three core decisions: the base vehicle you start from, the level and type of interior build-out you choose, and how strictly you must conform to local rules that govern health, safety, and business operations. The math is not abstract; it is an active constraint that changes the shape of your kitchen, your menu, and even your long-term plans for growth.
For anyone picturing a DIY path, the most obvious starting point is the chassis. The market offers several routes, and each route carries its own price rhythm. A used commercial van—think of something like a versatile workhorse that can house a kitchen with modest renovations—tends to fall in the neighborhood of roughly fifteen thousand to thirty thousand dollars. A new commercial van sits higher in the spectrum, often between forty thousand and seventy thousand dollars, with the caveat that a fresh vehicle comes with longer warranty coverage and the potential for fewer surprises during the initial months of operation. If you are drawn to a larger footprint, a used large truck chassis could land you somewhere in the mid-twenties to mid-fifties of thousands, depending on mileage, condition, and the exact configuration you intend for the body and kitchen systems. These numbers aren’t just numbers; they determine how aggressively you can pursue certain design choices later in the process. A higher upfront cost can sometimes translate into faster assembly, better efficiency, or longer life under heavy daily use, but it also raises the upfront risk and the amount of financing you might need.
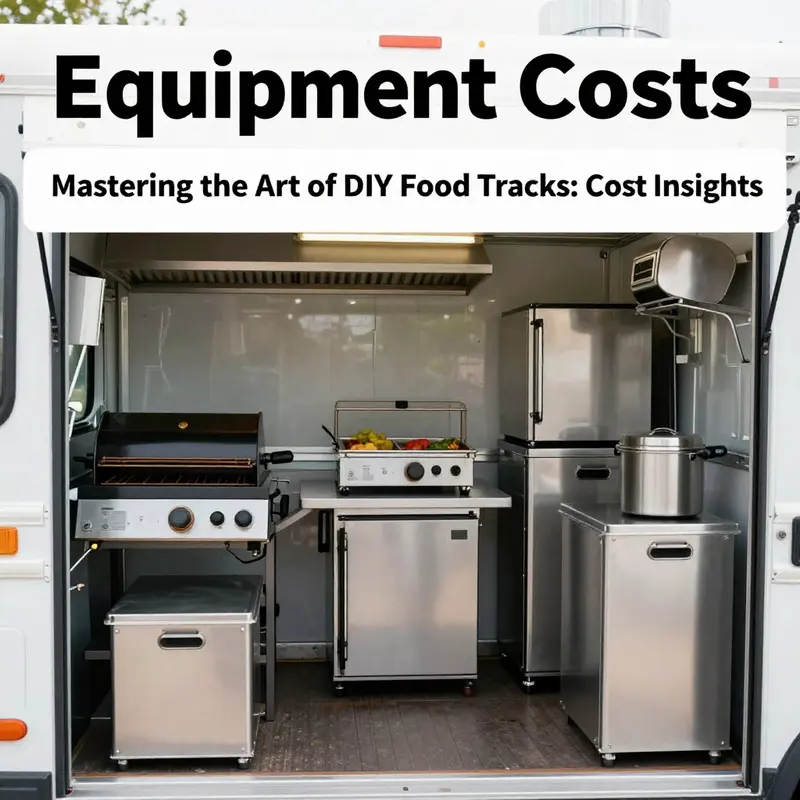
Once the base is chosen, the interior is where the budget begins to reflect your ambitions. The kitchen is the heart of a food truck, and the cost of turning the shell into a fully functioning kitchen is the largest swing factor in a DIY project. A basic setup—think a small footprint with a simple grill, a sink, a modest refrigerator, and compact shelving—can land around fifteen thousand to twenty-five thousand dollars. This entry-level configuration is enough to launch a modest menu, but it is intentionally lean: the appliances are compact, the ventilation may be basic, and the capacity for high-volume service is limited. Move into the mid-range zone, and you’ll be looking at roughly thirty thousand to fifty thousand dollars. This tier typically includes full-range cooking equipment, a walk-in or large reach-in refrigeration system, more robust ventilation, and higher-quality cabinetry that can withstand the daily wear of a busy service window. The high-end, commercial-grade route can push beyond fifty thousand up to one hundred thousand dollars or more. In this tier, you are likely to install industrial ovens, multiple grills, expansive refrigeration, advanced electrical systems, water management, and finishes that endure long service hours and frequent disassembly for maintenance.
These interior numbers, of course, interact with another pillar of cost: permits, licenses, and compliance. Getting your truck legally on the road is not optional; it is a fixed expense you cannot and should not skip. In most jurisdictions, you’ll face a business license, a food service permit, a mobile vendor permit, and an inspection fee from the health department. Taken together, these regulatory steps typically run somewhere around five hundred to twenty-five hundred dollars, depending on your city and state. The exact sum depends on the scope of your operation, the hours you plan to serve, and your business structure. The permits are not a one-time hurdle; they are annual or periodic renewals in many cases, and some regions require ongoing inspections or updates when you modify your equipment or service model. Those recurring costs, while smaller on a yearly basis, accumulate across the life of the truck and must be anticipated in your cash flow projections.
Beyond the vehicle, the kitchen build, and the regulatory gates, there are what might be called the “invisible” costs that quietly shape your bottom line. Insurance is a non-trivial line item—three digits annually for basic liability coverage is a reasonable starting point, with the potential to rise as you increase risk, add staff, or expand your menu. Transportation, if you’re not driving the truck yourself, can also surprise you: freight or delivery costs to move components and equipment from suppliers to your build site often run from a few hundred to a couple of thousand dollars depending on distance and fragility. Then there are the tools, materials, and miscellaneous hardware required to execute the build. A prudent DIY project sets aside a few thousand dollars for these essentials, because you will inevitably encounter unexpected needs as you install systems, work through wiring diagrams, or reconfigure storage layouts.
If you aggregate these elements, the range of possible total investments becomes clearer. A budget DIY path—using a used van, a basic build-out, and minimal, reliable equipment—can keep the total in the neighborhood of thirty thousand to fifty thousand dollars. This is a broad band that assumes careful procurement, efficiency in labor, and a willingness to do as much work as possible yourself. A more likely, realistic DIY route—still using a used van but with a mid-range build-out and standard professional-grade equipment—tends to run from about fifty thousand to eighty thousand dollars. You gain more cooking capacity, more durable equipment, and better workflow, but you also push closer to the upper edge of what many first-time operators budget before launch. For the bold, the high-end DIY route—often a new van paired with a premium build-out and top-tier equipment—tends to start near ninety thousand and can easily climb beyond one hundred fifty thousand dollars as you add advanced ventilation systems, multiple cooking zones, and a boutique finish that supports premium branding and higher price points.
This framework helps explain why DIY is not simply a question of whether you can cut labor costs by doing the work yourself. It’s about aligning the spend with your menu, your service style, and your expected scale. A solar-powered truck adds another layer of decision, especially for operators who want energy independence or operate in markets with high power costs. A solar-equipped setup can begin around four thousand four hundred dollars, though that price point often reflects a minimalist system with energy storage and basic integration. It’s important to note that even with solar, additional costs for electrical systems, cooking appliances, and battery management are not trivial. The solar choice can pay off in certain contexts—especially in daytime markets with limited electrical capacity from anchors or limited hookups—but it does not guarantee lower total costs without careful design and ongoing maintenance.
To gauge the true headroom of DIY, it helps to consider the broader market context. Pre-built, customizable food trucks offer another lens on cost. Some early-stage, low-profile builds can appear strikingly affordable when viewed as a chassis plus basic shell; for example, prices can dip as low as about nine hundred ninety dollars for a basic trailer body that does not include kitchen equipment, refrigeration, or branding. This demonstrates that the “cost of the shell” is only a fraction of the total. On the higher end, a solar-powered configuration combined with a robust kitchen package can push the price well above four thousand four hundred dollars, illustrating how energy systems and kitchen scale interact to expand the bill quickly.
The most important takeaway is not the exact dollar figure in any one line item, but the recognition that the largest costs are tied to the kitchen system, the electrical and plumbing installations, and the compliance envelope. Kitchen equipment dictates not only price but the form of your workflow: the number of cooking zones, the type of refrigeration, the size of prep surfaces, and the speed at which you can service customers. Electrical and plumbing work is not merely a line item; it’s the backbone that makes the kitchen durable, safe, and compliant with health codes. Finally, the regulatory framework is not a single hurdle to clear; it is an ongoing relationship with local authorities that requires careful record-keeping, regular inspections, and budgetary foresight for renewals, updates, and possible expansions.
If you want a practical touchstone that frames these choices against real market conditions, consider the contrast between DIY routes and turnkey options from suppliers. A fully customized, ready-to-operate truck from a supplier can have a starting price that is markedly higher than the DIY path’s upper end, depending on equipment and branding. In some cases, you may find pre-built options that are solar-powered or designed as compact storefronts on wheels; these will still require a meaningful investment for kitchen equipment, ventilation, and compliance. The comparison emphasizes a strategic decision: do you want the DIY route to maximize control and potential savings, or do you prefer the speed-to-market and standardization that a supplier-backed build can offer? The trade-off is not merely cost. It’s about risk, time, and how quickly you can begin generating revenue.
For those who want to see a broader spectrum of the market as they plan, supplier and platform listings can provide additional color on how others price the components of a mobile kitchen. Some buyers are drawn to multi-component packages that bundle body, electrical, and sometimes a basic kitchen module. The risk here is that the bundled price often assumes certain configurations, and it may require additional work to tailor the kitchen to your menu or your local health codes. The DIY approach gives you room to optimize for your specific cuisine, your peak service times, and your target customer, but it also places more emphasis on your ability to design, install, and test each system to avoid costly backtracking.
As you outline your own plan, a practical approach is to map your menu to your kitchen layout and then trace that layout back to the up-front investments you will need. Your menu will shape the number of burners, the oven or fryer capacity, the cold storage requirements, and the waste management needs. Each of these choices translates into a cost impulse: higher-end cooking equipment, larger refrigeration, more robust ventilation, and better finishes all pull the budget toward the higher end. Yet that higher end often translates into greater reliability, longer service life, and a more efficient workflow under stress, which can improve revenue potential and reduce downtime.
If you want to ground this planning in current market data, you can examine the broader price signals across the DIY landscape. As of early 2026, a practical reality is that total investments for a functional, compliant, and ready-to-service truck typically start around thirty thousand dollars and can easily exceed fifty thousand dollars, depending on the above variables. A more realistic middle ground tends to hover between fifty thousand and eighty thousand dollars, reflecting mid-range builds and standard equipment that support a growing menu and a reasonable service cadence. For operators with premium ambitions—new van, high-end build-out, and top-tier equipment—costs can push into the upper tier, often surpassing one hundred thousand dollars when you account for branding, custom finishes, and advanced systems.
To keep the numbers grounded in real-world procurement dynamics, it’s also valuable to keep an eye on the open market where builders and suppliers publish configurations, sometimes through brokered channels or marketplace listings. A pre-built, customizable truck can be listed at surprisingly low price points if the buyer is willing to accept certain constraints, while more elaborate configurations can mimic the price curve of a full, bespoke build. In all cases, your plan should include a buffer for equipment upgrades, maintenance, and the inevitable tweaks that arise after you begin serving customers. A practical, repeatable approach is to document every assumption, itemize every line item, and model how changes in menu strategy impact the required kitchen footprint and the associated costs.
Another important dimension is the potential for savings in certain areas through careful shopping for components that can be standardized across multiple builds. For instance, choosing modular systems and widely used appliances can reduce both the upfront capital and the ongoing maintenance complexity. It’s worth noting that while some buyers turn to global marketplaces to source components and even complete kitchen modules, the total landed cost—including freight, import duties, and installation time—needs careful budgeting. Engaging with verified vendors and validating specifications before purchase can help avoid misalignments that often show up after delivery.
For those who want to explore more concrete examples and current configurations, there are industry resources and supplier catalogs that can help illuminate what is possible within different budgets. And while these resources can be informative, the core message remains consistent: your success hinges on deliberate planning, precise alignment of your menu with your kitchen footprint, and an explicit acknowledgement of the regulatory and operational realities that come with mobile food service. If you are open to expanding your understanding of the full spectrum of options, you can also consult insights from third-party market data and vendor listings that highlight the variability in pricing and configurations across regions.
In the end, the cost map for a DIY food truck is not a single line, but a landscape of trade-offs. The more you align your fuel—your menu, your service model, and your regulatory plan—with a realistic budget, the more resilient your project will be. If you’re ready to begin exploring components, layouts, and accessory choices, there is value in examining the range of available options for essential add-ons and organizing solutions, which can greatly influence your workflow and your ability to service customers efficiently. For example, a solid set of modular accessories can help you reconfigure spaces for different events or seasons and keep labor costs manageable as your business scales. accessories can be a practical starting point for thinking through these kinds of choices.
For readers who want to broaden their perspective beyond in-house planning, it’s useful to consider the broader market ecosystem. A representative snapshot shows that even at the low end, the starting point for a functional trailer body can be under a thousand dollars, underscoring how much of the value in a mobile kitchen comes from the equipment, the fit-out, and the compliance framework you assemble around that shell. A solar-enabled setup illustrates how energy strategy can shift both cost and capability. While the solar basket adds tens of thousands in some cases, it can also reduce operating costs in the right market by lowering energy bills and enabling longer hours of operation without mains power. The bottom line remains that these are not independent levers—you tune them together with your menu, location strategy, and service hours to craft a business model that stands up to the realities of a mobile food business.
To help ground your planning, you may also want to compare these figures against what a turnkey supplier can offer in terms of speed to market and built-in compliance, recognizing that turnkey options frequently carry higher upfront costs. Yet even with those higher prices, the trade-off may be valuable for operators who want a predictable, tested workflow and a support network for ongoing maintenance. The choice is yours: leverage your own labor and craft, or lean on a structured build with professional guidance. Either path can work, as long as you enter the process with a clear sense of the cost drivers, a disciplined budgeting approach, and a realistic timeline for getting your truck on the road and into service.
External resource for broader market context can be found at a global supplier directory that aggregates listings for mobile kitchens, including solar-powered configurations and other modular options. This can help you understand price bands in a real-time sense and compare what you can expect to pay for different configurations as you finalize your design. For further context on current supplier pricing and listings, see a broad catalog of mobile kitchen configurations at https://www.alibaba.com/showroom/food-truck.html.
Permits, Licenses, and Fees: Budgeting the Regulatory Cost of a DIY Food Truck
Permits, Licenses, and Fees: Budgeting the Regulatory Cost of a DIY Food Truck
Launching a DIY food truck means building a mobile kitchen, and it also means buying legal permission to operate. Regulatory costs are often smaller line items compared with vehicle purchase and kitchen equipment. Still, they can delay launch and cut into working capital if you do not plan ahead. This chapter walks you through the permits and licenses you will likely face. It explains what drives fees, how to budget for them, and practical ways to reduce upfront regulatory expense.
Most cities and counties structure requirements around public health, zoning, and commerce. You will usually need a general business license and a mobile vendor permit. The health department issues a food service permit after inspecting your build. You may also need tax registrations, a seller’s permit, and specific zoning clearances for places you’ll park and sell. Each of these has a fee, and many require periodic renewals or inspections.
A general business license is the baseline. It registers your entity with the city or county. Fees here are typically modest. Expect a range that starts near fifty dollars and can climb to several hundred. The amount often depends on business size and the local fee schedule. Some municipalities apply a flat fee. Others scale the fee with projected annual revenue or with the number of employees.
The food service permit from the health authority is the most important for public safety. It confirms your truck meets food safety, storage, waste, and sanitation rules. Health departments commonly require a detailed plan of your layout and systems. They will check ventilation, handwashing and dishwashing stations, refrigeration, hot-holding equipment, and waste disposal. If your truck prepares high-risk foods, the requirements are stricter. That can mean additional equipment and higher inspection fees.
A mobile food vendor permit is specific to vehicles. It often limits where you can park, how long you may stay in one spot, and whether you can operate near schools or other restricted zones. Fees vary widely. In many cities permit costs fall between two hundred and one thousand dollars. Some places require proof of insurance and a separate background check for the vehicle operator.
Tax and commercial registrations are straightforward but essential. You may need to register for state and local business taxes. A seller’s permit lets you collect sales tax on food sales. Some jurisdictions combine these steps. Others require separate filings. Budget a few dozen to several hundred dollars for registration fees, depending on your state.
Zoning approvals and parking permits are the areas that surprise many first-time operators. Local rules may restrict vending in certain districts. You might need written authorization to operate at a private event or to park for long periods on city streets. Costs here depend on your market. In high-demand zones, cities sometimes auction prime parking permits or charge premium fees.
Beyond direct permit fees, inspections and compliance may mean additional expenses. Health departments may charge inspection fees on a per-visit basis. If your initial inspection fails, you may pay re-inspection charges. Some cities require fire inspections too, especially when gas or open flame is used. A failed fire inspection often results in required modifications, which add to your build cost. Plan for at least one or two inspections before you get approval.
The total regulatory cost depends on three clear variables: where you operate, what you sell, and how often you change your setup. Location matters most. Large cities typically have higher fees and more complex rules. Rural areas may charge less but offer fewer high-traffic opportunities. The type of menu matters because it determines the risk level the health department assigns to your operation. Prepackaged or cold offerings usually face simpler rules than hot, cooked meals.
Time is a hidden cost. Permit applications can take weeks or months. Building delays triggered by permit conditions or failed inspections increase holding costs. When you plan your timeline, add buffer weeks for permitting. If you count missed weeks as lost revenue, the effective cost of permits grows. Do not assume approvals will be quick, especially if your truck needs significant electrical, plumbing, or ventilation permits.
To manage costs, take a staged approach. Begin with a minimal menu that requires less specialized cooking equipment. This can reduce the scope of inspections and lower initial fees tied to high-risk operations. Keep your build flexible. For example, design equipment layouts that allow an upgrade path. That helps you start with simpler permits and expand once revenue stabilizes.
Shop permits like you shop equipment. Fees and enforcement vary by jurisdiction. Before committing to a purchase, research the exact rules where you will operate most often. Local business licensing offices and health departments have public resources. Some areas publish complete mobile vending guides with fee schedules. A targeted phone call or a visit can save months of guesswork.
Documentation is another place to control costs. Health and vending permits often require clear diagrams, equipment specifications, and proof of insurance. Gather plumbing diagrams, electrical load calculations, and detailed equipment lists early. This reduces the chance of follow-up requests and re-inspection fees. If you prepare paperwork thoroughly, inspectors spend less time asking for clarifications.
Insurance is sometimes bundled with permit requirements. Many permits demand proof of liability insurance and vehicle insurance levels. Insurance limits differ by jurisdiction. Shop insurance quotes early. Insurance premiums are recurring costs, but securing a policy that meets permit requirements prevents permit denial at application.
Look for financial help where permitted. Some local governments offer small business grants, microloans, or fee waivers for minority-owned, veteran-owned, or low-income entrepreneurs. Crowdfunding or community loans can also cover permit fees. Funds earmarked for regulatory costs reduce the pressure on your working capital.
Expect permit renewals and periodic re-inspections. Permits are rarely one-and-done. Annual renewals are common. Health departments may conduct scheduled or surprise inspections. Build renewal fees into your operating budget so licensing does not become a surprise expense a year in.
Anticipate additional fees tied to special events. Markets, fairs, and private events sometimes require event-specific permits. Event organizers may ask for proof of permits or charge vendor fees. These are separate from your base permits and vary by organizer and location. Factor them into your per-day cost for pop-up earnings.
A practical budgeting example helps clarify numbers. For a typical mid-sized city, expect the initial set of permits to fall between five hundred and two thousand five hundred dollars. Factor in state filings and seller’s permits, and add budgeting for potential re-inspections. For high-risk menus in large cities, costs can approach several thousand dollars before you serve your first customer. For lower-risk menus in smaller towns, the entry cost is closer to the low end of that range.
Plan for contingencies. A failed inspection can force changes costing hundreds or thousands. Pay particular attention to ventilation and fire suppression rules. These systems are often regulated tightly. They also require contractors who know municipal expectations. Obtain contractor quotes before finalizing your budget for permitting.
Recordkeeping prevents needless repeat fees. Keep copies of all permits and inspection reports inside your vehicle and in a cloud backup. Many health departments want to see permits on-site. Having documentation ready minimizes citations and fines.
Finally, align your launch strategy with regulatory realities. Use slower months to complete build-outs and surveys. Schedule inspections when inspectors are most available. Consider test days at private events, where permit requirements might be simpler, to refine processes before full public operation. Invest time in local research and you will convert uncertain regulatory costs into a predictable line item in your overall food truck budget.
For a concise starter checklist, include the business license, food service permit, mobile vendor permit, seller’s permit or tax registration, zoning or parking approval, proof of required insurance, and scheduled inspections. Expect total initial regulatory spend to range from a few hundred to several thousand dollars. Add buffers for inspections and contingency fixes. This approach keeps the permitting process from becoming an unpredictable drain on your DIY food truck project.
If you want a step-by-step resource for planning permits and licensing at the federal and local level, consult the Small Business Administration guide linked below. For equipment and accessories that help meet inspection standards, see this equipment and accessories resource.
External resource: https://www.sba.gov/business-guide/launch-your-business/start-food-truck-business
Internal resource: equipment and accessories resource
null
null
DIY or Professional: The Real Price Tag of Building Your Food Truck
When you start planning a mobile food business, the first big fork in the road is often DIY versus buying a professionally built unit. It’s tempting to think you can shave thousands off the price by sourcing parts yourself, welding a frame in a backyard shop, and ticking every compliance box with a DIY mindset. Yet the numbers tell a more nuanced story. Cost, yes, but also time, risk, quality, and the intangible value of a unit that runs smoothly from day one. As of early 2026, the most practical way to frame the decision is to weigh not only the sticker price but also the likelihood of delays, the complexity of code compliance, and the long arc of maintenance and safety. The result is a spectrum rather than a single figure, with DIY starting to look appealing only if you bring specialized skills, spare time, and a tolerance for potential reruns of electrical, plumbing, and ventilation tasks. If you want a concrete sense of the terrain, think of three broad layers: base vehicle costs, interior build-out and equipment, and the permits and ongoing risk that thread through the entire project. Each layer carries its own price dynamics, and together they form the total investment that determines when a business can start serving customers and when it begins to turn a profit. The math, in short, is less about finding a bargain and more about aligning your budget with your capabilities and your appetite for risk.
Starting with the foundation, the base vehicle is the canvas on which every later decision rests. A practical DIY path often begins with a used commercial van, where the chassis cost can be as modest as roughly fifteen thousand dollars and as high as thirty thousand, depending on condition and market dynamics. If you opt for a new commercial van, the price shoots up to roughly forty thousand to seventy thousand dollars or more, reflecting modern efficiency, warranties, and new-vehicle economics. For those who lean toward a larger chassis, used big-truck configurations can land in the mid-twenties to the mid-five tens, again largely driven by condition, mileage, and the overall tractability of converting a larger vehicle into a kitchen on wheels. These numbers matter because they set the ceiling and the floor for everything that comes after. The chassis is not simply a shell; it is the structural spine that must support a robust electrical system, plumbing, a ventilation hood, engines or generators, and heavy kitchen equipment. Skimping here can cascade into air leaks, electrical faults, or a roll of steel you end up reworking later, all adding to the total cost in both money and time.
If you navigate away from the base vehicle and toward interior build-out and equipment, the real investment often reveals itself as the bulk of the project. The story here is not simply about a list of appliances; it’s about the quality, safety, and reliability of the kitchen that will feed customers under busy service conditions. A basic setup might cover a simple grill, at least one sink, a small fridge, and decent shelving—these essentials can fall into a lower range, roughly fifteen thousand to twenty-five thousand dollars. But once you move into the mid-range territory, you begin to see professional-grade appliances, full-range cooking equipment, and a large walk-in fridge or freezer. The range here typically spans thirty thousand to fifty thousand dollars, with better cabinetry, improved ventilation, and more dedicated recipe and service areas. The high-end end of the spectrum climbs quickly into the fifty thousand to one hundred thousand dollar zone, where industrial ovens, multiple grills, expansive refrigeration, advanced electrical and water treatment systems, and premium finishes are part of the package. It’s easy to underestimate how quickly these upgrades accumulate when you are chasing durability, ease of cleaning, and the safety margins required by health codes. The reality is that the interior build-out is rarely a matter of a few stovetops and a sink; it is a complete system designed to operate under professional health and safety standards, with the right clearances, exhaust flow, temperature control, and waste management configurations. The importance of a well-planned interior cannot be overstated, because an underpowered electrical system or a poorly vented hood will only create bottlenecks on service days and invite costly retrofits later.
Permits and licenses remain a non-negotiable axis of cost and risk. Even in markets with streamlined processes, a family of fees accumulates quickly: a basic business license, a dedicated food service permit, a mobile vendor permit, and a health department inspection fee. In total, you should anticipate roughly five hundred to two thousand five hundred dollars for the stack of permits and inspections that most jurisdictions require to operate legally. While these costs might seem modest relative to the purchase price of the truck, they are not optional. They represent the baseline for a compliant operation, and skipping them is not a viable strategy for a business that aims to serve customers regularly and to avoid shutdowns or fines that can devastate a fledgling operation.
Beyond the obvious line items, there are miscellaneous costs that quietly add up and often catch first-time operators by surprise. Insurance is a practical necessity; budgeting five hundred to one thousand dollars annually for liability insurance is a reasonable starting point. If you do not drive the truck yourself, transportation and delivery costs for getting the unit to your site can range from roughly five hundred to two thousand dollars, depending on distance and logistics. And for the DIY enthusiast turned builder, tools and materials needed for the build can reach one thousand to three thousand dollars. These are costs that accumulate even when you already have the chassis, and they reflect the reality that the craft of turning a shell into a functional kitchen involves consistent tool time and a steady flow of materials that are safe for food contact and robust enough for daily service.
Putting all these pieces together yields a practical picture of the total investment, which the market currently summarizes in a three-tier framework. A budget DIY path, using a used van plus a basic build-out and minimal equipment, is typically in the thirty thousand to fifty thousand dollar range. A more realistic DIY approach—still using a used van but with a mid-range build-out and standard equipment—lands between fifty thousand and eighty thousand dollars. For those who want to maximize quality and reliability, a high-end DIY setup with a new van and premium equipment pushes the total well beyond eighty thousand, often into the ninety-thousand to one-hundred-fifty-thousand dollar territory. These ranges reflect the broad spectrum of choices operators face, from the humility of a small, simple menu to the ambition of a full-blown culinary operation with extensive refrigeration, ventilation, and multiple cooking zones. It is worth noting that these figures are not arbitrary numbers scraped from a single source; they consolidate the current market realities that buyers encounter when assembling the pieces needed to operate legally, safely, and on schedule.
In the same breath, it is useful to contrast these DIY figures with what a professional builder might deliver. The surprising part of the comparison for many is that a ready-to-operate unit from a professional builder can still start from a relatively modest level if you frame the request as a lean, basic mobile setup. Some professional builds can be placed into the range of roughly three thousand to fifteen thousand dollars, depending on size, features, and whether the unit is a simple cart or a more elaborate food truck shell. These numbers often exclude the base vehicle and the high end equipment that would be needed for a full menu, but they provide a baseline for the cost of a professionally constructed, code-compliant body designed specifically for food service. Even the most budget-conscious professional options might begin in the low thousands, while premium or solar-powered concepts or cuisine-specific configurations can push past the mid-teens or into higher figures depending on customization. The key takeaway is that professional builds exist on a different axis from DIY in terms of upfront certainty and regulatory preparedness. They frequently come with warranties, service networks, and a structured hand-off that reduces the risk of later retrofits and unexpected downtime.
The tension between these two paths is not simply about dollars saved upfront. It is about the likelihood of getting to service faster, staying in regulatory good standing, and maintaining consistent performance in a busy kitchen. DIY offers the lure of control and potential savings, but it invites a different calculus: time spent sourcing materials, learning codes, designing safe plumbing and gas or electrical layouts, and coordinating inspections. The risk of missteps is real, from incorrect ventilation capacity to improper insulation that invites heat loss or moisture problems. Each misstep has a price tag attached, whether in the form of costly rework, downtime, or the expense of bringing in a professional to correct course after a mistake. The factor of safety and compliance often nudges the professional path from a gamble toward a predictable, regulated deployment that can begin service on a reliable schedule.
For those who do choose to pursue a DIY route, a practical approach is to treat the project as a staged process rather than a single sprint. Start with a clear map of the essential systems: structure, electrical, plumbing and gas if used, refrigeration, and exhaust. Then outline a tolerance for nonessential upgrades that can be postponed to later stages—such as secondary cold storage, a backup generator, or a spare equipment line. Each stage brings its own incremental cost but also reduces the risk of a costly, all-at-once upgrade. A staged plan also helps you incorporate improvements that align with actual sales data from your pilot operations, a critical factor for any business that plans to scale. Keeping a meticulous budget with built-in contingencies—five to ten percent for unexpected costs—is wise, given the likelihood of hidden expenses in both DIY assemblies and rework from early prototypes.
Within this framework, it is also useful to remember that the quantity and quality of accessories can influence both the price and the performance of the final unit. The right add-ons can enhance efficiency, safety, and service speed, while unnecessary gadgets can inflate costs without delivering proportional returns. A practical mind-set is to assess each potential add-on against a concrete return on investment: will this feature save time during peak service, improve product quality, or reduce waste and cleanup time? An accessible way to explore a broad catalog of possible add-ons is to browse the Accessories catalog, which showcases a range of interior and exterior enhancements that might support service flow and branding. This resource can help you imagine how your truck will function on the line, beyond the visible finish and branding. For a catalog of add-ons, Accessories page.
If the goal is to balance speed to market with reasonable cost, the professional route often delivers more predictable results. The trade-offs involve higher upfront payments and less flexibility in the initial menu or setup, but you gain a unit designed to meet health and safety standards from the start, with a warranty and support network that can mitigate early downtime. Conversely, the DIY path invites a longer burn of your own time and a higher tolerance for risk and iteration. It can yield substantial savings if you have specialized skills, the time to invest, and a willingness to navigate regulatory landscapes with care. It is not a one-size-fits-all choice; rather, it is a calculus that must factor in your culinary ambitions, the speed of deployment you require, and your personal readiness to manage complex trades. The numbers are not simply a matter of counting dollars; they are about forecasting operations, customer experience, and the reliability of your brand in a mobile environment.
For those seeking further real-time context about supplier options and prices that exist beyond the DIY frame, it is possible to explore market listings through broader sourcing platforms. A widely referenced external resource provides direct supplier options for materials and components, illustrating how the market can scale with demand and the breadth of offerings available to aspiring food truck operators. External resource: https://www.alibaba.com. This is not a recommendation to purchase through any single supplier, but it serves as a snapshot of how the market sometimes frames the base cost of components that feed into both DIY and professional builds. It is one piece of the broader puzzle that helps a prospective owner calibrate expectations and timelines.
In the end, the decision to DIY or hire a professional to build a food truck hinges on your budget, your technical skill set, and your tolerance for risk. If speed to market and regulatory certainty are paramount, a professional build offers a safer, more predictable path, even if the upfront price is higher. If you relish hands-on work, have the required skill set, and can absorb the possibility of delays and rework, a DIY approach can yield meaningful savings and a deeply personalized kitchen on wheels. The numbers throughout this landscape support a simple takeaway: start with a realistic appraisal of your base vehicle, then map the interior and utility needs against the permits and ongoing compliance requirements. The cost is not just the sum of line items but the alignment of your capabilities with your business goals. The sooner you can forecast these elements together, the more accurately you can chart a course from planning to serving customers and building a brand that travels with you.
Final thoughts
Navigating the costs of DIYing a food truck requires careful consideration of various elements, including the base vehicle, equipment, permits, and design choices. Each chapter has unveiled the layered costs involved, giving you a clearer understanding of how to budget for this entrepreneurial adventure. While the initial investment for a DIY food truck can be significant, thorough planning and knowledge of expenses can make this venture rewarding. Equipped with this insight, you’re better prepared to make informed decisions that align with both your culinary vision and business goals.