Attaching a camper to a truck is a vital skill that ensures the safety and efficiency of your business operations, especially for mobile entrepreneurs. Understanding the technical requirements, such as towing capacity and hitch selection, is essential. This guide is tailored for business owners looking to engage in DIY camper attachment. In the first chapter, we will explore how to understand your truck’s towing capacity, critical for safe transport. The second chapter will focus on choosing the right hitch system for your specific needs. Finally, we’ll cover DIY installation and safety checks essential for a secure connection, enhancing your confidence as you prepare for your trips.
How to Know What Your Truck Can Tow: Practical Towing Capacity for DIY Camper Attachment
Understanding what your truck can safely tow is the single most important step before you attach a DIY camper. Too many DIY projects stall because the builder relied on advertised dry weights or guesswork instead of hard numbers. A safe tow setup starts with a clear picture of limits: what your truck’s structure, drivetrain, brakes, suspension, and factory options allow, and what the fully loaded camper actually weighs. This chapter walks through those realities in a single, connected discussion so you can plan a DIY camper attachment that won’t harm your truck or put you at risk on the road.
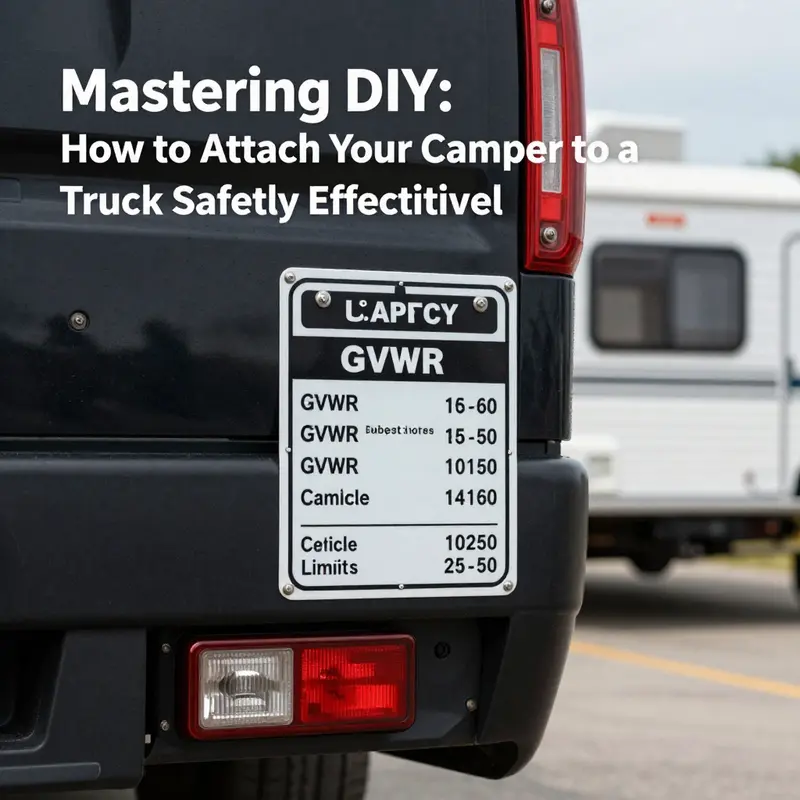
Begin by separating three weight concepts that are often confused but determine everything that follows. Gross Vehicle Weight Rating, or GVWR, is the maximum safe operating weight of a vehicle, including cargo, passengers, and tongue weight transferred from a trailer. Gross Combined Weight Rating, or GCWR, is the combined maximum weight of the tow vehicle plus trailer and all cargo. Payload capacity is how much weight your truck can carry in its bed and cab—this includes passengers, aftermarket equipment, and any portion of the trailer weight transferred as tongue weight. All three must be respected when attaching a camper.
A camper’s advertised dry weight is only a starting point. The moment you add water, propane, food, tools, batteries, and personal gear, that number grows significantly. Water weight in particular is easily overlooked. A 40-gallon freshwater tank adds roughly 320 pounds when full. Add a full LP tank, tools in a bed box, spare tires, and gear and a camper’s real on-road weight can exceed the advertised weight by hundreds of pounds. The only way to know the true weight is to weigh it loaded.
Practical weighing can be done two ways. Use a certified public truck scale to weigh the camper on its own and then weigh the truck with the camper attached to confirm combined weight and tongue load. If you prefer mobile solutions, a portable wheel scale system or tongue weight scale provides reliable measurements at home. Record the empty and loaded weights and keep them in a log. These numbers inform hitch selection, brake requirements, and whether suspension upgrades are needed.
Hitch selection is driven by two main numbers: gross trailer weight and tongue weight. Hitch classes are rated for both gross trailer weight and tongue weight; select a hitch where both ratings meet or exceed your measured numbers. Tongue weight should normally be 10 to 15 percent of the loaded trailer weight for most campers. If your loaded camper weighs 5,000 pounds, aim for 500 to 750 pounds of tongue weight. Too little tongue weight can cause trailer sway. Too much transfers excessive load to the rear axle and can ruin handling.
How does tongue weight interact with payload? Tongue weight counts against your truck’s payload capacity because it sits on the truck through the hitch or fifth-wheel plate. Exceeding payload reduces braking effectiveness, can over-stress suspension components, and may violate legal weight limits. Confirm your truck’s payload by checking the door jamb sticker or owner’s manual. Subtract estimated passenger and cargo weight, then subtract measured tongue weight to see how much capacity remains for bed cargo.
Factory towing packages and cooling systems matter far more than many DIYers expect. A proper factory towing package often includes a stronger radiator, a transmission cooler, heavy-duty alternator, and sometimes upgraded suspension components. These elements let your truck manage heat and stress from sustained towing. Without adequate cooling, transmission and engine temperatures can spike on long climbs, shortening component life or causing failure. If you plan heavy towing, consider whether the truck’s cooling and drivetrain options are sufficient—or whether an aftermarket transmission cooler, upgraded radiator, or suspension enhancement is necessary.
Beyond raw capacity numbers, consider axle and frame limitations. A truck’s axle rating and the condition of tires and brakes set practical limits in real-world driving. Tires must be rated for the combined load they carry. Under-inflated or overloaded tires overheat quickly. Wheel bearings, suspension bushings, and frame mounting points should be inspected for wear. Older trucks may meet rating numbers on paper but have weakened components that no longer safely carry those loads. If you have any doubt about structural soundness, enlist a qualified mechanic for inspection before attaching a camper.
Brakes are another crucial piece. A heavier trailer generally requires its own braking system. Many jurisdictions require electric trailer brakes above a certain weight. Independent trailer brakes reduce stopping distances and lessen stress on the tow vehicle’s braking system. For heavier campers, a proportional brake controller or an integrated system tuned to the trailer’s weight improves control. Test the controller with the trailer loaded and adjust it so the trailer brakes engage smoothly and predictably without locking wheels.
Center of gravity and load distribution inside the camper also affect how the combination behaves. Keep the heaviest items low and as close to the camper’s axle as possible. Store heavier supplies near the centerline and over the trailer axle to minimize nose or tail-heavy loading. An off-balance load increases the required tongue weight correction and can create handling problems. If you find the tongue weight outside the recommended range, shift cargo forward or backward until it falls into the target window.
Sway prevention is best addressed proactively. A weight distribution hitch with integrated sway control stabilizes both light and heavy setups by redistributing tongue weight and reducing trailer yaw. On fifth-wheel or gooseneck setups, look to integrated anti-sway features and ensure the hitch is mounted to a structure rated for the load. If you experience sway, slow down smoothly, maintain a steady line, and pull to a safe spot to re-check cargo distribution and hitch connections.
When planning modifications or aftermarket upgrades, keep in mind that any change can alter ratings and legal responsibilities. Adding a heavy bed rack, tool boxes, or water storage affects payload. Installing a lighter camper or reducing onboard water can bring loads within limits, but adding auxiliary batteries, solar panels, or rooftop gear might push you back over the threshold. Everything counts. Document every permanent addition so your weight calculations remain accurate.
Reading vehicle labels is simple but essential. The tire and loading information sticker and the manufacturer’s certification label on the door jamb list the GVWR, GAWR (gross axle weight rating) for front and rear axles, and sometimes the recommended tire pressure. These numbers are a legal baseline. The owner’s manual or the vehicle’s VIN-based specifications will list towing capacities and any factory package details. If the manual lists multiple towing numbers, the most restrictive number is what you must observe.
The VIN can also be decoded to confirm factory-installed towing equipment and axle ratios. Some trucks with the same engine offer different towing limits because of axle ratios, cooling options, or electronic control modules with towing calibration. If you’re unsure which configuration your truck has, a dealer or an online VIN decoder can confirm the installed options. That knowledge clarifies whether an apparent towing limit is real for your truck or a figure for a different configuration.
Planning for a DIY attachment also means thinking about everyday usability. How will you load and unload the camper? Does the hitch setup permit the use of bed-mounted accessories? Will the camper block rear visibility or interfere with aftermarket equipment? Ensure any chosen hitch allows safe access to lights, tailgate, and bed storage. Consider a removable hitch or a quick-disconnect system for times you don’t tow.
Maintenance keeps towing safe over the long haul. Inspect the hitch, mounting hardware, and fasteners before every trip. Check torque values after the first 50 miles from installation and again after extended use. Lubricate moving parts, and keep electrical connections clean and corrosion-free. Regularly inspect trailer wiring, connectors, and ground points. Faulty lights or a loose connector is an easy failure to prevent.
Testing is the final check before you hit the highway. After connecting the camper, perform a walk-around visual inspection. Verify that coupler latches or fifth-wheel jaws are secured and locked. Confirm safety chains are crossed under the coupler and attached to the hitch points. Test lights, turn signals, and trailer brakes. Take a slow test drive in a low-traffic area, practicing braking, cornering, and backing. Listen for unusual noises and feel for handling changes. Return and re-check fasteners and tire pressures.
Legal and insurance implications deserve attention as well. Exceeding the vehicle’s ratings can void warranties and, in some cases, affect insurance coverage after an incident. Check local regulations about required trailer brakes, lighting, and maximum allowed weights on certain roads or bridges. Maintain records of your weigh-ins, modifications, and maintenance. These records help defend your decisions if you need to document compliance after an event.
Finally, adopt a conservative mindset. Capacity numbers are upper limits, not ideal operating targets. Staying below maximum ratings gives the truck breathing room for hills, emergency maneuvers, and towing in high temperatures. When planning a DIY camper attachment, design your setup so routine use keeps weights well under the published limits. That approach reduces wear, improves fuel economy, and most of all keeps you safer on the road.
For practical help choosing accessories for cargo management and secure mounting when preparing your truck bed and camper, consult this internal resource on truck DIY accessories for ideas and compatible solutions: truck DIY accessories.
For an authoritative external reference on towing ratings, factory towing packages, and guidance on matching vehicles to trailers, refer to this official towing guide: https://www.vw.com/en/vehicles/towing-guide
Selecting the Right Hitch: Practical Guidance for Attaching a Camper to Your Truck
Attaching a camper to a truck starts and ends with the hitch. The hitch you choose sets the limits for safety, stability, and legal compliance. It also determines how the vehicle and trailer behave on the road. Selecting the correct hitch is not a single decision; it is the result of understanding weight, geometry, component ratings, and real-world loads. This chapter walks through those considerations in a continuous, practical narrative so you can make confident, DIY choices and avoid common mistakes.
Begin with the numbers that matter. Your truck has published ratings, but those numbers are only the starting point. The critical values are Gross Vehicle Weight Rating (GVWR), Gross Combined Weight Rating (GCWR), payload capacity, and any published tongue weight limits. These figures tell you how much the truck can carry and tow when everything is loaded. They also reveal how close you are to the edge when you add passengers, water, gear, and accessories. Always think in terms of a fully loaded rig. Manufacturers often list dry or empty weights for campers, which omit fluids and gear. A freshwater tank, propane, luggage, and appliances add real pounds quickly. Weigh the camper loaded at a public scale or use portable wheel scales to get actual numbers before deciding on a hitch.
With accurate weights in hand, calculate tongue weight. The tongue weight should typically be 10 to 15 percent of the total trailer weight when loaded. That proportion keeps the trailer settled and reduces sway. If your loaded camper weighs 5,000 pounds, aim for 500 to 750 pounds on the hitch. If the tongue weight exceeds your truck payload or causes the rear axle to sag excessively, you need a system that redistributes load. This leads directly to hitch class selection and whether weight-distribution hardware is required.
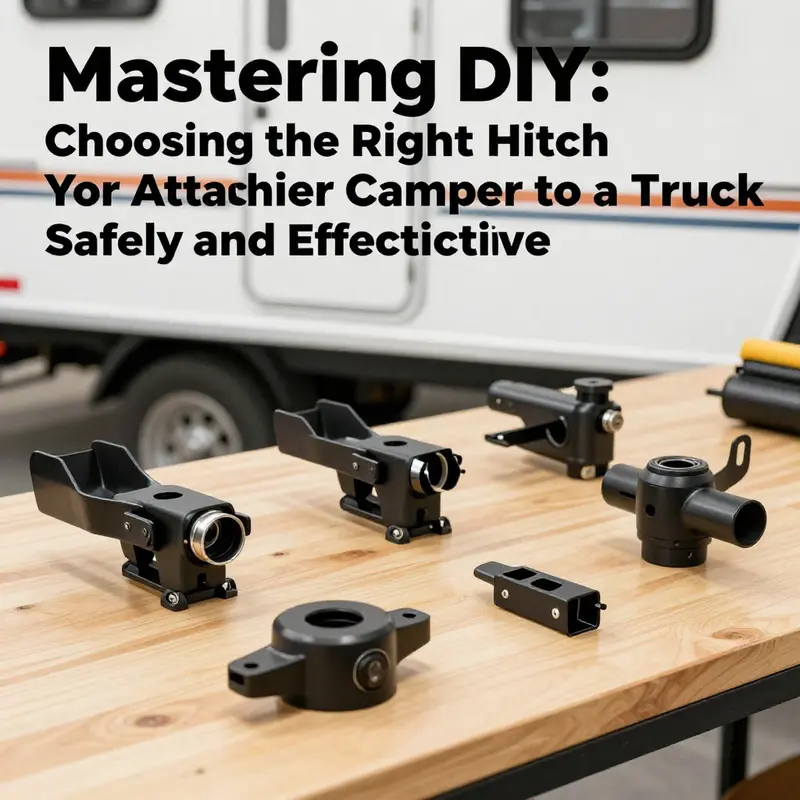
Hitches are grouped by class, and each class has rated gross trailer weight and tongue weight. Matching hitch class to the trailer is not optional. Choose a hitch whose rated capacity exceeds the camper’s GVWR and its measured tongue weight. For light trailers, a mid-range receiver might be sufficient. For larger campers, heavier-rated hitches are necessary. The key is to ensure the hitch, the hitch pin, and the receiver are all rated above your measured maximums. Never rely solely on sticker ratings for the trailer or the hitch; always compare them to your real, loaded weights.
Ball size and coupler compatibility are small details that matter a great deal. Hitch balls come in common diameters, and the trailer coupler must match the ball. A mismatched ball and coupler are an immediate safety hazard. Inspect the coupler for wear and ensure the ball mount lets the coupler sit flat. The shank diameter of the ball must fit your ball mount. After you select the ball size, confirm that its vertical load rating meets or exceeds your tongue weight. It is better to have a ball rated higher than necessary than to push a component near its limit.
When tongue weight exceeds the truck’s comfortable payload or when trailer sway becomes a concern, a weight-distribution system can make a dramatic difference. Weight-distribution systems use spring bars and leverage to transfer some of the trailer’s load forward to the truck’s front axle. This helps level the vehicle, improve steering response, and reduce braking distances. They also often include sway-control elements that dampen lateral motion. Correct adjustment is essential. If the spring bars are over-tightened or installed improperly, they can induce binding and poor handling. Follow manufacturer torque specs, adjust to measured ride height, and perform a test drive with careful checks after short distances.
Not every hitch topic is metal and torque. Electrical integration is critical for safe towing. Your trailer lights, brake controller, and any auxiliary power must have a reliable connection. Use a 7-pin connector when possible; it supplies lighting, brakes, and auxiliary circuits in one plug. A simple 4-pin harness provides basic lights but leaves out electric brakes and auxiliary feeds. Wiring must be routed to avoid heat and moving parts, and grounds must be solid. Test every function before you leave: brake lights, turn signals, running lights, and the trailer brake operation. Small faults like a weak ground or a corroded terminal are often the cause of in-trip failures.
Install the hitch correctly. For receiver-style hitches, many DIYers can handle the job with the right kit and tools. Use grade-appropriate hardware and follow torque specifications. Ensure the hitch mates fully to the frame points and that any cross-members or reinforcement plates are aligned. Use locking hitch pins and secure fasteners with thread locker if specified. For bed-mounted fifth-wheel and gooseneck setups, be cautious. These systems transfer immense vertical loads into the truck bed and frame. Many installations require bed reinforcements or manufacturer-specified rails and torque patterns. If your set-up requires drilling into frame rails or welding, weigh the pros and cons of doing it yourself versus seeking professional installation. Improper installation can lead to structural failure.
Safety chains and secondary retention are not negotiable. Chains should be crossed under the coupler to form a cradle. This prevents the tongue from dropping to the road if the coupler becomes disconnected. Attach chains to rated anchor points on the truck frame, never to suspension components. Inspect chain hooks for wear and secure them with locking hardware if possible. Keep chain length such that there is enough slack for tight turns without letting the chain drag on the pavement.
Sway control strategies deserve attention. Trailer sway can be caused by improper weight distribution, high crosswinds, passing trucks, or sudden maneuvers. You can mitigate sway by ensuring correct tongue weight, adding a weight-distribution system with friction or dual-cam sway control, lowering tire pressures to recommended towing levels, and keeping speed moderate. Electronic stability assists and trailer brake controllers also help manage sway. If you experience regular sway, reassess the hitch, weight distribution, and loading balance before continuing long trips.
Tires and wheel bearings are integral to the hitch conversation. Under-rated or under-inflated tires on either vehicle can heat, fail, or cause handling issues. Confirm tire load ratings for both truck and trailer. Check and adjust pressures for the combined load and expected highway speeds. Periodically inspect wheel bearings and consider repacking or servicing them as recommended for the trailer’s service interval. On long trips, stop early to inspect tires and hubs; heat discoloration or unusual smells may signal a problem.
Practical DIY tips reduce surprises. Use a tape and level to check the trailer coupler height relative to the truck hitch when the trailer is fully loaded and the truck cargo and passengers are accounted for. This ensures that the trailer sits level when attached. A level trailer reduces sway and improves tire wear. Keep a tongue weight scale and a basic torque wrench in your garage. After initial hitching, torque critical fasteners once the rig is on level ground, then recheck after the first few miles of driving.
Protective measures extend service life. Corrosion on hitch hardware reduces strength. Clean mating surfaces, apply anti-seize where specified, and coat exposed metal with rust inhibitors. Replace worn components instead of repairing them with improvised parts. Use safety-capture mechanisms for pins and fasteners to prevent loss on the road. For long-term storage, raise the tongue and support it to avoid seal and jack stress when the trailer is stationary for months at a time.
Legal and compliance items tie into hitch selection. Many jurisdictions require functional lighting and brakes for trailers over certain weights. Your hitch choice may influence what braking system is necessary. Ensure your truck and trailer conform to local laws. In addition, insurance policies sometimes require that towing equipment meets specific industry standards. Keep documentation for hitch ratings, installation receipts, and weight certificates in the vehicle while towing.
When to upgrade is a decision based on repeated needs and risk tolerance. If you find yourself frequently near the upper limits of a hitch rating, upgrade to a higher-capacity unit. If your adventures move from weekend trips to full-time travel, consider a heavier-duty hitch and a professionally installed weight-distribution system. Small investments in a properly matched hitch and associated hardware repay in reduced maintenance, better fuel economy, and far greater safety.
Hands-on checks before you roll are simple and effective. Confirm the coupler latch is fully seated over the ball and that the latch is pinned or locked. Measure tongue weight with a scale. Verify the safety chains are crossed and attached to rated points. Plug in and test the electrical connector. Walk around and visually inspect tires, make sure all fasteners are torqued, and confirm that nothing is rubbing against wires or structural parts. After driving 10 to 20 miles, stop and re-torque, re-check lights, and inspect for signs of movement.
Some situations call for specialist equipment. Fifth-wheel applications often require bed-mounted rails and a kingpin plate. Gooseneck systems need appropriately rated bed balls and reinforced anchors. If you tow commercial or unusually heavy trailers often, consult a certified installer to verify frame integrity and mounting patterns. These systems transfer larger dynamic loads and thus demand attention to frame stress and fastener patterns.
The right hitch selection is part engineering, part measurement, and part practical experience. Avoid common traps such as sizing purely by manufacturer dry weight, assuming the heaviest hitch available is always best, or ignoring tongue weight until sway becomes a problem. Balance is the goal: a hitch rated for your real loads, installed correctly, and paired with proper electrical, braking, and weight management systems.
Finally, equip yourself with quality reference materials and local expertise. A comprehensive towing resource from a vehicle manufacturer offers installation diagrams and towing specifications that can help confirm your choices. For additional advice on accessories, harnesses, and general truck preparations, consult a truck accessories guide that focuses on practical installations and common upgrades.
Useful external resource for towing specifications and guidance: https://www.ford.com/towing/
Internal reference for practical truck accessories and installation ideas: truck accessories guide
With accurate weights, the correct hitch class, matched ball and coupler sizes, proper weight distribution, and reliable electrical connections, you will have a safe and predictable towing setup. A thoughtfully selected hitch keeps control in your hands and turns towing from a risk into a reliable capability.
Secure and Smart: A Practical DIY Guide to Installing and Inspecting Your Truck-Camper Connection
Practical DIY installation and safety checklist
Attaching a camper to your truck is not a single quick action. It is a sequence of deliberate checks, measured adjustments, and simple mechanical tasks that together keep you safe on the road. Treat this as a systems job: weigh the load, choose the right connection, secure the hardware, verify the electrics and brakes, and then test. Each step reduces risk and prevents damage. Below is a single, continuous walkthrough that you can follow from planning to the first miles, with practical tips for doing it yourself while respecting manufacturer limits and common-sense safety.
Begin with weight and capacity—this is the foundation for everything else. A truck’s towing rating is not negotiable. Factory numbers often list dry weights for campers, but your real number includes water, propane, tools, gear, and passengers. A full freshwater tank alone can add several hundred pounds. Measure your camper’s loaded weight at a certified scale or use a portable wheel scale for axle weights. Record the fully loaded camper weight and compare it to your truck’s towing capacity and gross axle weight ratings. Also calculate tongue weight—the vertical force the camper places on the truck hitch—which should typically be about ten to fifteen percent of the camper’s total loaded weight. If the tongue weight falls outside that range, you will need to adjust load placement inside the camper or consider a weight distribution system to correct balance and handling.
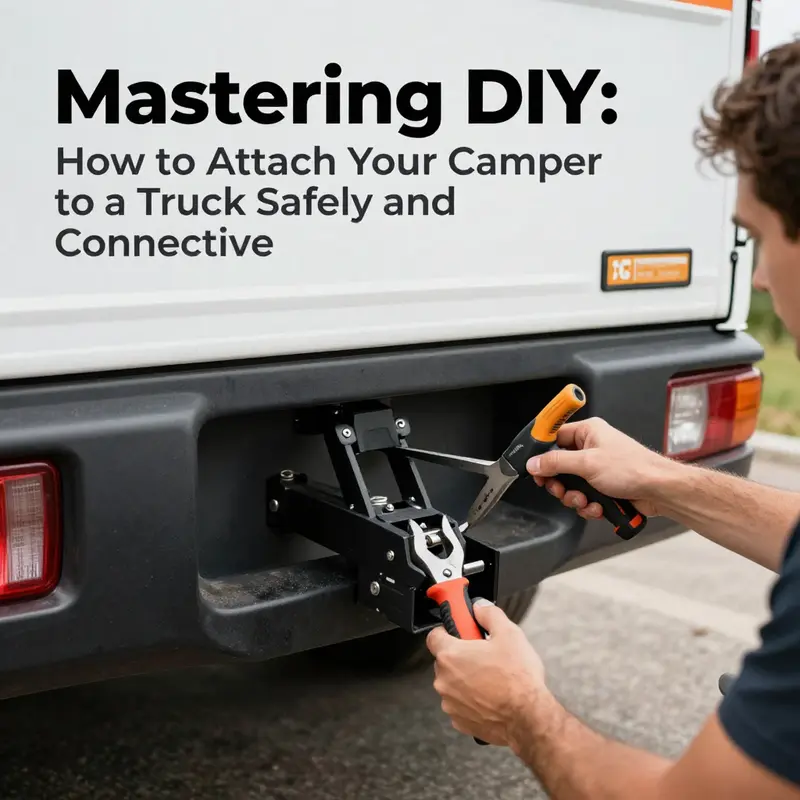
Choosing the proper hitch follows naturally from knowing the weights. Match the hitch type and rating to the total and tongue weights you measured. Common suitable options include a bed-mounted hitch for heavier payloads and receiver-style hitches for lighter loads. Make sure the hitch receiver and ball or plate are rated for more than your measured loads. When installing a receiver, follow the kit instructions and torque every bolt to the specified value. For bed-mounted systems, professional installation is often advised because these systems transfer large forces into the truck frame. If you do install a bed hitch yourself, use grade-rated hardware, torque to spec, and verify the truck bed and frame interfaces for cracks or wear.
Tongue weight is one place where small errors make big differences. Too little tongue weight and the setup will be prone to sway; too much and the truck’s steering and suspension will suffer. Use a tongue weight scale or a portable wheel scale to verify numbers while the camper is fully loaded and mounted. If the tongue weight is low, shift heavier items forward; if it is too high, move gear rearward or remove unnecessary mass from the nose. When balance cannot be achieved by shifting gear, a weight-distributing hitch redistributes forces across axles, improving steering and ride height. That said, these systems must also be sized and installed correctly. Read the rating charts for the weight-distributing system and ensure its spring bars and head assembly match your loaded tongue weight.
Install hardware with attention to detail. Inspect the hitch receiver for corrosion, bent welds, or loose bolts. Use a locking hitch pin to prevent theft and confirm the hitch adapter, ball mount, or coupler is seated firmly. For ball-type connections, ensure that the ball diameter matches the coupler and that the ball is torqued to its specification. For fifth-wheel or gooseneck attachments, torque fasteners to the manufacturer’s specs and recheck torque after the first few hundred miles. Safety chains must be properly rated and crossed beneath the coupler so the chains form a cradle if the hitch disconnects. Ensure chain hooks are anchored to the proper frame mounts and that chains are not dragging on the ground nor so tight they lift the trailer tongue.
Electrical connections and brakes demand equal respect. Inspect the trailer connector plug and the truck’s receptacle for corrosion, bent pins, or loose wires. Clean any corrosion and tighten connections. Use dielectric grease sparingly to repel moisture without insulating electrical contact. Confirm that running lights, brake lights, and turn signals operate correctly. If your camper has electric trailer brakes, verify the brake controller in the truck is compatible and adjusted for the loaded weight. Brake controllers usually have a gain adjustment; set it to the minimum that produces firm, smooth braking on a test stop, and fine-tune as necessary. Some systems include inertia or proportional controls—understand how your controller responds and practice in a safe area.
Camper jacks and stabilizers can be easy to overlook but will cause damage if left extended. Check that all leveling jacks are fully retracted and secured before driving. Remove chocks and re-locate any support blocks. Verify slide-outs are fully retracted and locked. Inside the camper, secure loose items and close cabinet doors with latches. Heavy objects should be strapped down or stored low and toward the center line to maintain a stable center of gravity.
Inspect your truck’s suspension and brakes for suitability. Towing places extra demands on springs, shocks, and brake systems. Look for sagging springs, oil leaks from shock absorbers, or uneven tire wear as clues you may need suspension upgrades or maintenance. Confirm tire pressures on both truck and camper, setting them to manufacturer-recommended values for the loaded condition. Underinflated tires overheat and can fail; overinflated tires reduce traction and ride quality. Brake pads and rotors should have ample thickness and be free of glazing. If your truck’s braking system is marginal with the added load, consult a technician about brake upgrades or adding a brake controller for the trailer.
Perform a systematic pre-trip inspection each time you attach the camper. Walk around the rig in a consistent order and check the following: hitch latch engaged, coupler secured over the ball or kingpin set properly in place, safety chains crossed and attached, electrical plug connected, breakaway switch hooked and battery charged, jacks stowed, tires checked, and doors/slide-outs locked. Make a short checklist you can keep in the glove box and run it every time. Small habits prevent big problems.
Once everything looks right, do a staged test procedure. With the camper attached and the truck parked, tug on the hitch gently to ensure the coupler is fully seated. Have a partner apply the camper brakes while you observe that the brake lights activate. If you find any lights not working, don’t drive until repaired. Next, try a short, slow drive in a safe, open area. Start with low speeds and practice turns, lane changes, accelerating, and braking. Listen for unusual noises and feel for vibration, judder, or sway. After a short run, stop and recheck hitch torque, chains, and electrical connections. It is common for freshly tightened bolts to settle; tightening them again after the first few miles is a prudent step.
Sway control is not a luxury; it is a serious safety measure when towing. Sway can start from crosswinds, passing vehicles, or sudden maneuvers. If you experience sway, reduce speed smoothly and avoid sharp steering corrections. Consider installing an anti-sway device or weight-distributing hitch with sway control. For lighter campers, friction sway control devices at the coupler can help; for heavier setups, integrated mechanisms within a weight-distributing hitch or a hitch-mounted sway damper are more effective. Remember that proper load distribution and correct tongue weight are the primary defenses against sway. Devices help, but they do not replace correct loading and safe driving practices.
Secure all cargo and personal items inside the camper. Unsecured items shift during travel and can change the center of gravity. Store heavy items low and over the axle if possible. Use straps or cargo nets for loose gear and ensure propane tanks are properly secured and valves closed. Check that the fresh-water tank and gray/black tanks are sealed; water sloshing can change weight distribution and produce unexpected handling. Consider baffles or tank level indicators to monitor liquid movement.
Tire and wheel health must be current. Match tire load ratings to the axle weights measured earlier. Inspect for sidewall damage, chunks, or punctures and replace any suspect tires prior to travel. Use a reliable tire pressure gauge and check pressures cold. Don’t forget the spare tire: confirm it is inflated and accessible. Wheel lug nuts should be torqued to specification; recheck torque after the first 50 to 100 miles of a new installation or after wheel work.
Routine maintenance and inspections save time and reduce risk. Before each trip and every few hundred miles on long trips, do quick checks of lights, coupler attachment, chain condition, jack stowage, tire pressure, and brake operation. Clean and lubricate moving hitch parts and couplers with the proper lubricants to reduce wear and ensure smooth operation. Inspect safety chains and replace any that show signs of stretching, rust-through, kinks, or nicks deeper than the surface. Replace worn wiring or connectors and secure loose electrical lines to prevent rubbing and eventual failure.
Legal and regulatory considerations are simple but important. Ensure your registration, inspection, and insurance cover towing operations and the camper’s weight class. Confirm that your trailer’s lighting and brake systems meet local and federal regulations. Some jurisdictions require supplemental braking for trailers above a certain gross weight. Know and follow those rules; they exist to keep everyone safe.
Emergencies demand preparation. Carry a basic toolkit with a torque wrench, pliers, screwdrivers, spare fuses, electrical tape, and straps. Add a portable tire inflator, compatible spare bulbs, a fire extinguisher inside the cab, and wheel chocks. Keep contact information for roadside assistance and a mechanic known for trailer work. A simple plan for how to safely pull over, deploy triangles, and set the parking brake will keep you composed if something goes wrong.
Finally, develop a short learning loop. After each trip, review how the rig handled and whether any hardware needed attention. Note any unusual wear patterns on tires or strain on coupler components. Small corrections over time—shifting a drawer lock here, adding a strap there—improve the system. If you ever feel uncertain about a structural hitch installation or the integrity of the frame mounts, stop and consult a trained installer. DIY is empowering, but some connections require professional inspection and periodic torque checks by those with specialized tools.
For a practical reference tailored to the specific model of your camper, consult the manufacturer’s manual for torque values, stowage procedures, and recommended pre-drive checks. Manufacturers provide vehicle-specific instructions that complement these general steps. You can use the manual linked in the detailed resources to verify model-specific procedures and torque specifications: https://www.example.com/manuals/camper780_manual.pdf
If you want to expand your rig sensibly, look into accessories that support safe towing—cargo containment options, bed storage solutions, and tie-down systems designed for trucks. For a starting point on truck accessory options that help with organization and load security, see this guide to truck accessories.
Following these steps produces a repeatable, safe process for attaching a camper to your truck. Measure, match, secure, inspect, and test. Those five actions protect you, your vehicle, and your camper, and they make towing predictable and manageable. Adopt a checklist, respect rated limits, and treat every attachment like a mission-critical system rather than a single fastener. That mindset keeps your DIY work reliable mile after mile.
Final thoughts
Successfully attaching a camper to your truck is essential for any mobile business owner. By understanding your truck’s towing capacity, selecting the right hitch, and following proper installation and safety checks, you ensure a reliable setup for all your travels. These steps not only foster confidence in your DIY skills but also enhance the safety of your operations. As you embark on your adventures, remember the importance of adhering to safety guidelines and planning for your equipment needs. Equip yourself with knowledge, and make the road ahead smoother and more enjoyable.