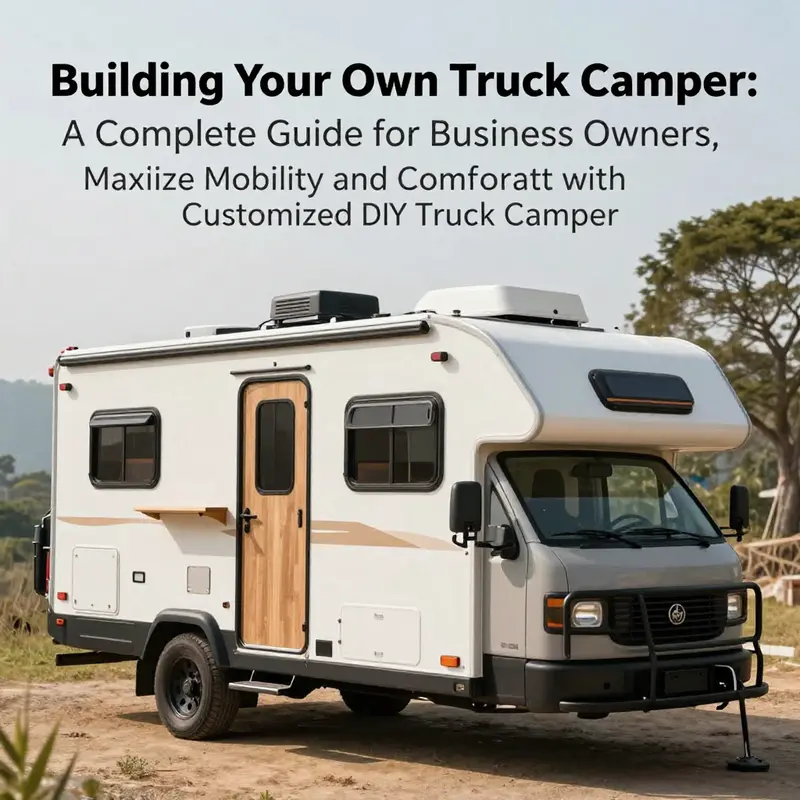
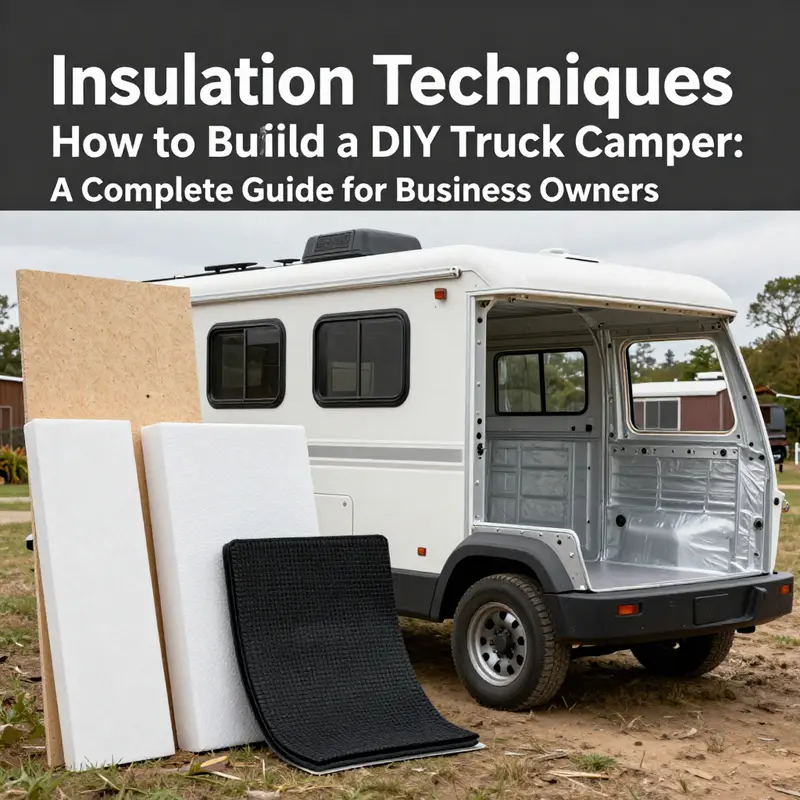
The allure of mobile living, complemented by the practicality of a truck camper, is becoming increasingly appealing. For business owners, the ability to travel without sacrificing the comforts of home can open new avenues for exploration and creativity. As we navigate the world of DIY truck campers, we will explore essential aspects — from selecting the right base vehicle that meets both business and comfort needs to planning an efficient layout that maximizes utility. Additionally, setting a realistic budget ensures that your project remains financially viable. Proper insulation is critical for a comfortable experience no matter the weather, and creating a functional kitchen that caters to your culinary needs is a must. By the end of this guide, you’ll be equipped with the knowledge to build a truck camper that reflects your personality and your professional ambitions.
Solid Foundations: Selecting the Right Base Vehicle for Your DIY Truck Camper
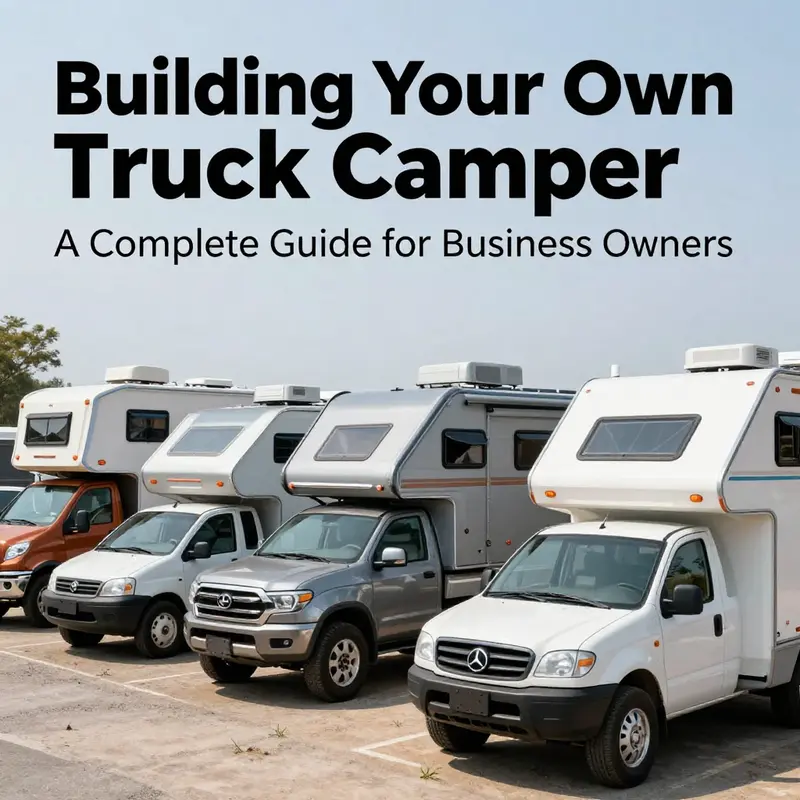
Choosing a base vehicle for a DIY truck camper is not a glamour decision; it is the quiet, steady heartbeat of the entire project. The camper you envision—lightweight comfort, rugged reliability, off-grid capability—depends on the vehicle you build around. The foundation sets the pace for everything that follows: how much weight you can carry, how you distribute that weight, how you handle rough roads, and how long you can stay off-grid without begging for a fuel station or a tow. When builders treat the vehicle as a mere afterthought, the result is stiffness in the wrong places, intolerable strain on suspension components, and a narrative of trips cut short by avoidable mechanical issues. When they treat the vehicle as a design partner, the camper and the truck form a harmonious system that travels farther with less friction, using the same attention to detail you would apply to a well-planned home improvements project.
At the core of that harmony is a careful respect for weight—both the vehicle’s own weight and the weight you will add with insulation, walls, a bed, a basic kitchen, and storage. The gross vehicle weight rating, or GVWR, is more than a number on a spec sheet. It is the practical ceiling that tells you how much you can safely load while maintaining predictable handling, braking response, and steering feedback. Many builders discover that the difference between a comfortable weekend setup and an aching, underperforming rig is simply knowing where that ceiling sits and designing with it in mind. Exceed the GVWR by a small margin, and you invite compromised braking distances, altered weight distribution, and potential warranty concerns. These are not abstract worries; they translate into real-world risk on remote stretches of road where a single miscalculation can turn a dream trip into a stressful retreat.
The bedrock of the base vehicle discussion is not glamour but compatibility. A truck bed must be structurally sound and capable of accepting a camper frame design that distributes loads evenly. Width, length, and wheel well clearance matter as soon as you start sketching a layout. A camper that sits too high or concentrates heavy components over a single axle can transform a smooth highway cruise into a jiggle-filled ride on even moderate dirt roads. For a design that remains stable, weight distribution needs to be considered from the moment you start planning. If you intend to carry heavier gear for extended off-grid trips, the vehicle should offer not only a robust frame but an upgraded suspension path that can handle extra mass with controlled, predictable compliance. If the goal is versatility—a camper that can be removed for daily driving and reattached for weekends—a lighter, modular approach may be more appropriate. In this case, the base vehicle becomes a tool, not a prison, and the camper becomes a set of modules that can be swapped as needs change.
Durability also comes into play. A permanent or semi-permanent setup benefits from a heavier-duty platform that can handle increased weight and resist long-term fatigue. This choice often narrows the field to vehicles with stronger frames and more robust suspensions. The potential trade-off is reduced daily practicality and higher upfront costs, but the payoff is longevity and easier resale for builders who expect to use the same base vehicle for many seasons. For families or frequent travelers, the balance shifts toward practicality and comfort inside the cab and cargo area, while still honoring the GVWR limits. Off-grid explorers, who routinely push the envelope with gear, weatherproofing, and fresh water or waste management, typically require a rugged, capable chassis that can withstand demanding terrain and remote service conditions.
Before any frame or sheet metal is cut, a deep design conversation should occur between the camper and the base vehicle. Structural compatibility is not about forcing a fit; it is about aligning the camper’s frame geometry with the truck’s bed and chassis in a way that preserves safety margins. The design should account for weight distribution along the wheelbase, the location of anchor points, and the potential for dynamic loads during cornering, braking, and rough road surfaces. If the camper is intended to be semi-permanent, the design can favor a heavier-duty truck that remains stable under higher loads, but if portability and daily usability are paramount, a lighter configuration with a modular build can keep the system agile without compromising safety.
Intended use naturally reshapes the choice of base vehicle. A weekend warrior who camps in backcountry locations fewer times a year might prioritize a lighter-duty pickup with a well-planned, removable shell. That approach keeps fuel economy reasonable and makes urban parking less painful. In contrast, a long-haul traveler chasing remote conditions may opt for a more capable chassis, ideally with a robust suspension and all-wheel or four-wheel drive to handle unpredictable trails and varied weather. In either case, the bed’s integrity becomes central: are there structural reinforcements available, and can the camper’s frame anchor securely without compromising the bed or nearby components?
Designers who plan a flexible, modular build often search for bedside access and removable interfaces rather than a fixed, permanently attached camper. A modular arrangement enables the vehicle to perform like a conventional pickup when the camper is detached. It also offers options for upgrading insulation, storage, or even the interior footprint as needs evolve. If the camper is meant to stay on the truck for most trips, the frame and bed must tolerate a continuous load with margins for future upgrades, such as additional batteries or a larger water tank. Either route—modular or permanent—begins with one honest assessment: what can the base vehicle realistically carry, and how does that align with the envisioned footprint of the living space?
When you map out the relationship between camper and vehicle, consider the practical details that determine success. The bed’s dimensions, wheel well clearances, and overall strength influence every subsequent decision. A bed with adequate depth and a flat, uninterrupted surface offers the best foundation for a durable camper frame. If wheel wells intrude into the available floor area, plan around them with raised platforms or recessed sections that preserve usable space without weakening the bed’s structural integrity. The choice of bed length and cab configuration also matters for interior planning. A longer bed can translate into broader interior layouts, allowing a wider bed or more generous storage, while a shorter bed may push you toward clever, space-efficient solutions and more modular components.
In the end, the right base vehicle is the one that respects GVWR, provides reliable chassis integrity, and aligns with your lifestyle. It is the canvas on which your home-on-wheels will take shape, and it should invite careful, precise planning rather than impulsive upgrades. As you refine your layout, keep an eye on how the truck’s support systems—suspension, steering, brakes, and traction—will interact with the camper’s mass and distribution. A well-matched system reduces vibration and improves comfort, especially on longer trips where small compromises accumulate into fatigue. If you want to explore practical ways to expand or adapt the vehicle’s utility while maintaining safety and reliability, consider looking into roof racks and other mounting options that help you store gear without overloading the bed or compromising accessibility. For a concise guide on securing gear with roof racks, see this resource: roof racks for trucks.
Choosing the right base vehicle is a foundational decision, not a cosmetic one. It shapes the build process, informs budgeting, and sets up the camper for a long, comfortable life on the road. If you approach this choice with discipline—checking the GVWR, evaluating bed compatibility, envisioning your day-to-day use, and planning for weight distribution—you will begin the build with a clear map rather than guesswork. And with that map in hand, you’ll be ready to move from concept to concrete, knowing that your home away from home is anchored to a sound, resilient platform. For builders seeking a deeper dive into the structural considerations and practical steps involved, a detailed, widely respected resource provides a thorough walkthrough of selecting the base vehicle based on GVWR and intended use: external reference.
External resource: https://www.thespruce.com/build-a-diy-truck-camper-4167950
Blueprints in Motion: Planning a Practical, Comfortable Layout for a DIY Truck Camper
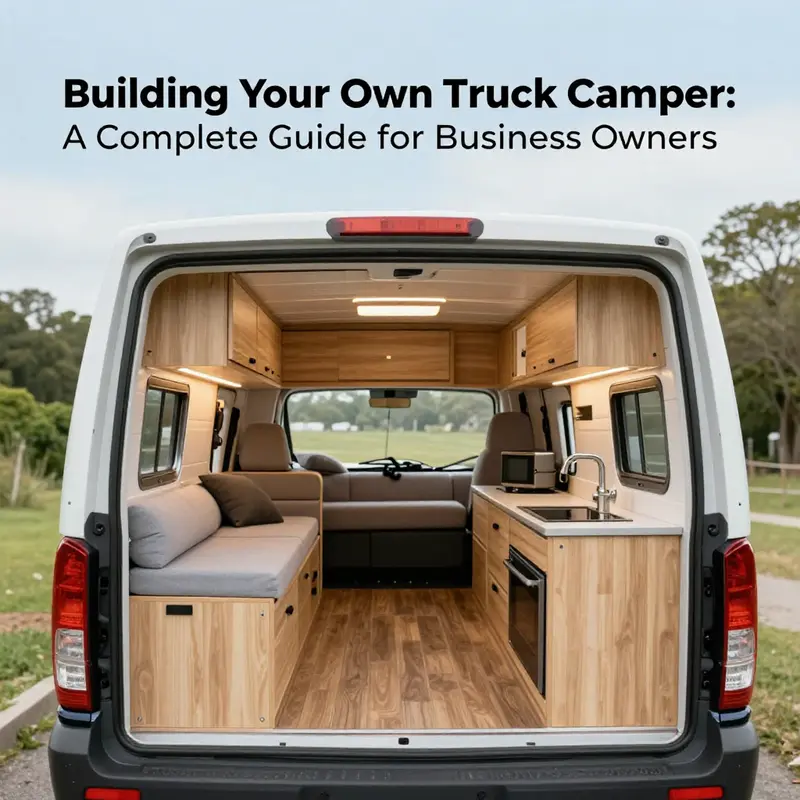
Designing a truck camper begins long before a single cut or screw is turned. It starts with a clear sense of how you intend to live on the road, what you will need to sleep, cook, work, and relax, and how those needs can coexist in a compact space. The truck bed, after all, is a finite stage where every inch must be choreographed with intention. You are not just tucking a few features into a box; you are composing a small, mobile home that must feel open enough to move in yet sturdy enough to withstand rough roads. This planning phase, when done with honesty about your daily rhythm and your limits, pays dividends in less waste, fewer mistakes, and a smoother build that actually serves you on long trips rather than adding stress on the road.
Begin with a practical mindset: imagine you are packing for a week in a place that doubles as your house and your vehicle. First, measure the truck bed with care. Length, width, wheel well intrusions, and any cab-over height constraints all matter. A precise floor plan starts with real measurements rather than optimistic guesses. Sketching on paper or in a simple CAD program helps you see how the geometry of your space translates into livable zones. The goal is to maximize usable area without overloading the truck’s payload or obstructing visibility and access. You should be able to stand up in the areas that matter most, move between zones without bumping elbows, and still keep your gear organized and secure. A well-considered layout reduces later revamps and material waste, which often become disappointingly expensive detours.
Once the skeleton of the space is mapped, it’s time to identify the core elements that will define daily life inside the camper. Sleeping, cooking, dining, and storage occupy the central axes of most layouts. For sleep, many builders favor an elevated bed that creates under-bed storage, freeing floor space for a compact lounge or workstation. The kitchenette, even in a minimalist form, should include a means to wash, a stove or burner, and a place for dry goods and cookware. A sink is excellent, but even a small, efficient basin can be enough if you design the rest around it. Storage must be integrated rather than tacked on; think drawers that pull out from under the bed, wall-mounted cabinets above head level, and ceiling storage that keeps odds and ends from hitting your head when you rise in the night. A dining area can double as a work surface and a social hub when you’re parked; it should offer comfortable seating for at least two and be adaptable to a compact table that can hinge or fold away when not in use. Above all, plan for headroom. While a compact build often sits low to the ground, you still want to avoid crawling on hands and knees to move around your own space. The layout should feel like a small apartment on wheels, not a cramped capsule.
All of this planning rests on a foundation of flexibility. Comfort and versatility often go hand in hand in a truck camper, where space is at a premium and weight is a constant consideration. A design that emphasizes modularity will serve you well when you begin adding features. For example, a slide-out section can dramatically increase interior space when parked, providing a wider lounging area or a more expansive kitchen footprint. A fold-down bed also opens possibilities: it can convert from a sleeping platform into a sofa or dining surface, letting you switch modes without sacrificing essential functionality. If you prefer a lean, no-nonsense approach, you can invest in a fixed bed with clever under-bed storage and retractable or stowable dining arrangements. Either route requires careful consideration of hinges, supports, and weight distribution. The aim is to preserve the vehicle’s driving dynamics while giving you room to live when you park.
In practice, this means embracing a mindset of future-proofing. Even as you plan for a simple, budget-friendly build, reserve space and structure for features you might add later. The frame and floor deserve attention that goes beyond the initial sheet. You should design weight paths that can handle solar panels, water tanks, and perhaps a compact bathroom setup without compromising timing on turns or tire wear. This doesn’t mean overbuilding; it means building with a clear sense of how the space will evolve and how the weight will shift when you add or reconfigure components. A sturdy floor, reinforced mounting points, and thoughtful load distribution become the quiet backbone of a camper that stays reliable after hundredth-mile drives and through the aftershocks of long highway stretches.
The process of identifying what to include—and what to leave out—also benefits from a candid look at your daily rituals. If you cook most meals outdoors or on a portable stove, a minimal kitchenette can be enough; if you love a hot morning coffee and long evenings, you’ll want a reliable water supply and a compact sink, plus some counter space for preparation. If you work remotely from the road, you might prioritize a small desk area with power access and a steady internet connection, as well as a desk chair that stores away neatly. If you’re a weekend wanderer, a simpler setup with quick access to bed, seating, and a few cabinets could be more satisfying than a labored, feature-rich interior. The beauty of DIY planning is that it invites you to tailor every feature to your actual life, not to a brochure or influencer’s dream.
As you begin to translate your plans into a tangible layout, keep a running inventory of potential constraints that might shape decisions. The width of the bed, the height of the bed above the wheel wells, and the location of any cross members will influence where you can place a stove, a sink, or a fridge. The presence of a roof vent, the position of the truck’s exhaust stack, and the possibility of battery storage under the floor can all factor into where you place each element. When your plan feels tight, take a step back and ask: does this arrangement make the space feel larger, rather than tighter? Am I giving myself enough room to move, stretch, and reach for essential items without stepping on a cable or tripping over a hose? These checks are not ornamental; they are essential to creating a space that you’re excited to inhabit rather than endure.
The practicalities of this planning stage extend beyond the inside. You’ll want to think about the exterior silhouette and access points—where doors and hatches will live, how they will seal against weather, and how you’ll ventilate without inviting drafts or heat loss. Ventilation, in particular, anchors comfort more than many other features. It’s difficult to overstate how a well-placed vent, combined with a modest roof fan, can transform a truck camper from a cramped, stuffy cabin into a space that breathes with you as you move between campgrounds and backcountry tracks. You might also consider passive features that improve comfort with minimal energy use, such as strategic placement of windows and vents to promote cross-ventilation during hot summer days while minimizing heat loss in cooler evenings.
To anchor your design in reality, keep a running dialogue with the space you’re trying to create. Refer back to your measurements, your sketches, and your list of priorities. If a feature begins to push the weight or complicate installation, reassess whether it truly serves the lifestyle you’ve chosen. In the end, your layout should emerge as a reflection of how you want to live on the road: compact yet capable, simple yet satisfying, modular enough to adapt to different adventures while cohesive enough to feel like a home away from home.
As a practical guide to ongoing planning, you can explore a range of resources that translate these ideas into build steps and design strategies. Tutorials, guides, and video walkthroughs can illuminate the design process, showing how seasoned builders translate measurements into real, livable spaces. When you’re ready to source components that align with your layout, you can consult a catalog of accessories and fixtures to plan compatibility with your chosen plan. For readers who want to dive deeper into the organizational logic of a camper, a dedicated section on truck camper accessories can be particularly useful, offering ideas on space-saving storage solutions, latching systems, and modular components that stay secure on rough roads. If you’re curious about how others translate a concept into a finished interior, a quick look at a few build journals or show-and-tell videos can provide helpful benchmarks for scale, proportion, and material choice while reinforcing the idea that every successful layout begins with honest planning and patient iteration.
In the spirit of practical planning, consider the following anchor points as you finalize your layout: ensure your bed location allows under-bed storage without impeding the kitchen flow; place a compact sink and cooktop in a manner that preserves counter space and keeps dirty dishes away from your sleeping area; design seating that can be converted for different uses while keeping safety in mind with secure latches and non-slip surfaces. Above all, let the layout emerge from you—your habits, your gear, and your travel dreams—not from a template designed to impress others. The most successful DIY truck camper plans feel intimate, lived-in, and ready for the next road.
For readers who want to see how these concepts translate into tangible builds, practical guidance is available in a range of formats, including design templates, measured floor plans, and example layouts. A concise, actionable approach is to start with a simple, scalable plan and then let your space reveal its best configuration through testing and iteration. With the right layout in mind, you can begin the next phase of your build—creating a durable floor, selecting insulation, and wiring a power system—knowing that the blueprint you’ve chosen serves your lifestyle as faithfully as it serves the road. If you’re seeking a consolidated resource to help you think through storage and fixture choices, consider exploring the broader category of truck camper accessories, which compiles ideas for optimizing small spaces without compromising safety or function. This approach keeps your layout aligned with real-world needs and helps ensure that every penny you invest toward your interior makes your trips more enjoyable.
External resource: https://www.youtube.com/watch?v=example123
Budgeting Smart for Your DIY Truck Camper: Priorities, Pitfalls, and Practical Savings
Budgeting basics and strategy
A realistic budget turns ambitious plans into a finished truck camper. Start by listing must-haves and nice-to-haves. Must-haves are the structural essentials: a watertight shell, basic insulation, a safe sleep platform, secure storage, and a reliable electrical core if you want off-grid power. Nice-to-haves are finishes, custom woodwork, and luxury appliances. Decide early which side of that line each feature falls on. That decision will guide every purchase and trade-off.
Estimate three cost groups: vehicle condition and preparation, core build materials and systems, and optional comforts. Vehicle work may include rust repair, mechanical maintenance, or bed prep. Core materials cover insulation, framing, flooring, bed structure, water basics, and simple wiring. Optional comforts include upgraded cabinetry, decorative trim, and a high-capacity power setup. Tackle each group with realistic price points rather than wishful thinking.
Begin with a clear baseline. A simple, functional build focusing on warmth, dryness, and safe sleep often fits beneath a modest budget. This baseline keeps the project achievable. From that baseline, layer upgrades as funds allow. Prioritize anything that affects safety or long-term reliability over cosmetic choices. A dependable engine, sealed seams, and proper fasteners pay off more than premium finishes.
Account for hidden and variable costs. Common surprises include rust found during stripping, fasteners and brackets you didn’t plan for, replacement of damaged wiring, and the need for specialty tools. Labor can be a hidden cost too, either in professional help or time you spend away from work. Build a contingency of 10 to 15 percent of the projected cost. This buffer prevents small issues from derailing the whole project.
If your budget is tight, use strategy instead of sacrifice. Reclaimed materials and community swaps can supply wood, cabinet hardware, and insulation at low cost. PVC, plywood offcuts, and used hardware make fine prototypes. Buy only structural-grade materials for load-bearing applications. For trim and non-structural items, reclaimed pieces work well.
Choose modular systems where possible. A modular bed or kitchen that can be installed in stages lets you spread costs over months. Start with a fixed platform and add a compact cooking module later. Modular builds also allow you to test layouts and avoid expensive changes after final assembly.
Tools add up. If you lack basic tools, budget for them or borrow from friends. Prioritize a circular saw, drill, jigsaw, clamps, and a good tape measure. Renting specialty items like a router for a weekend saves money. Treat tools as long-term investments if you plan more projects.
Electrical systems deserve special attention in your budget. Even a minimalist 12V setup requires wiring, fuses, a safe mounting system, and ventilation for batteries. If you plan solar later, design the wiring with that upgrade in mind. That foresight will save on rework and extra connectors. Avoid cutting corners on safety components such as breakers and proper gauge wiring.
Water and plumbing can escalate costs quickly. A simple freshwater tank, a pump, and a hand-pump shower keep things affordable. If you prefer a closed gray-water system, account for space and drainage requirements. DIY plumbing often means flexible hoses and durable fittings. Pay for quality where leaks would cause long-term damage.
When planning storage, think like a gear manager. Built-in drawers under a platform bed cost more upfront than loose bins. However, built-ins save space and reduce movement while driving. Consider a hybrid approach: a basic under-bed platform with slide-out storage added later. Use secure latches to prevent cargo shift.
A phased budget helps maintain momentum. Break the project into clear phases: prep and shell, insulation and floor, bed and storage, systems and framing, final trim and testing. Allocate funds per phase and only start a phase when funds are committed. This method prevents half-finished builds waiting for cash.
Cost-saving tips that actually work include shopping salvage yards, buying imperfect plywood for areas behind panels, and turning to maker communities for second-hand parts. Local online groups and swap pages often list materials salvaged from bigger builds. Take your time to scavenge; the savings multiply quickly.
Consider lifecycle costs, not just upfront price. A heavier build may force more frequent service or reduce fuel economy. Insulation choices, ventilation systems, and how you mount heavier items influence long-term maintenance and fuel costs. Prioritize lightweight durable materials for components you carry permanently.
Financing the build should align with how long you plan to use it. If the camper is a short-term experiment, a modest budget and resale-friendly choices are sensible. If it becomes a long-term home, invest more in structural durability and reliable systems. Avoid financing decorative upgrades when the base vehicle needs attention.
Make decisions using a decision matrix. List items, costs, and impact on safety, comfort, and resale. Give each a score and fund high-impact items first. This objective approach removes emotion from spend choices. It also helps justify cuts when budgets tighten.
Track every expense. Use a simple spreadsheet or a budgeting app. Record receipts and label purchases by phase. Tracking provides a clear picture of where funds go and helps refine estimates for future projects. It also makes selling parts easier when you upgrade components later.
Plan for testing and iteration costs. Your first weekend away will reveal missing items. Reserve a small portion of the budget for tweaks. That money should cover additional hooks, extra latches, more USB ports, or simple trim adjustments. Expect this phase; it’s part of the build cycle.
If you want inspiration or parts ideas, a practical guide to truck accessories is helpful. Review resources that cover storage solutions and mounting systems to avoid costly mistakes early. For example, a truck accessories guide offers useful perspectives on efficient, secure equipment installation and layout choices.
Above all, let the budget shape the design, not the other way around. Design choices informed by cost produce better builds than designs that force spending beyond means. Keep the focus on shelter, safety, and functionality first. Let style follow when resources allow.
Finally, remember that a DIY truck camper is an evolving project. A modest initial build can grow with you. Prioritize upgrades that deliver measurable benefits. Replace or add features as experience and funds allow. This incremental mindset prevents overspending and delivers a camper that truly fits your needs.
Further reading: How to Build a DIY Truck Camper on a Budget
null
null
Compact Camp Kitchen: Designing a Practical Cooking System for Your DIY Truck Camper
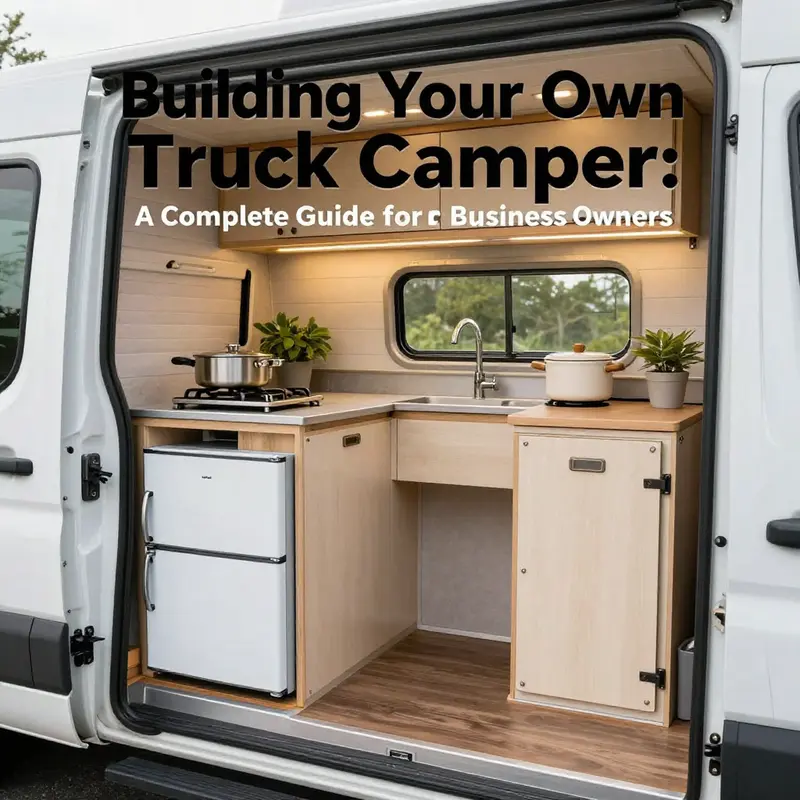
Designing a Compact Camp Kitchen
A truck camper kitchen must be compact, resilient, and easy to use. Space is limited, so every decision should add utility. Think of the kitchen as a single system that includes cooking, water, storage, and ventilation. When these elements work together, cooking becomes simple and pleasant. Plan with movement and vibration in mind. Secure everything, and keep heavy items low and centered to protect handling. Aim for surfaces that clean easily and fixtures that lock tight for travel.
Start by mapping the usable area. Measure the bed and any built-in structures. Allow space for sleeping and walking when the kitchen is deployed. Slide-out kitchens are an excellent way to gain workspace without sacrificing interior room. A slide mechanism can house a sink, a cooktop, and storage. When extended, it creates a proper prep area. When retracted, it locks in place behind a hatch or under a lid. If a slide-out is impractical, build a pull-out drawer or a hinged countertop that folds down for use.
Choose cooking appliances with power and safety in mind. Portable two-burner units and compact induction cooktops offer the best balance between performance and footprint. If using an electrical cooktop, plan battery capacity and inverter size accordingly. If you prefer a gas-based option, install a secure, ventilated compartment for the fuel source. Always mount a heat shield between cooking surfaces and combustible materials. Create a stable, flat platform for any stove so it cannot tip while the vehicle is moving.
Water design shapes everyday life in your camper. A built-in freshwater tank keeps water handy and low to maintain center of gravity. Pair the tank with a small pressure pump and a compact stainless steel sink sized to the truck bed width. A shallow sink saves weight and volume while still serving for food prep and washing. Use flexible hoses with quick-connect fittings to simplify removal for service. For wastewater, route a gray-water tank to a secure, accessible location that can be emptied at appropriate dump stations. Position valves where you can reach them without moving heavy panels.
Ventilation is crucial to manage steam, smoke, and cooking odors. Roof vents and a small, low-profile exhaust fan work well without taking up counter area. If you cannot install a powered fan, design panels and screens that open to create cross-breeze when cooking. Consider a removable down-draft panel that vents under the slide-out when in use. Keep screens and seals tight to prevent insects and dust from entering when vents are open.
Storage will determine how well the kitchen functions day to day. Design multi-tiered drawer banks under the counter for pots and pans. Use soft-close slides and deep drawers to keep gear secure. Vertical shelves can hold dry goods and small appliances. Magnetic strips on side panels hold knives and utensils in a compact footprint. Incorporate modular bins sized to fit stacked containers and spice jars. Label each bin for quick access. For fragile items, use padded inserts and secure latching mechanisms.
Worktop material matters. Choose a hard, non-porous surface that resists scratches and stains. Laminate and solid-surface materials clean easily and resist moisture. Apply non-slip strips where dishes rest while driving. Seal exposed plywood edges and fasteners to prevent water infiltration. Consider a thin, replaceable countertop overlay for heavy-duty cooking; it allows you to swap a worn surface without rebuilding the whole module.
Make the kitchen multi-functional. A fold-down table can serve as a dining surface and prep area. A removable cutting board that fits over the sink increases usable workspace. Design storage to double as seating or steps where possible. This approach keeps the footprint small while expanding functionality.
Securement and safety are non-negotiable. Fasten cabinets and appliances with bolted brackets or marine-grade fasteners. Use positive-latch hardware designed to resist vibration. Install a heat-resistant barrier behind the stove. Fit a dedicated ventilation path if fuel-burning appliances are present. Add a compact fire extinguisher within reach of the cooking area. For electrical systems, run circuits through a fused consumer unit and use marine-grade connectors where vibration is expected.
Integrate electrical planning into the kitchen early. Determine the loads for refrigeration, pumps, and cooktops. A dedicated 12V circuit keeps pumps and lighting efficient. If you plan to run an induction cooktop, calculate inverter size and battery capacity so you do not drain your house bank on a single meal. Add USB ports and 12V outlets near the prep area for small appliances. Keep switches and outlets in weather-sealed housings if exposed to the elements.
Weight and balance influence driving and comfort. Distribute heavy items centrally over the axle when possible. Stow water tanks low and near the centerline. Use lighter materials for upper cabinetry to keep the center of gravity down. When designing storage, consider both loaded and unloaded weights to avoid unintended handling changes.
Materials and construction choices affect longevity. Use plywood rated for marine or exterior use where moisture is likely. Edge-band exposed plywood to block moisture. Choose stainless or coated hardware that stands up to vibration and corrosion. For drawer slides and hinges, opt for hardware rated for heavy use. Apply sealants at joints and around penetrations to prevent water intrusion.
Small conveniences make daily life easier. Add a pull-out dish drying tray that nests inside a drawer. Install a compact knife block or magnetic rack for quick access. Include a bungee or clip system to secure bottles and jars while driving. Mount a small folding shelf on the exterior of the camper for outdoor cooking or coffee brewing.
Test early and iterate. Build a mock-up of your chosen layout using cheap materials or cardboard. Cook a few meals in the mock kitchen during a short test trip. Note ergonomics: counter height, reach to storage, and location of waste valves. Adjust drawer depths, shelf heights, and faucet reach based on real use. Real-world testing often reveals small but critical changes that improve long-term satisfaction.
Aesthetics matter but keep them practical. Use durable fabrics and finishes that hide wear. Soft-close drawers and concealed hinges elevate the feel with little cost. Keep color contrast between surfaces and hardware to improve visibility of items during low light. Add simple lighting under cabinets and above prep areas to aid cooking after dark.
Finally, think modular. Design components to be removable for maintenance or upgrades. Quick-release mounts for the sink, stove, and fridge let you swap parts when needed. A modular build also enables conversions: detach the kitchen for a cargo-focused trip, then reinstall it for camping weekends. This flexibility extends the usefulness of your truck.
For examples and layout inspiration, check curated build ideas on trucksdiy accessories. For visual boards and creative layouts, see this Pinterest board: https://www.pinterest.com/pin/123456789012345678/.
Final thoughts
Building a DIY truck camper offers business owners the flexibility to travel and work in comfort. By selecting the appropriate vehicle, planning a practical layout, budgeting wisely, ensuring adequate insulation, and designing a functional kitchen, you can create a mobile sanctuary that serves both your professional and personal needs. Taking the time to carefully plan and execute each step leads to a rewarding experience that enhances your lifestyle while supporting your business pursuits. Embrace the adventure ahead as you construct a customized truck camper that reflects your vision.