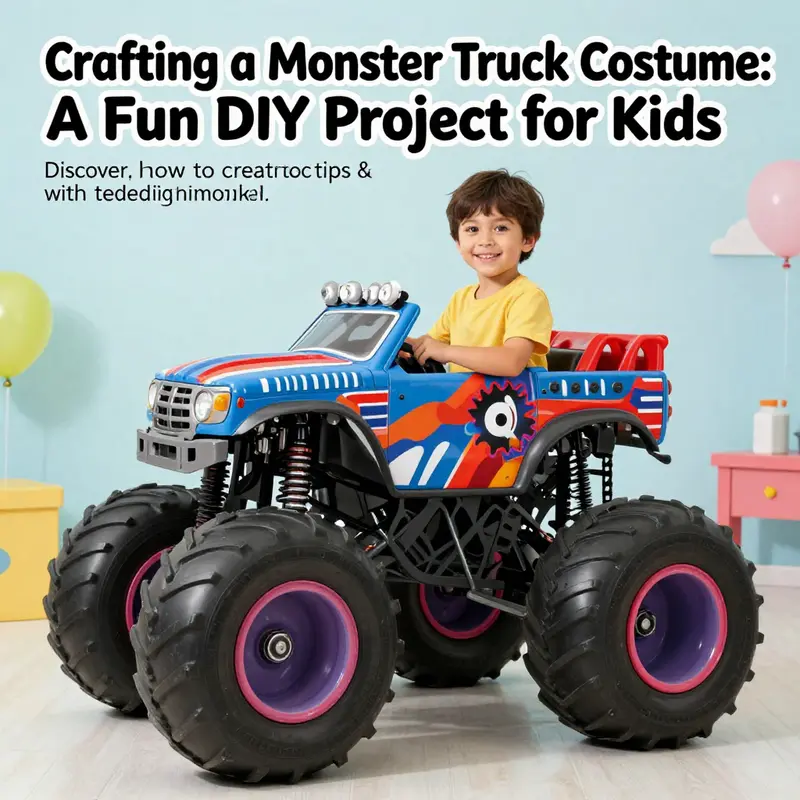
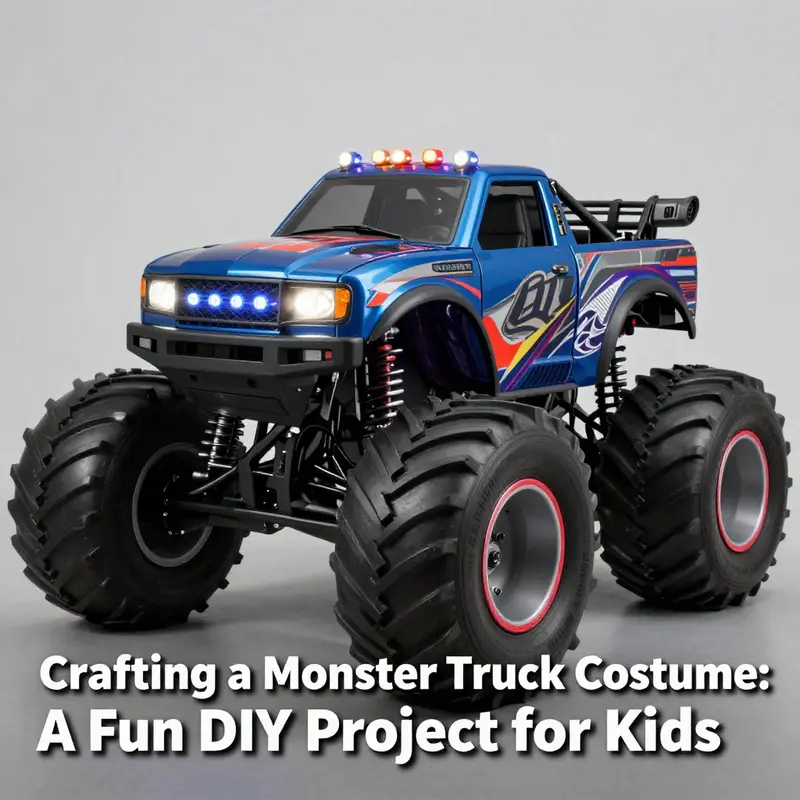
Creating a DIY monster truck costume is an engaging project that encapsulates creativity, fun, and the excitement of crafting. This costume can ignite a child’s passion for monster trucks while providing a fulfilling experience for parents or business owners aiming to host children’s events. By exploring the necessary materials, step-by-step assembly, painting techniques, and clever enhancements, you will ensure a standout costume that delights kids and encourages community recognition. In this guide, we will delve into each chapter, offering practical insights that will contribute to a successful costume-making endeavor that celebrates imaginative play.
Essential Materials and Smart Substitutes for a DIY Monster Truck Costume
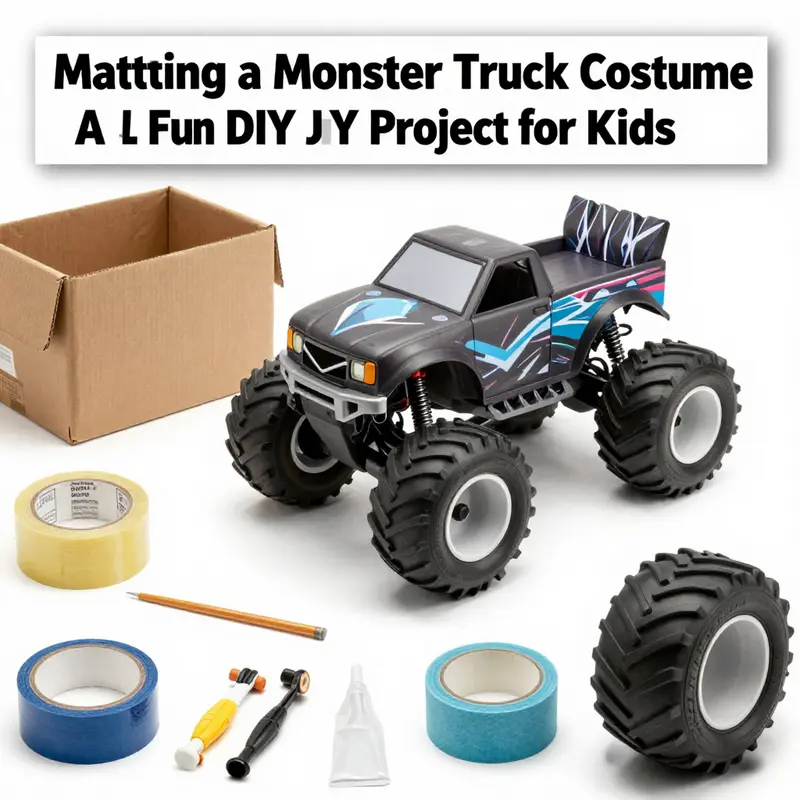
Materials and smart substitutions for building your monster truck costume
Gathering the right materials sets the tone for a successful monster truck costume. Choose items that are sturdy yet light, easy to cut and shape, and safe for a child to wear. A large cardboard box is the foundation. Look for a medium-to-large box from recent deliveries or a moving supply. Avoid boxes that are too floppy; double-walled boxes work best because they hold their shape and tolerate cutting. When selecting the box, imagine the child standing inside or through it. The box should allow arm and head movement without scraping or restricting breath.
Reinforcement comes next. Use wide cloth-backed tape or general-purpose duct tape to strengthen edges and corners. Tape along inside seams prevents rips when the costume is bumped or picked up. Reinforce the bottom and shoulder openings too. Adding a layer of tape to corners extends the life of the cardboard and keeps the shape tidy during active play. For structural joins, plan taped or glued joints rather than relying on a single fold. Folding cardboard inward and taping over the fold produces cleaner, stronger edges.
You will need adhesives and basic tools. A hot glue gun is ideal for quick bonds and attaching decorations. For parts that must hold weight or resist repeated pulling, use a strong construction adhesive. Scissors and a sharp utility knife are essential for cutting windows, doors, and wheel openings. Sandpaper or a sanding block helps smooth rough cardboard edges. If you prefer a safer cutting approach around children, score cut lines lightly and break the cardboard along the score.
Paint and surface finishes transform a plain box into an eye-catching truck. Water-based acrylic paints dry quickly and are kid-friendly. Spray paint gives a smooth finish, but use it outdoors or in a well-ventilated area and wear a mask. If you plan to add metallic highlights, metallic craft paint or aluminum-colored foil provides that look without heavy materials. Seal painted areas with a clear coat or water-based varnish to protect details from scuffs during wear.
Wheels make the costume unmistakable. Create wheels by cutting matching circles from extra cardboard or from foam board. Sandwich a disposable cup or a short paper towel tube between two rounds to give depth, then glue the layers together. For a chunkier look, glue several rings of cardboard together before adding the center spacer. Cover wheel edges with black paint or strips of black paper to mimic tire treads. Lightweight foam plates or craft foam work well for tire accents because they bend and glue easily. If you want a metallic rim, wrap the wheel centers in aluminum foil or paint them with metallic paint.
Axles and wheel attachments must allow the costume to be lifted and carried without the wheels drooping. Instead of a working axle, mount wheels flush to the side of the box using reinforced cardboard tabs. Cut small rectangular tabs from extra cardboard, fold them into stiff L-shapes, glue them to the box interior, and screw them together with heavy-duty tape. For a floating-wheel look, use thicker cardboard or a thin wooden dowel embedded through a reinforced tube that acts as an axle. Always ensure that any rod used is sanded smooth and has no sharp ends.
Lighting adds drama. Salvage battery-powered lights from old toys or use small craft LED lamps. Remove lights from old items carefully, then secure them inside the headlight openings. Place them on a small switch and battery pack that stays accessible for quick on/off. Keep wiring taped down and away from the wearer’s face. If you use shoe lights or other repurposed sources, check batteries and connections beforehand. Avoid using mains-powered lights or anything that produces heat.
Comfort and wearability are crucial. Elastic straps or wide fabric ties make the costume easy to slip on and off. Attach straps inside the top and the middle of the box, crossing them to distribute weight. Use strip padding—small rectangles of foam or folded fabric—where the straps press against the shoulders. Velcro strips allow quick adjustments and removal. Cut a breathing hole and a clear sightline for safety. If the design covers the head, add an inner headband or cushioned rim so the cardboard does not rub on skin.
Detailing brings personality. Use felt, fabric scraps, or craft foam for grills, bumpers, and accents. Felt sticks well with hot glue and hides rough edges. Create bold graphics with stencils or freehand paint. For muddy realism, sponge on layers of brown and tan paint. Use stickers or laminated paper decals for logos or numbers, but avoid brand names; instead, craft your own racing number or team emblem. Glue a small license plate on the rear for a finishing touch.
Consider materials for safety and durability. Avoid heavy metals, glass, and long, sharp protrusions. Keep all exposed edges taped and smooth. Use breathable materials near the face and head. For outdoor play in wet weather, either avoid using water-based paint or protect the costume with a light clear coat. If the costume may be stored or reused, consider building the truck so it disassembles easily. Use tabs and slots for parts that should come off, rather than permanent glue.
Think about balance and weight distribution while assembling. Place heavier decorative elements low and towards the center. Lightweight foam and paper are preferable for chimneys, spoilers, and raised features. If you add batteries or a battery pack for lights, tuck the pack into a pocket on the inside of the box near the child’s waist. Secure it so it doesn’t swing or press against the child’s back.
If you want more realism with texture, layering techniques help. Start with a base coat of paint, then add dry brushing to highlight edges. For tire tread, glue narrow strips of foam or cut textured craft foam into zigzag shapes. For a grungy look, crumple and glue small pieces of brown tissue paper and seal them with a varnish coat. For metallic sheen, wrap thin card shapes in foil and then glue them on. For bold raised numbers or letters, glue foam letters or make stencils, paint over them, and lift once dry for crisp edges.
Finally, keep the process fun and collaborative. Let a child choose colors and decide which features to add. This keeps engagement high and ensures the costume reflects the wearer’s imagination. Test fit the costume early and often, letting the child move, bend, and walk. Make adjustments for clearance, visibility, and comfort. With basic tools, safe adhesives, and creative substitutions, you can build a lightweight, durable, and show-stopping monster truck costume that will fuel play and smiles.
For ideas on assembly steps and visual guidance, explore a practical tutorial on creating a monster truck costume: https://www.instructables.com/Grave-Digger-Monster-Truck-Costume-12-Steps/.
For further inspiration on parts and finishing touches, see this truck accessories reference for ideas on hardware and accessory styling: truck accessories.
From Cardboard to Chrome: A Cohesive Guide to Building a DIY Monster Truck Costume
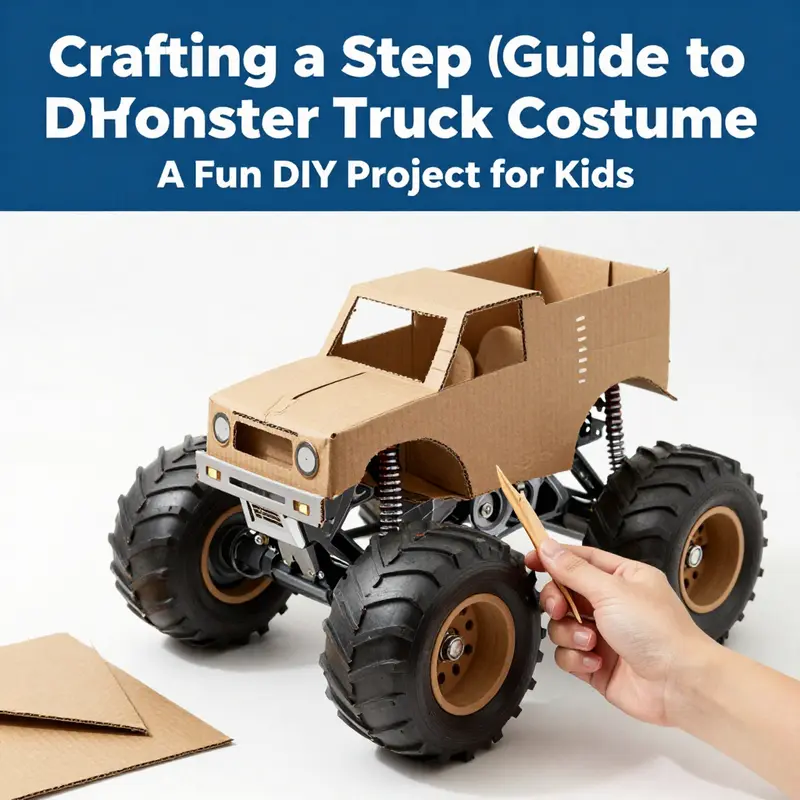
Turning a large cardboard box into a roaring, kid-friendly monster truck on the outside and a safe, comfortable costume on the inside is a project that blends imagination with practical tinkering. The thrill comes not just from the final look but from watching a child step into a self-made vehicle and become the driver of their own story, racing across the living room floor or marching down a neighborhood street with a chorus of cheers. The process invites design collaboration, color planning, and thoughtful engineering, so the costume reads as a convincing vehicle while remaining light enough for a youngster to wear without overheating or fatigue. The heart of the build is simple in concept: a sturdy main body, oversized wheels, and a chrome-like finish that catches the eye as it moves. With the right mindset, you can transform a humble box into a stage for play, pride, and a little bit of automotive fantasy that will linger in memory far longer than any store-bought costume could. Begin with a clear, child-centered plan that honors safety as a base assumption; prioritize airflow, comfortable weight distribution, and the ability to see and move without restriction. In practice, that means selecting a design the child loves, then translating that idea into a functional, wearable shell. You’ll want bold colors, simple but striking details, and the confidence that comes from testing early and often. Materials, when chosen thoughtfully, become accelerants for creativity rather than obstacles, and the most satisfying builds use lightweight elements that still read as real metal and rubber from a distance. A successful monster truck costume is not about perfection; it’s about the story it tells when it rolls into a party or a parade. It’s about the kid who points to the fake grille and declares the vehicle’s name with a grin, and about the parent who smiles, impressed by how the boxy silhouette becomes a vehicle that travels on imagination rather than fuel. The practical side is essential too, and a well-executed build will be sturdy, safe, and comfortable enough to wear for extended periods. The first step is to assemble the right toolkit of materials, which anchor the entire project. A large, sturdy cardboard box serves as the main body, chosen for its shape and availability. Duct tape becomes the backbone of the structure, used to reinforce edges, seam lines, and the joints where the box will bear weight during wear. Scissors or a utility knife are your cutting tools, enabling clean windows and door openings that provide visibility and movement. Paints—bold blacks, reds, yellows, and any other colors that fit the design—bring the truck to life while offering a chance to practice shading, highlights, and weathered effects that add character. Styrofoam plates or sheets are utility players here, used to craft the wheels and other three-dimensional features such as fenders and light housings, while aluminum foil or metallic paint gives a convincing chrome-like sheen that reflects light as the wearer moves. If you want headlights or taillights, old children’s light-up shoes offer a clever and economical source for simple, battery-powered LEDs that can be repurposed and secured in place. Elastic straps or Velcro are essential to keep the whole thing on the wearer comfortably, letting the child bend, twist, and walk with fewer restrictions than a rigid shell would allow. Finally, glue guns, craft glue, and a few extra decorative elements—felt scraps, decals, or fabric patches—round out the materials list, inviting you to personalize the truck with a name, a number, or a slogan that makes the design uniquely your own. The project then moves from materials into the drama of construction, starting with the box itself. Lay the box flat on a clean surface, with the largest faces facing up, so you can make careful, deliberate cuts that won’t compromise the box’s integrity. Cut a windshield opening that offers good visibility; you can go with a wide front window for a driver’s face or a narrower slit to maintain a more traditional truck silhouette. The goal is to create a clear line of sight for the wearer while preserving a silhouette that reads as a real monster truck from a short distance. Reinforcement comes next. Use duct tape along the interior seams and at the most stressed areas to prevent tearing when the wearer moves, sits, or shifts weight. The structure should feel solid without turning the box into a heavy shell; you want youth to feel safe without losing the sense of scale that makes the costume magical. Then comes the color and detail work. Apply a base coat of your chosen color, letting it dry thoroughly before adding accents like racing stripes, numbers, or logos. The paint choice matters: matte or satin finishes reduce glare and read more realistically at a distance, while glossy surfaces can exaggerate the chrome-like shine when you catch light. Add deck-reckoning lines and decals using a small brush or stencil shapes cut from foam or felt for crisp edges. The next big step is to conjure the wheels, the proud, oversized tires that define the monster truck look. Cut four large circles from Styrofoam plates or reuse heavy cardboard to create wheel hubs. If you’re using plates, reinforce their edges with duct tape to avoid crumbling under stress. Paint them black for the tires, then add white or light-gray lines to mimic treads and grooves. Attach the wheels to the sides of the box using duct tape, then reinforce with extra tape or a second layer of material so they feel securely anchored and appear to protrude outward as if the tires are gripping the ground. To give the wheels more teensy realism without adding weight, you can wrap the outer rims with aluminum foil or metallic tape, letting reflections catch the eyes of observers as the wearer moves. With the fundamental body and wheels in place, you can sculpt the truck’s exterior details. Styrofoam sheets can become fenders, bumper lobes, or light housings, carefully cut into curved shapes and attached with glue or tape. Attach these features with a light hand to avoid sharp edges, then wrap the exterior in aluminum foil to produce a gleaming, chrome-like surface. The lights are a highlight that can radically elevate the costume, so consider how to position them for easy operation and maximum effect. If you’ve saved the mechanism from an old pair of light-up shoes, you can remove the delicate wiring carefully, then secure the LED modules inside the box near the front and rear to act as headlights and taillights. Ensure the batteries remain accessible to enable simple on/off control, and fix the wiring away from the wearer’s skin and clothing to prevent tangling or overheating. Comfort is a non-negotiable priority, and the interior design should reflect that. Attach elastic straps to the inside of the box near the shoulder area and at the waist so the wearer can stand and move with the structure resting comfortably on the torso. Test the fit by having the child try it on and walk around a room; adjust strap lengths, verify that the opening for the driver’s eyes is not obscured, and make sure the box isn’t pressing against the ribs or chin. You’ll want room for a light layer of clothing underneath to keep cool and to prevent chafing where edges might press against skin. When you reach the finishing touches, you can add a bit of character with decals, a license plate, and perhaps a name or squad number painted along the side. You might grunge up the surface with a subtle stippling of brown or tan to simulate dirt and mud caked in the wheel wells after a pretend off-road run, or you can keep it pristine for a showroom look. The key is to balance bold design with practical wearability; a costume that looks dramatic must also feel safe and comfortable to wear for an extended period, especially if it will be sported by a child during a party or school event. As you approach the end of the build, test remains essential. Have the wearer walk, bend, and reach so you can observe how the box moves with the body. Check for any loose tape, exposed edges, or protruding components that could snag clothing or catch on furniture. Ensure the lights stay in place and the battery compartment remains accessible for quick on/off control. If anything feels tight, trim or reposition a strap, smooth any rough edges, and recheck the balance so the weight sits evenly across the torso. The joy of this project isn’t simply in the final product but in the process—the kid’s excitement as the design unfolds, the parent’s satisfaction in turning a box into a believable vehicle, and the shared memory of a day spent building and playing together. For families seeking a broader context or inspiration that broadens how such builds can be adapted to different sizes or themes, there is a linked resource that explores related container-based builds and structural strategies: truckboxes. This reference helps connect the concept of a monster-truck shell to other practical ideas for reusing materials creatively and safely. The approach here scales well to various ages and settings, allowing you to reuse parts, swap colors, or adjust the wheel size to create a different impression of speed and power with every run or pose. The overarching lesson is that construction matters less in achieving a perfect replica and more in empowering a child to participate, imagine, and enjoy the tangible pride that comes from seeing their own design take on a life of its own as they move through a party or parade. In this way, the DIY monster truck costume becomes not just a costume but a small triumph of creativity, engineering, and shared joy that can inspire future projects, from a backstage prop for a school play to a home-built float for a local festival. If you approach the task with curiosity, a light touch, and a willingness to adapt, you’ll find the process rewarding in its own right, and the end result will carry the warmth of a memory made tangible through cardboard, foil, and a child’s bright imagination. For a visual, step-by-step demonstration with photographs, refer to this external guide: https://www.instructables.com/Grave-Digger-Monster-Truck-Costume-12-Steps/.
From Base Coat to Bolt-Pattern Brilliance: Painting a Realistic DIY Monster Truck Costume
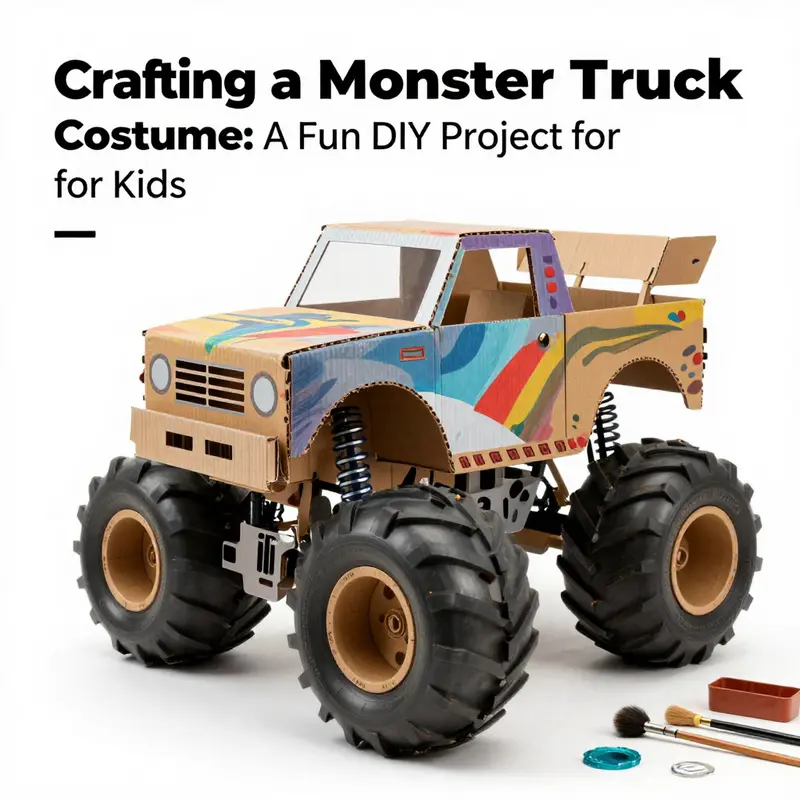
Color is the heartbeat of a DIY monster truck costume. It has to read from a distance like a roaring vehicle and up close reveal the craft behind the construction. The costume’s shell begins with a deliberate choice of base tones that anchor the rest of the work. A bold, solid foundation—often black or a deep metallic shade—gives the surface a canvass that can hold bright colors and sharp decals without looking muddy. This base also sets the mood for the entire piece. If the goal is a Grave Digger-inspired look, a dark undertone makes the brighter greens and oranges pop with credible contrast. For a star of your own design, let the base color whisper the vibe you want—aggressive, playful, or retro. The painting process benefits from starting with a clean, slightly rough surface, because a smoother finish can peel or look flat under lighting. A light sanding after assembly removes the gloss that can resist adhesion and creates a better grip for subsequent layers.
Once the base is settled, layering becomes the second act. Monster truck art thrives on depth, shading, and the impression of three-dimensional panels on a two-dimensional costume. Build this illusion by applying a series of coats in progressively lighter or darker tones. A base layer under the hood and on the chest panel can be a slightly cooler shade, which helps the bright accents read as highlights rather than flat color blocks. Layering is more than color; it’s texture. You can simulate the look of worn metal and weathered paint by introducing subtle variations in hue within the same family. A small brush can lay in a barely visible seam line or a faint scratch, while a sponge dab can create soft, irregular edges that echo days of road dust and chalky weather. The key is restraint: too many layers busy the eye and undo the bold graphic you want to shout with.
Reflection and shine are the third pillar of a believable monster truck skin. Real trucks glint under arena lights because metal surfaces catch and scatter light in unpredictable ways. In a costume, this translates to reflective accents and metallic textures that catch the eye without overpowering the broader design. A very practical route is to reserve metallic paint or foil for trim and key features such as wheel rims, bumper highlights, or the edges of hood scoops. Aluminum foil, when used sparingly and sealed properly, can mimic chrome and add a kinetic shimmer that mirrors stage lighting. If you lean into foil, fold it tight along curves and corners so it follows the shape you are painting rather than creating bulky, unmanageable patches. This reflects light in ways that a flat painted surface cannot, giving the costume a dynamic, cinematic feel as the wearer moves.
The actual application of color demands thoughtful technique. Acrylic paints offer bold, precise control for logos, sponsor decals, and fine linework that define the toy-like, larger-than-life identity of monster trucks. They’re fast-drying and forgiving for beginners, especially when you’re painting on cardboard, foam, or fabric closures integrated into the shell. Use small, stiff brushes for sharp lines and detours around edges where you want crisp boundaries. For broader areas, spray paints can deliver a quick, even coat that avoids brush marks and hand fatigue. If you choose spray, work in a well-ventilated space and apply several light passes rather than one heavy coat. The goal is a smooth color surface with a subtle satin finish that won’t glare under stage lighting or school gym lights.
A careful transition from base color to accents is where the costume begins to tell its story. Consider the way real racing machines wear their branding and decals, which rarely sit on perfectly flat planes. Use masking tape or lightweight stencils to guide bold patterns, such as tire treads, racing stripes, or sponsor logos. Stencils are particularly useful when you want repeatable, precise shapes like track marks or chain-link motifs along the sides. If you’re not confident freehanding a complicated logo, mask off the area and apply paint through the stencil in light passes, removing the stencil before the paint fully dries. This approach reduces the risk of smudges on the edges and preserves the sharpness of each graphic.
Texture and surface manipulation play a decisive role in convincing viewers the costume can withstand the rough-and-tumble life of a show or parade. Dry brushing is a simple yet powerful technique that creates the impression of raised edges, bolts, and panel seams. The idea is to load a brush with pigment, wipe most of it away, and softly drag it across the surface so color remains only on the raised areas. On foam or cardboard, dry brushing reveals the grooves you carved for panel lines and gives a tactile sense of rugged metal. With a light touch, dry brushing can emphasize the bolts and rivets that run along the truck’s fenders and hood, making them pop while maintaining the overall cohesion of the piece. It’s the kind of nuance that makes a viewer lean in for a closer look.
Another practical trick is the careful use of weathering effects to mimic the long days of driving and the episodic scrapes from show floors or carnival routes. Subtle dirt streaks, chips, and scuffs can be produced with slightly darker or lighter shades blended at the edges of the base color. The goal is not to skimp on realism but to keep the look expressive and fun rather than documentary. A light, irregular dusting of darker pigment along the lower edges where dirt would accumulate iterates well on the bottom panels or the lower rims of wheel wells. For chips, a tiny piece of tape can create a clean edge for a lighter or darker chip; removing the tape reveals a crisp chip that reveals the color beneath, producing that classic chipped-paint effect.
The role of light cannot be overstated. In a live setting, the costume moves in and out of spotlights, and this can shift the perceived color dramatically. Foil, metallic paints, and glossy finishes catch light in unequal ways, giving the costume a living, mechanical aura. If you aim for a chrome-like gleam, you can selectively apply metallic paint to highlight certain curves or use a thin layer of foil along the hood edges where a gleaming line would naturally run. The interplay of matte and gloss finishes creates depth; the eye reads the high-gloss areas as raised metal, while the matte panels recede slightly, simulating shadowed recesses and worn surfaces. To keep these choices practical, sealants are essential. A flexible, clear sealant locks in color, prevents chipping, and preserves the finish through wear and cleaning. A light spray sealant built for fabric-friendly surfaces helps keep the surface supple and reduces cracking when the wearer moves or sits.
If you want your design to evolve in a living, interactive way, you can plan a few glow elements that don’t rely on heavy electronics. Old light-up shoes, once deconstructed, can reveal a string of tiny LEDs that you place at the front and rear edges of the box, simulating headlights and taillights. Use battery-friendly LEDs and a simple, safe wiring approach with low voltage to avoid overheating any foam or cardboard. The glow adds a cinematic touch, especially in dim environments, and it invites the eye to linger on the edges and contours of the shell. When integrated with paint, the lights can reveal subtle color shifts: the edges glow with a cooler white, while the inner surfaces carry a warmer tone from the base color peeking through the chip marks and weathering. The result is a lively, kid-friendly costume that feels almost collectible, like a miniature, wearable monster truck.
Practical care and long-term wearability are the final pieces to consider as you weave paint, texture, and light into the shell. The surface needs to be comfortable against the wearer’s skin and clothing, especially where straps or padding contact the paint. Consider sealing the interior side of any painted area that might rub against fabric to reduce wear. If possible, allow extra drying time between coats to prevent tackiness that can pull on fabrics. Lightweight materials help with airflow and keep the wearer from overheating, which means that even elaborate color schemes stay fresh and vibrant through hours of use. Always test mobility by having the wearer go through a short course of movements before finalizing the design. Temporary mobility issues are far easier to fix early than after the costume is finished and in use.
As you plan the visual language of the costume, you may find it helpful to consult additional build resources that map well to the shell’s layout and texture. For example, a practical reference on constructing the outer shell can guide you in visualizing where panels should align with the body’s arcs and how to place decals so they follow a natural seam line. See the truck box guide for layouts and measurements that translate well from a static model to a wearable shell, ensuring the box’s proportions stay believable when worn by a child. This alignment matters because a well-proportioned shell reads as a single, cohesive vehicle rather than a collection of painted parts. The ultimate reward is a costume that breathes life and personality, capturing the energy of the real monster trucks while remaining safe, light, and comfortable for the wearer.
A final note on the painting process is the social, collaborative element. Invite the young designer to participate in color decisions and detailing. When a child selects a color scheme or logo, their investment deepens, and the final look often becomes more dynamic. The act of choosing colors, applying decals, and watching the design take shape can become a shared journey, not just a crafting task. And because this is a costume, the process of painting is not merely about appearance; it’s about storytelling—the story of a vehicle that roars to life through cardboard and glue, now wearing a bold, vivid coat that invites friends to cheer and imagine alongside the wearer. If you want to explore practical steps in more detail, consider a dedicated, hands-on guide that shows the exact layout and layering process used by many makers. For the broader shell construction and layout, you can consult the truck box guide. truck box guide.
External inspiration can also come from community tutorials that demonstrate long-form, color-first approaches to monster truck aesthetics. For a detailed, step-by-step painting walkthrough with practical tips on layering, foil accents, and durable finishes, you may find a hands-on tutorial at this external resource: https://www.instructables.com/Grave-Digger-Monster-Truck-Costume/.
null
null
Built to Roar: Practical Tips for a Kid-Friendly DIY Monster Truck Costume
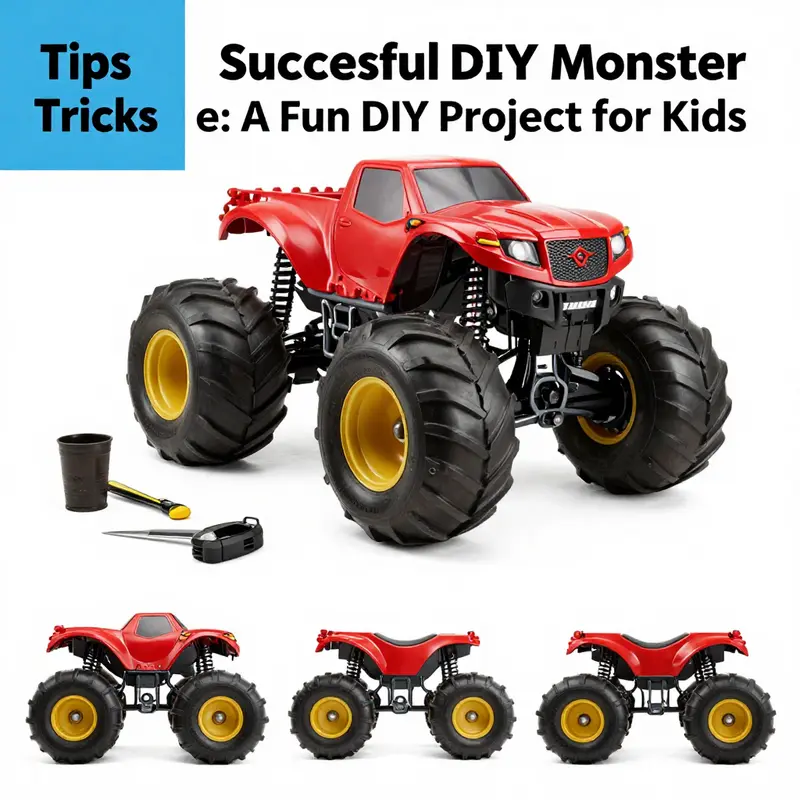
Practical Tips and Quick Tricks
Making a monster truck costume that looks bold, holds up during play, and stays comfortable requires more than a paint job. Small choices made early shape the final result. Choose a sturdy corrugated box that gives the child room to move. A box meant for medium-sized appliances or yard equipment often works well. Check the interior for staples, sharp tape, or labels and remove anything that could scratch skin or snag clothing. Start by flattening one side so you can test-fit the child. If the box is too tall, trim the top so the hem sits near the hips. If it’s too wide, score and fold the sides to create a snuger cabin.
Once you have a box that fits, reinforce it before you get creative. Corrugated cardboard has weak points at the corners and along cut openings. Run wide strips of duct tape along every seam, inside and out. Tape the top and bottom edges to prevent crushing. For added strength, glue a narrow strip of scrap cardboard across each long interior seam and tape over that. This creates internal ribs that reduce flex. When you cut windows, leave at least an inch of flaps around the opening and tape those flaps down. That prevents the cut edge from tearing when the costume is lifted or bumped.
Think through how the child will wear and carry the costume. Cut arm holes that allow full motion of the shoulder and elbow. Test the hole placement while the child is standing and moving. If the costume slides, add soft elastic straps across the shoulders. Sew or staple fabric to each strap and attach the ends to the interior with heavy-duty adhesive. Elastic keeps the box centered and lets the child run without the costume shifting. For a hands-free experience, add a wide belt loop at the back and a Velcro strap to fasten around the waist. That shares weight between shoulders and hips and keeps the costume from spinning when the child turns.
Plan visibility and ventilation early. The front window should line up with the child’s eye level when they stand comfortably. Cut the opening larger than you think you need; you can always reduce it with lightweight mesh or a tinted plastic insert. Cover the window with clear plastic from a food container or packaging sheet to protect against wind while keeping sight clear. Punch a few small ventilation holes near the top and bottom on each side to keep air flowing. If you plan to add lights, place batteries in a pocket or secure them with tape inside a plastic bag to avoid any moisture contact.
The monster-truck look depends on oversized wheels and bold graphics. Create wheels from layered cardboard or from foam plates glued into discs. Cut two identical circles for each wheel and sandwich a narrow strip of cardboard between them for depth. Paint the edges black and attach smaller white circles for sidewalls. If you want more realism, add a metallic center cap made from painted foam or a crumpled sheet of metallic paper. Mount the wheels so they appear to stick out from the sides. Use a short length of dowel or a stiff cardboard axle inside the wheel, then tape or glue the axle to the box. Reinforce the axle area with small interior blocks of scrap wood or cardboard so the wheel doesn’t tear off when knocked.
When painting, less is more. Start with a quick primer coat of white or a neutral color to help the paint adhere evenly. Use broad strokes for the base color and let each coat dry completely. Acrylics work well for brush painting. If you use spray paint, work outside and mask off areas with paper. Bold, simple shapes read better from a distance. Racing stripes, flames, and blocky logos make a big visual impact. Cut stencils from cardstock for repeated shapes like stars or numbers. Secure stencils flat with masking tape so paint doesn’t bleed underneath. For shiny accents, use metallic paint or wrap small sections with aluminum foil and smooth it down with a bit of glue.
Add three-dimensional details selectively. A raised grille made from felt or foam sheet can be glued to the front to give depth. For headlights, repurpose old battery-powered lights or small LED puck lights. Mount lights in secure pockets and tape the wiring inside the box. If you have a pair of small light-up items at home, remove the lights carefully and place them inside plastic housings on the front and back. Always secure batteries and wires in a way the child cannot access them while wearing the costume. Keep wiring minimal and use LED lights to avoid heat.
Balance detail with weight. Heavy materials make the costume tiring to wear. Substitute foam board or lightweight craft foam for wood or dense plastics. Where metal would be neat, mimic the look with painted cardboard or foil-covered foam. Use glue sparingly. A hot glue gun bonds quickly and holds well, but large glue beads add weight. Spread adhesive thinly and clamp parts until set. If you expect wet weather, avoid materials that soak and sag. Seal painted cardboard with a thin layer of clear craft sealer to protect against light moisture.
Safety matters as much as style. Smooth any rough cardboard edges by folding a thin strip of tape around them. Check for loose pieces that might fall off during play. Avoid small parts that could be a choking hazard for young children. Make sure the costume does not interfere with normal walking, sitting, or using stairs. Test the costume on a mock trick-or-treater route or in a living room obstacle course. Adjust armholes, window size, and strap placement until the child can move freely and comfortably.
Personalization makes the costume memorable. Let the child choose colors, numbers, and a name for their truck. Add removable stickers or decals so the design can change later. If they like lights, opt for battery packs with a simple on/off switch. For extra theater, create a cardboard ramp or small obstacle as a prop for photos. Store any fragile embellishments separately and attach them just before use to avoid damage in transit.
Budget-friendly substitutions keep the project accessible. Use foam plates or recycled packaging for wheel faces. Old fabric scraps become upholstery or seat covers. Shoe box lids form smaller panels and vents. Clear plastic from clamshell packaging makes windows without buying specialty materials. Use school glue reinforced with tape when heavy-duty adhesive is not available. Work in stages: build the structure one day, paint another, then add details. This pace helps the costume dry properly and makes the project more enjoyable for a child.
Finish with a final wear test. Dress the child in the costume and simulate trick-or-treating or a play session. Watch for rubbing points and listen for sagging seams. Tighten straps and re-tape any stressed corners. If the child will be out after dark, add reflective tape in hidden locations for safety. Keep a small repair kit with tape, a few glue sticks, and extra Velcro for on-the-fly fixes.
If you want a visual step-by-step to follow while you craft, a detailed online tutorial provides helpful photos and direction to complement these tips. For ideas on rugged visual additions, see this guide to truck accessories: truck accessories.
For a full step-by-step photo guide you can follow while building, consult this detailed tutorial: https://www.instructables.com/Grave-Digger-Monster-Truck-Costume-12-Steps/.
Final thoughts
Crafting a DIY monster truck costume is not merely about creating a fun outfit; it fosters creativity, engages children in imaginative play, and encourages family or community bonding. As you gather materials, execute the crafting steps, apply vibrant paints, and even incorporate lights, you transform not just a cardboard box but a child’s imaginative experience. This guide is designed to make your costume-making journey enjoyable and rewarding, ultimately resulting in a costume that is both engaging and memorable. Embrace the creative process and witness the joy it brings to your young monster truck enthusiast.