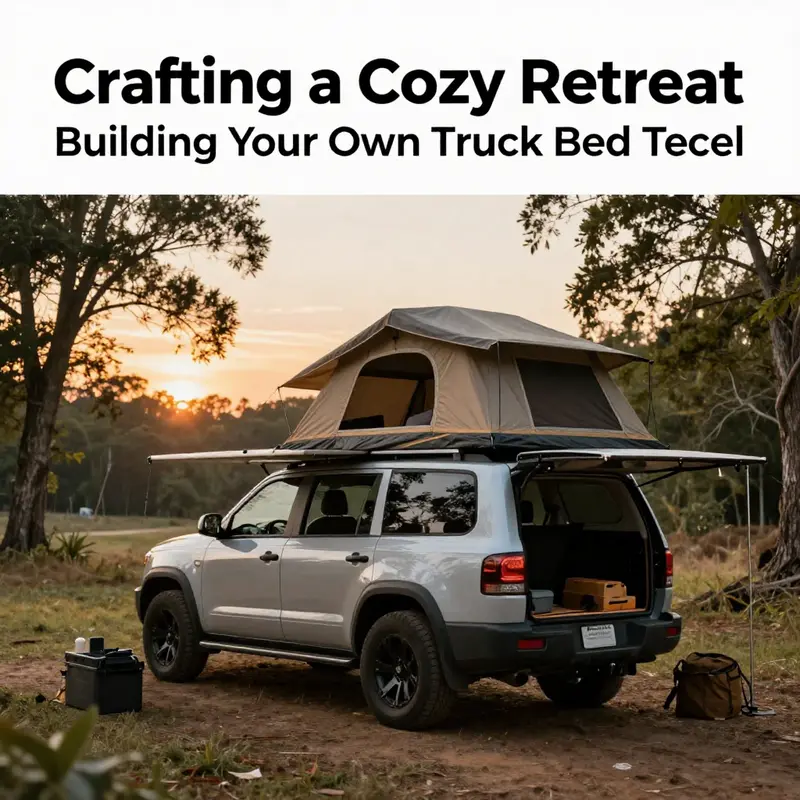
Creating a DIY truck bed tent offers business owners a versatile and cost-effective solution for mobile camping. This approach not only saves you money but also transforms your vehicle into an innovative space that can serve both personal and professional needs. In this guide, we will delve into three critical areas: planning and design, required materials and tools, and a step-by-step build process to help you embark on this exciting project. By the end, you’ll not only have the knowledge to create your own truck bed tent but will also be equipped to offer this unique experience to customers, enhancing your business’s value proposition.
Blueprints on the Back Door: Designing a DIY Truck Bed Tent That Fits, Feels, and Travels With You
A well-planned truck bed tent is more than a shelter; it is a mobile room that travels with your rhythm of adventures. The design phase is where comfort meets practicality. It is where you decide how you will live inside a compact space, how you will anchor it to the bed, and how you will keep weather and wind at bay while you sleep. Planning is not a dry exercise in numbers; it is the blueprint of how you will experience nights under the stars or rain tapping on a fabric roof. A thoughtful approach begins with a clear understanding of what you want to gain from the tent and what you are willing to trade off to get it. The more honest you are about how you camp—the number of people using it, the season, the terrain, and the distance you expect to travel—the more your measurements and decisions will pay off in real life. The bed, the rails, the cab, the tailgate—each element becomes part of a cohesive system rather than a loose collection of parts stitched together at the last minute. In this chapter, planning becomes the backbone of a successful build, guiding every choice from precise measurements to the final fabric choices. A good plan sets the pace for what comes next and keeps the project from drifting into a pile of scrap or a fragile frame that cannot stand up to road vibrations and weather shifts.
Measurement is the first rhythm you must learn. The bed is not a single, flat canvas; it is a three-dimensional space with corners, curves, and rails. Start by measuring the length from the rear of the cab to the tailgate. Note any overhang or protrusions that could interfere with a door or a hinge. Then determine the width inside the bed walls, taking into account wheel wells that steal space from the sleeping area. Height is equally important because it defines headroom and the potential interior layout. Think not just about sleeping, but about moving inside the tent—getting in and out, sitting up, and storing gear without tripping over a loose rope or a collapsed corner. To avoid a cramped feel, add a small margin to your final figures, typically a couple of centimeters or more, to account for the frame thickness and the ease of assembly. Precision here matters because a tent that is too tight will rub and chafe fabric, while one that is too loose may shift, leak, or swing like a sail in the wind. A strong planning mindset helps you anticipate these issues before you cut or weld a single joint.
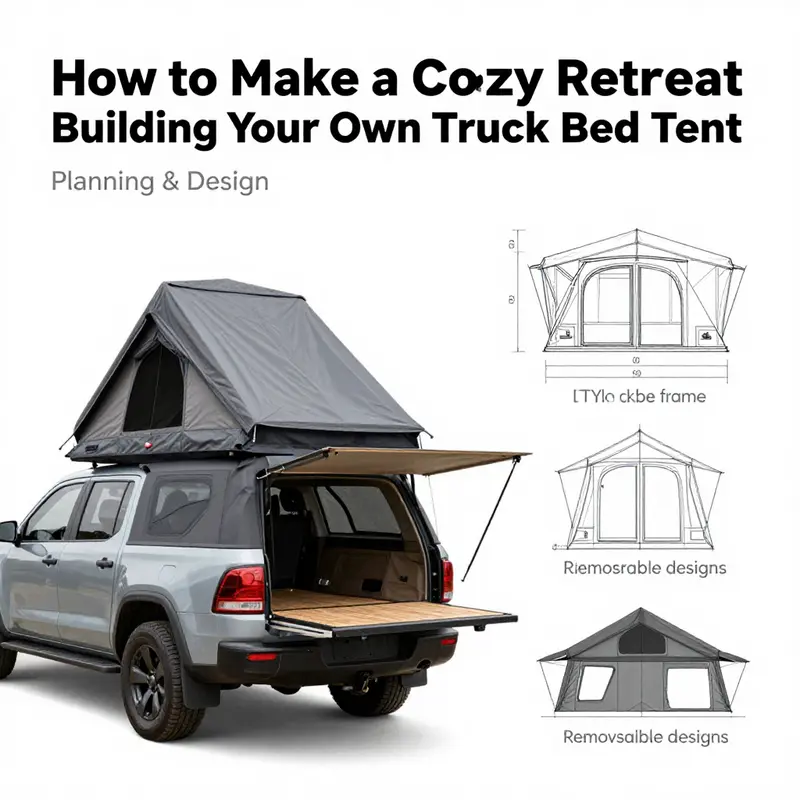
With measurements in hand, you then choose a tent style that matches your camping philosophy and your truck’s personality. The frame-style tent is the most common route for those who crave rigidity and weather resilience. A rigid frame made from aluminum tubing or galvanized steel gives you a stable skeleton that resists wind and road vibes, allowing the fabric to stretch over clean lines rather than sag under strain. The downside is the extra time and effort required to assemble and disassemble, plus the need for precise joints and brackets that won’t shake loose on a bumpy highway. The tarp-style tent offers a far lighter, quicker solution. A heavy-duty tarp or canvas can be stretched over the bed rails and anchored with ropes or straps, trading some protection for speed and simplicity. It can work for mild weather and short trips, but it often lacks interior space and a clean, weatherproof perimeter. Hybrid designs attempt to blend sturdiness with ease. A simple frame might form the roof, while sides are panelled with tarps or canvas for ventilation and flexibility. Each option has a philosophy behind it: weight distribution, ease of setup, and how much you value interior headroom versus external protection. Choosing the right style is a question of what you want to prioritize on a given trip and how often you plan to travel with the setup.
The materials and the materials’ match are the physical language of your plan. For the frame, galvanized steel or aluminum tubing offers durability and resistance to the elements, while keeping weight manageable. Some builders lean toward 1.5-inch diameter tubing for a good balance of strength and flexibility, but the exact size depends on your bed width and the chosen design. The fabric is the last line of defense against rain, dew, and sun. A heavy, waterproof fabric such as 600D polyester or a durable canvas provides long-term performance, but you should also consider UV resistance to prevent deterioration after long exposure to sun. Reinforced stitching at the stress points, seam sealant, and a robust rain fly help prevent leaks where the frame meets the fabric. Hardware choices matter as well. Stainless steel bolts, nuts, and washers resist corrosion, while reliable fasteners like high-tension straps or ratchets keep the fabric taut as winds rise. The idea is to create a system where every joint, every seam, and every fastener works with the others, never against them.
Designing for safety and functionality is the next layer of the plan. The tent must stay put while you drive and during a camping night with gusts rattling the fabric. A triangulated frame is a common approach because triangles are naturally stiff. Secure all connections firmly, whether you are welding a bracket or tightening a bolt with a wrench. Accessibility is equally important. A single large door can simplify entry, or two doors on opposite sides can improve ventilation and convenience when you are turning in or out at night. Ventilation prevents condensation and hot pockets inside the tent, especially when you seal the top and leave a small opening for air to exchange. Storage is not an afterthought but a built-in necessity. Consider pockets or mesh compartments around the interior so you can locate a headlamp, phone, or a small water bottle without crawling across a sleeping bag. Weight distribution is another critical safety factor. A misbalanced tent can affect handling, especially during braking or cornering on uneven roads. Plan for how much the structure adds to the overall weight of the truck, and how it interacts with your truck’s suspension and air flow. If you mount a rigid roof-like structure, ensure it does not interfere with the operation of the tailgate or the cab’s weather stripping. The space inside should feel like a small living area rather than a cockpit of mechanical joints. In this sense, design is as much about minimizing friction and noise as it is about keeping rain out and sleep inside.
Your design process should stay grounded in practicality while inviting creativity. Draw a layout that translates measurements into a physical plan. Consider modularity: can you assemble and disassemble sections quickly? Can you store panels or frames separately for better transport? Modularity is not just an efficiency; it is a safety feature. If one component fails or if bad weather hits, you want the other pieces to be removable or replaceable with limited effort. Modularity also makes it feasible to upgrade later. You might start with a simple side-awning concept and then add a rigid frame later, or vice versa, depending on how your trips evolve. The balance between speed and reliability is the hinge on which your decision turns. As you refine the plan, test becomes essential. First, practice setting up and taking down in your driveway, paying attention to where you need extra clamps, where fabric pulls taut at the corners, and where reflections from the sun may heat the interior. A dry run reveals potential pinch points and awkward angles that you can address before you head into a rainy field test.
A practical mindset in this phase also means embracing thrift without compromising safety. Salvage materials can be a goldmine for a DIY truck bed tent. Old bed slats can become crossbars, and scrap metal from a construction site can yield reinforced corners. The key is to inspect thoroughly for rust, cracks, and weaknesses. Clean everything before assembly to reduce the risk of rust or future degradation. This approach aligns with a broader DIY ethic: build with what you have, but never cut corners on essential structural integrity. The practical craft of designing a tent that travels well is a blend of measured precision and improvisational problem solving. A thoughtful plan recognizes that the bed is a dynamic space. It must stay anchored yet adaptable, secure yet accessible, waterproof yet breathable. This chapter does not demand perfection on the first try; it invites you to iterate. Each build becomes a refined version of the last, with improvements in fit, ease, and weather resilience. In a sense, planning is not a single act but a continuous conversation with your equipment and your ambitions as a camper.
Throughout this process, a simple principle keeps you oriented: design for the long haul, not just the first adventure. A well-planned tent should age gracefully, resisting wind on the highway and dew on a hillside campsite. When you choose materials, you are choosing how long they will serve you before you decide to upgrade. When you cut joints or drill holes, you are deciding how the frame will flex and absorb vibrations. When you sew a seam or secure a rain fly, you are determining whether the interior stays dry and comfortable as storms roll in. The point is not to chase a flawless first attempt but to pursue a robust, adaptable system. A robust system gives you confidence, so you can wake to the sound of birds or rain and know you have shelter that will keep you dry and comfortable through the night. The planning and design stage thus becomes the foundation on which every future trip rests. It is the moment where your ideas take shape as a tangible, tested, and trustworthy campsite in a truck bed. If you walk away with two things from this chapter, let them be this: measure with care, and design with a mindset that welcomes iteration. When those two habits anchor your practice, the rest of the build becomes a sequence of deliberate, confident decisions that respond to the realities of the outdoors.
To keep your planning anchored in practical resources, you can consult guides that discuss mounting options, fit, and accessories. A close look at common mounting ideas helps you think through the best way to attach a frame to your rails or to create a stable, collapsible junction at the corners. For a broader sense of what fits your truck and how to arrange hardware, see the Accessories guide for mounting and hardware considerations. This internal resource can help you compare brackets, clamps, and fasteners, ensuring that your chosen solution is both secure and reversible when needed. At the same time, the planning stage remains anchored to measurements, geometry, and a clear sense of how you want to live inside the space. You may decide to rely on a fixed-frame structure for maximum weather resistance, or you may lean toward a removable, modular design that travels light and packs away compactly. Either path is valid as long as it fits your bed, respects safety, and honors the practical factors of your camping style.
As you move toward turning plans into parts, remember that the journey from idea to shelter is as important as the shelter itself. The act of drafting a plan helps you anticipate constraints and opportunities, and it helps you cultivate a sense of craftsmanship that will accompany you into every road trip. The next chapter will bring you from plan to build, translating these decisions into a concrete frame, fabric, and finishing touches. You will learn how to select materials with a view toward longevity, how to join elements without sacrificing flexibility, and how to seal corners so rain stays outside where it belongs. In the meantime, if you want to explore how others frame their choices around accessories and mounting systems, you can reference the internal guide on truck accessories. It provides a snapshot of common components people rely on to secure a tent and keep gear organized during travel. And when you’re ready to widen your search for inspiration, the external research results point you toward practical, hands-on guides that document real builds and the lessons they reveal.
For readers seeking deeper context about this planning phase, an external resource offers a broader perspective on DIY truck bed tents and the design decisions that go into them. It complements the hands-on approach described here by showing how communities solve similar constraints across different vehicle platforms and climates. See the external guide linked at the end of this chapter for more examples, measurements, and design options that resonate with the approach outlined above. The goal is not to replicate a single blueprint but to internalize the ways thoughtful design anticipates weather, space, and movement on the road.
External resource: external guide
From Frame to Fabric: Essential Materials and Tools for a DIY Truck Bed Tent
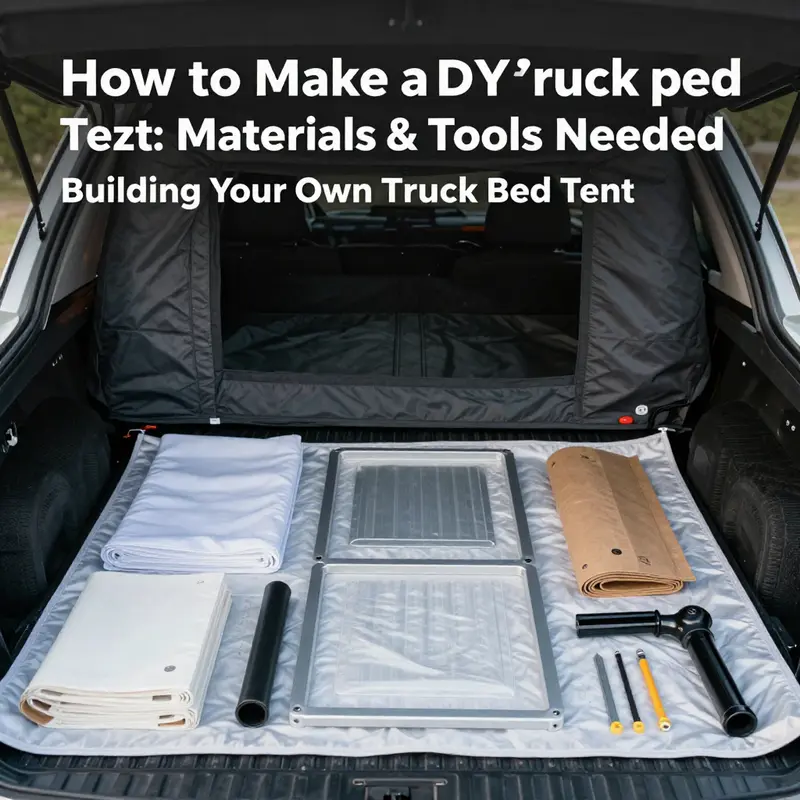
Building a DIY truck bed tent starts with a simple realization: the right mix of frame, fabric, and fasteners can transform a pickup bed into a weatherproof retreat. The materials you choose set the tone for weight, durability, and ease of assembly, while the tools you keep on hand shape how smoothly the project moves from plan to punch list to test. This chapter weaves those choices into a cohesive practice, emphasizing the logic of pairing a frame that survives road vibration with fabric that staves off rain, wind, and sun. It’s about designing with intention rather than chasing a perfect one-size-fits-all solution.
First, consider the fabric as the tent’s skin and its primary shield. Durable, waterproof material is essential, but beyond waterproofing, it needs to resist UV damage and hold up under repeated folding and unfurling. A common, economical path uses a heavy-duty tarp or canvas. Tarp materials, especially if treated for UV resistance, can cover the bed and extend over the cab to create a sheltered cocoon. Canvas offers breathability and a traditional feel, which can help regulate interior humidity and temperature, though it tends to be heavier and may require more careful seam work. The key is to select a fabric wide enough to span the truck bed and reach comfortably beyond the cab, ensuring the sides are tucked well against the truck to minimize drafts. Waterproof seams, or the application of a reliable seam sealant along all joins, are non-negotiable.
Color and reflectivity have more impact than many first-time builders expect. A lighter shade can cut heat buildup during sunny days, while a darker color can help with heat retention in cooler climates. If heat is a concern, consider fabrics with a reflective or light interior lining to bounce heat away or diffuse it. Whatever you choose, the fabric should be sized with generous margins—think at least 12 inches of overhang beyond the bed on each side. This extra fabric becomes a buffer for wind, rain runoff, and wind-driven spray while also accommodating slight misalignments in frame setup.
The frame and support structure form the skeleton that keeps the fabric taut and the shelter standing upright in gusts. Aluminum tubing is often favored for its light weight and corrosion resistance, which matters when you’re dealing with road spray, humidity, and the potential for moisture to wick into frame joints. Steel pipe—galvanized or painted—offers unmatched rigidity, but it adds weight. Some builders mix both: a lighter aluminum upper frame with a steel base for stability where it matters most. A modular approach can be especially forgiving for a DIY project. Consider a simple side-awning style where verticals attach to the truck bed rails and crossbars span across, with a center brace or pole for headroom. A more robust option resembles a hard-top frame, where a rigid box-like structure sits atop the bed and is covered in waterproof fabric. Each approach has its trade-offs in weight, wind performance, and ease of removal.
Salvage and repurposing resources can be a smart part of the build if you’re mindful about safety and cleanliness. Old furniture frames, scrap steel or aluminum tubing, or repurposed bed supports can become core components. The practice of reusing salvaged materials keeps costs down and reduces waste, but it requires careful inspection: clean off rust, verify straightness, and confirm that joints hold under load. If you’re cutting and welding, you’ll want to confirm metal thickness and structural integrity before committing to a mounting point on the truck. A practical motto is to design for modularity—frames that can be disassembled into manageable pieces for storage or transport.
When you move into hardware and fasteners, the goal is dependable tension that won’t loosen with vibration. Bolts, nuts, and washers are the base; you’ll also want brackets or gussets to reinforce corners and joints. Quick-release clamps can simplify assembly and disassembly, especially for a design that needs to be removed before driving or when space is tight in a garage. For fabric attachment, consider rivets, grommets, or heavy-duty sewing along seam edges. A robust corner reinforcement helps resist tearing at high-stress points. Cordage and tensioning systems—durable rope, bungee cords, or weather-resistant straps—keep fabric taut and minimize flapping in wind. In all cases, select hardware with corrosion resistance appropriate for your climate; outdoor conditions demand materials that won’t rust or lose their grip after a few rain showers.
Attachment points are the connective tissue that holds the entire structure to the vehicle and to the ground when needed. Trucks typically offer one or more dependable anchor points along the bed rails. If your design uses side supports, ensure there are solid attachment points that won’t shear under load. In cases where you want to enhance stability on soft ground or in a windy site, add ground stakes or weighted anchors at the corners. If your design leans toward a more permanent feel or a roof-tent-inspired setup, you may explore clamps or brackets that can attach to bed rails or other fixed points on the truck. The objective is to avoid relocating frame anchors every time you park at a campsite. A thoughtful approach to anchoring not only reduces movement in wind but also helps distribute weight evenly so you don’t accentuate bending forces that could damage the bed or frame.
Insulation and interior comfort can’t be overlooked if you’re planning longer stays. Foam insulation panels or lightweight fleece liners can create a buffer against ground chill and nighttime drafts. Insulation is especially valuable in damp or cool climates, turning a drafty shelter into a more livable space when temperatures drop. You don’t need to overdo it; a thin layer that reduces heat loss on the bed floor can make a meaningful difference, especially when paired with a small, compact sleeping mat. If you’re carrying electronics for lighting or climate control, a simple interior pocket system helps keep cords tidy and prevents snags on fabric seams.
Tools are the quiet engine of the project. A good measuring tape ensures you don’t cut fabric too short at the edges; a sharp utility knife or fabric scissors makes clean, accurate cuts. A drill with a range of bits is essential for drilling mounting holes in brackets or crossbars, while a socket wrench set helps tighten bolts and brackets without stripping the heads. A rubber mallet can help seat fittings without damaging metal. Pliers, a utility knife, and a level round out the core kit. For metal joints, a soldering iron or brazing torch might come into play if you’re fabricating custom joints. If you’re building a truly modular design, you might also add simple hand tools like clamps, a square, and a chalk line to ensure straight alignment across the frame.
The process hinges on balancing practicality with durability. Start by laying out dimensions for your truck bed: measure length, width, and height, then sketch a frame profile that minimizes obstruction of the bed’s true storage potential. For a simple side-awning, the verticals attach at the front and rear of the bed, and crossbars span the top to form the roof. A center brace can add headroom without turning the whole system into a heavy, rigid box. For a hard-top frame, envision a lightweight box that sits flush with the bed rails; the fabric drapes over the sides and over the cab with ample overhang. With fabric cut and reinforced corners, you can begin attaching to the frame using fasteners, making sure to test fit before finalizing. A few quick tests at home—checking for water runoff in a mock rain scenario and confirming that the frame holds under light gusts—can catch issues before you’re miles from civilization.
The inclusion of an internal link to our broader tooling and accessory ecosystem can help you refine the process. For builders who want a quick reference to compatible add-ons and mounting options, the Accessories hub offers curated ideas on how to extend or customize a truck bed tent setup. This is where you can explore additional hardware, mounting brackets, and organizational pockets that blend with your frame and fabric choices. See the resource here: truck bed tent accessories.
Finally, the broader context matters as you assemble your toolkit. The community knowledge base emphasizes modularity and reusability, encouraging builders to plan for easy disassembly when needed. The goal isn’t a single rigid construct but a flexible system you can adapt as seasons change or as you upgrade your vehicle. This adaptability is what turns a simple shell into a reliable, go-anywhere shelter. You’ll find that the most satisfying builds pay close attention to the interplay between fabric tension and frame rigidity. A taut skin minimizes rain seepage and wind flutter, while a strong, lightweight frame prevents the shelter from acting like a sail in gusts.
While the chapter above emphasizes the materials and tools, the reality is that the best DIY truck bed tents emerge from informed improvisation. You’ll refine your fabric choice after you test a few patterns, adjust crossbar lengths for optimal headroom, and determine the best clamp configurations for your truck model. The beauty of a DIY approach lies in its responsiveness: you can always alter the frame length, swap out fabric panels, or rework attachment points to suit a new vehicle or climate. The practical discipline—measuring twice, cutting once, testing in a driveway before a trip—becomes the bedrock of a shelter that remains comfortable across seasons and miles.
In closing, remember that the path from plan to pitch hinges on a sequence of careful material choices and the right toolkit. Materials set the baseline for durability and comfort, while tools translate your idea into a real, functioning shelter. The conversation between frame and fabric, between anchoring and insulation, frames the entire journey from scratch to campsite. With these insights, you’re equipped to design a truck bed tent that respects your bed’s geometry, respects weather, and respects your budget. The result isn’t simply a sleeping space; it’s a compact, adaptable campsite that travels with you, built from the things you chose and the hands you use to assemble them. If you want to explore more about accessories that complement this setup, follow the internal link to our dedicated hub. And when you’re ready to broaden your horizons or test a different, eco-friendly approach, an instructive, hands-on example can be found in the external resource linked here: https://www.instructables.com/DIY-Truck-Bed-Tent-Using-Recycled-Materials/.
Bed-Side Shelter: Designing and Building a DIY Truck Bed Tent That Turns Your Truck into a Campsite
If you’ve ever slept under a cold night sky in a pickup bed or watched a weathered camping tarp flutter against the wind, you know the appeal of a dedicated shelter built literally around your vehicle. A DIY truck bed tent is not just a clever tent idea; it’s a portable, adaptable living space that borrows the resilience of the outdoors and the functionality of a well-made vehicle. The goal is simple in concept but nuanced in execution: create a weatherproof, comfortable sleeping area with enough headroom to roll over, stash a few essentials, and, ideally, detach or collapse quickly when the ride pulls into town or the weather shifts. The best builds feel almost invisible when they’re stowed, but when they’re pitched, they transform a pickup into a tiny, self-contained campsite. The process flows from careful planning to practical assembly, with attention to materials, joints, and method that keep the project affordable without sacrificing durability. What follows is a cohesive path through that journey—an approach grounded in real-world practice and the quiet creativity that comes from using reclaimed or repurposed parts alongside sturdy, purpose-built components. It’s a pathway that encourages experimentation while offering a reliable framework you can adapt for your own truck, climate, and style of adventure.
Begin with a clear plan. Measure your truck bed with care: length, width, and height at the rails, noting any wheel wells or irregularities that might complicate a uniform frame or a single-piece fabric panel. Decide whether you want a fixed-frame tent that stays in place for weeks on end or a removable or convertible design that makes it easy to clear the bed for hauling gear or transporting items that don’t travel well with a shelter attached. The most straightforward and cost-effective option for many builders is a simple side-awning style tent, a fabric canopy stretched over a light frame that anchors to the bed rails. This approach minimizes weight, reduces wind catch, and allows you to flip the tent up or down as needed. It’s also forgiving for beginners because the frame doesn’t have to bear the full weight of a rigid box; instead, it supports the fabric and a soft inside environment that can be padded with a mattress and small storage pockets.
As you sketch the layout, imagine two key sleeping zones: a single cozy space for one traveler or a compact double arrangement for two. The zone decision influences the frame height, the amount of headroom you need, and how the fabric panels will wrap around the sides. A tunnel tent or a low-profile canopy can be designed to span the width or length of the bed, with openings oriented for quick access to gear or to the tailgate when you’re parked. A simple, foldable awning-style tent can be built to fold back along one side of the bed, which makes it easier to access the cargo space or to drive with the setup stowed. If you’re leaning toward a more robust solution, think about a hard-top style roof tent variant that sits flush on the bed and uses a rigid frame, but be mindful that those builds demand stronger joints, precise mounting, and sometimes professional assistance. The design choice should reflect the climate you’ll camp in, how often you’ll pack and unpack, and how much you value speed versus longevity in set-up.
Materials and tools set the tone for what’s possible. The frame is the backbone, and the choices often come down to weight, corrosion resistance, and ease of assembly. Aluminum tubing is a common favorite for its lightness and stiffness, with lengths in the neighborhood of 4 to 6 feet enabling a modular build that can be disassembled for storage. Steel can also work, particularly if you source lighter-gauge piping or repurpose metal from scrap piles, but it will weigh more and require more effort to tune for corrosion resistance. The tent fabric should be waterproof and UV-resistant to handle sun exposure and prolonged rain. A durable 600D polyester or canvas is a reliable starting point, offering a balance between weight, durability, and breathability. The sides can be reinforced with extra panels or weatherproof flaps to reduce drafts and to help channel rain away from the sleeping area. For a simple, lower-cost project, reclaimed textiles or tarps can be repurposed if they’re still in good condition and free of chemical residues or odors that would bleed into sleep. Always prioritize waterproofing at the seams; even the best fabric benefits from seam sealant or a lightweight rain fly to serve as a secondary shield against leaks during a downpour.
Hardware matters. You’ll need bolts, nuts, washers, brackets, and robust fasteners that can withstand repeated setup and takedown. Quick-release clamps and brackets are especially helpful in a removable design, allowing you to detach the tent from the rails without wrestling with stubborn hardware. Don’t overlook simple, practical details: grommets or reinforced rivets in the fabric help anchor the sides to the frame. Velcro straps or tension ropes can keep the fabric taut while still letting you loosen things when you want to store the tent. A ground strap or anchor system using ratchet straps or stakes is essential if you’re camping in sunny or windy environments where wind can catch the fabric like a sail. Thinking through these connections early prevents a lot of headaches later when you’re trying to set up in the field.
A note on the sourcing mindset: salvage is not only budget-friendly, it’s often a creative impulse that yields surprisingly robust results. Old bed frames, scrap metal, or disused furniture parts can become the backbone of a frame that will outlive many commercial kits. The caveat is to examine every piece for integrity and to clean it thoroughly before you incorporate it into your build. If you’re using salvaged metal, inspect for rust, sharp edges, and structural fatigue, and deburr or heat-treat as needed before you work with it. If you’re repurposing wood or slats, ensure they’re dry and free of insects or rot. The combination of salvaged pieces with new hardware can create a sturdy, resourceful build without breaking the bank, and it invites a degree of improvisation that is part of the DIY ethos.
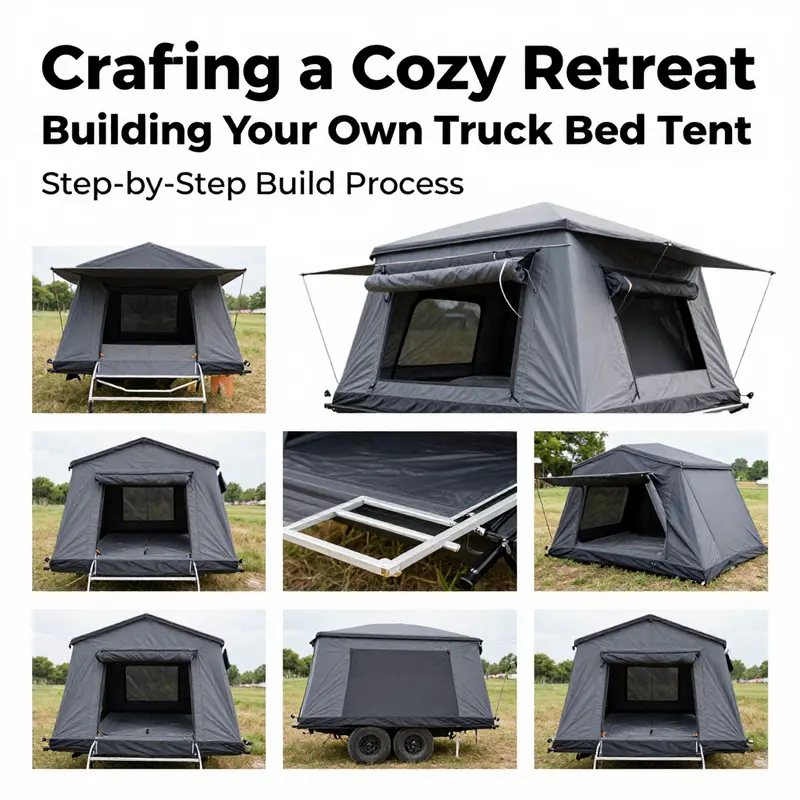
When it comes to the actual frame, most builders favor a rectangular or arched configuration that spans the bed and attaches securely to the rails. A common, accessible route is to mount two vertical supports at the front and rear corners of the bed and connect them with crossbars along the top. You can design the joints to be foldable, so you can collapse the frame into a compact bundle for storage. The goal is to achieve a structure that is rigid enough to resist light wind and bouncing during road use but not so heavy that it defeats the purpose of a portable shelter. A center support is optional but often helpful for headroom and to reduce sag if the fabric panels are thick or if you’re using a rigid top. The exact dimensions will vary with your truck model, but a practical target is to maintain at least 2 to 3 feet of vertical clearance in the middle of the bed, ensuring you can sit up without banging your head and comfortably position a small mattress or sleeping pad.
With the frame in mind, the next layer is the fabric work. Cut the fabric to size with generous margins. Allow about 6 to 12 inches of overhang on each side to accommodate securing the fabric to the frame and to permit a little wiggle room for wind. The attachment method can be as simple as sewing channels for the frame bars or as robust as rivets and grommets that thread through corner pockets and the frame joints. If you’re aiming for a truly snug, weatherproof envelope, consider reinforcing the corners with extra stitching, adding a waterproof seam tape along critical seams, and running a lightweight interior liner to tame condensation. The fabric should drape smoothly, with no major wrinkles that could snag on the frame or catch rainwater as it runs off the canopy. The front opening, whether left open for airflow or fitted with a zipper or flap, should align with the bed’s access point so you’re not contorting to climb inside.
Weatherproofing is more than a rain shield; it’s a habit of design. A dedicated rain fly, a separate outer layer that can be deployed over the main tent during wet conditions, is a smart choice. This second layer should be light enough to roll up when not in use but substantial enough to shed rain away from the sleeping area. Seams demand attention; sealants create a waterproof seam that lasts several camping seasons with proper care. If you’re building a sizable tent, ventilation becomes important. Poor airflow can lead to condensation buildup inside the shelter after a warm night, which can dampen gear and disturb sleep. A small vent or mesh panel at the top helps circulation without inviting rain. If your climate includes strong sun, a reflective outer fabric can help keep temperatures down inside the tent by reducing heat buildup. Bright colors or reflective bands also provide daytime visibility when you’re moving around the campsite. Inside, a compact mattress or sleeping pad, perhaps with a thin foam topper, can transform the bed into a comfortable retreat. Small storage pockets sewn into the liner become useful places for headlamps, chargers, and a paperback or book—the kind of possessions that keep a road trip from feeling like a string of utilitarian stops.
Setting up and testing the tent is the last critical phase before capitalization on real trips. Start in a driveway or yard before you head out. Erect the frame, attach the fabric, and walk through a mock rain test by using a garden hose or sprinkler to assess water flow and any potential leaks. Shake the frame to see how the joints hold up under a light breeze and check for any fabric sag that could channel rainwater toward the interior. It’s a chance to observe how the overhang works and whether the rain fly effectively deflects water. If you notice any stiffness in the joints or if a limb seems to bind, disassemble, adjust, and reassemble with a touch more generous tolerance. A practical reminder: a ground tarp beneath the tent can protect the fabric from moisture and abrasion while adding a small buffer between the sleeping area and the damp ground. This matters especially if you plan to camp on uneven terrain or damp soil after a night of rain.
The design should also consider modularity. A tent that can be broken into lighter segments makes storage easier and allows you to tailor the footprint for different trips. A foldable joint or a quick-release clamp lets you collapse the frame in minutes, a feature that matters more on days when rain or a long highway stretch tempts you to stay in town instead of pressing onward. Modularity also invites future customization: you might start with a side-awning style tent and later upgrade to a more rigid, hard-top variant if your budget or confidence allows. The trick is to anchor your decisions in practical needs: how often you’ll use the shelter, how much gear you bring, and how much you value speed of setup versus durability in challenging weather.
If you’re thinking about the broader ecosystem around a truck bed tent, you’ll find value in accessories that keep the interior organized and the exterior tidy. For example, a compact set of organizers, LED lighting options, and mounting points for a small portable stove or a charging station can turn the bed into a functional micro-campsite. The important thing is to keep the design modular so that you can add or remove components without dismantling the entire structure. For readers who want to explore these add-ons further, there is a practical collection of accessories that complements a DIY build and can help you tailor the shelter to your particular style of travel. Accessories is a good place to start when considering what pockets, straps, or mounting options could integrate with your frame. While you don’t have to implement every idea at once, it’s nice to have a plan for how you’ll evolve the shelter as you gain experience and decide what trips you value most.
Real-world stories illuminate the spectrum of possibilities. A 2025 project documented on a Chinese blog describes a free-standing, foldable truck bed tent assembled from salvaged stainless steel shelves and abandoned furniture parts. The builder used manual support rods and adjustable angles to carve out a stable shelter that could be deployed without heavy equipment. The result was a weather-resistant space with enough headroom for a couple of sleeping mats and a small storage pocket system integrated into the fabric panels. It’s a reminder that ingenuity often thrives where resources are scarce and patience is the guiding discipline. Another example from 2024 showcases a smaller, more minimalist setup in a compact pickup: a metal frame with a waterproof tarp section that closed on three sides. That design creates a snug, enclosed sleeping space perfect for weekend getaways where wind and cool nights could otherwise disrupt a more exposed sleeping arrangement. These anecdotes aren’t recipes; they’re threads in a broader tapestry of DIY practice, each highlighting a different balance between weight, cost, durability, and quick setup. What binds them is a shared understanding that a truck bed tent is about leveraging existing space—your vehicle’s geometry and your own willingness to tettle a few joints—into a shelter that travels with you.
For readers who want to see the practical steps laid out in a visual format, a detailed, step-by-step tutorial from a trusted DIY source offers diagrams and user tips that align with the approach described here. The guide emphasizes recycled materials and common tools, guiding you through measuring, framing, fabric cutting, and weatherproofing with an eye for real-world constraints. This kind of resource complements the narrative here by confirming that a successful build is less about heroic engineering and more about thoughtful planning, careful execution, and a willingness to iterate based on what you learn from your own driveway tests. If you’re hoping to add a practical reference to your build journal, consider bookmarking that visual walkthrough as a companion to the plan you’ve started in your own workshop. Its diagrams can illuminate the frame geometry and the way fabric panels should contour to the rails, while its checklist can jog your memory on the small but essential details like seam sealing or grounding the tarp properly against rising winds.
As you prepare to embark on your own project, remember that the best DIY truck bed tent respects both restraint and ambition. It should be light enough to move around without a forklift but sturdy enough to resist a gust and weatherproof enough to remain comfortable after a night of rain. It should be modular, so you can scale the design up or down depending on the season or the trip. It should also be adaptable, so you can upgrade individual components—perhaps moving from a simple side-awning to a more integrated faux-wood or metal-frame shelter that echoes the aesthetic you love in the rest of your rig. The process you follow becomes a reflection of how you travel: practical, patient, and a little bold in the face of a blank canvas. Ultimately, the chapter you write with your own hands is a record of your own adventures—an invitation to wake up at dawn, look out over a new horizon, and know that the shelter you built with your own hands is ready to carry you there. The road, after all, is not just a route but a canvas, and your truck bed tent is the frame that holds the story you’ll tell under open skies.
For readers who want to see how this idea connects with broader vehicle-camping concepts, a curated look at related builds and accessories can help shape a future upgrade path. Consider consulting the online catalog of shelter and accessory options as a way to align your build with the way you use your truck in daily life and on weekend escapes. The key is to keep the plan flexible and the expectations realistic. A well-built DIY tent can be a faithful companion for many trips, especially when you invest time in a robust frame, careful fabric selection, and solid weatherproofing. And if you ever need a quick reminder of the philosophy behind these projects, remember that salvaged parts, patient measurements, and a clear design goal are often more important than any single clever trick. Your vehicle is already a kind of shelter on wheels; the tent simply makes that shelter more intentional and more inviting when you pull into a campsite after a long day on the road.
External resource for additional context and a detailed visual walkthrough: you can explore a comprehensive step-by-step guide that emphasizes recycled materials and practical workmanship at The Adventure Blog. It offers diagrams and user tips that complement the approach outlined here and can help you visualize the frame geometry and the fabric integration in a way that complements the narrative of this chapter. https://www.theadventureblog.com/diy-truck-bed-tent-guide/
Final thoughts
Building a DIY truck bed tent is not just a fun project; it is an innovative solution that can expand your offerings and enhance customer experiences in the mobile camping industry. By understanding the planning, required materials, and the building process, you can create a comfortable and functional space that meets diverse needs. This valuable addition could elevate your business profile, attract outdoor enthusiasts, and provide them with memorable adventures. As you embark on this journey, remember to seek inspiration, experiment with designs, and possibly even consider extending these creations to your customers.