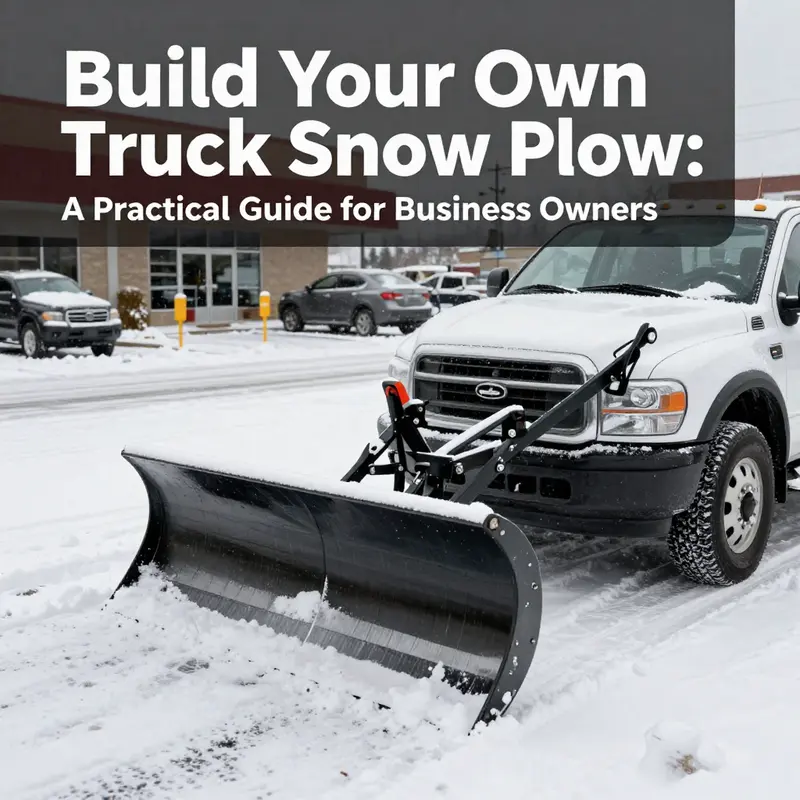
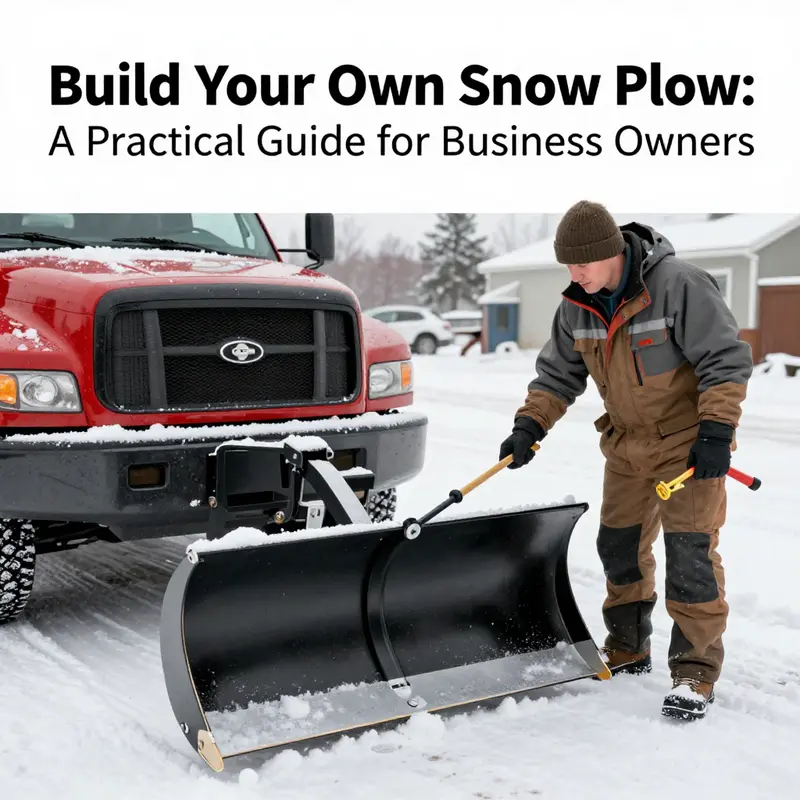
For business owners in snow-prone regions, investing in a truck snow plow can dramatically improve operations during winter. Building a DIY snow plow not only saves costs but also equips you with a custom tool suited to your specific needs. This guide navigates through the essential steps of gathering materials, designing a robust blade frame, attaching the plow to your vehicle, and ensuring safety during operation. Each chapter outlines practical aspects that reflect the DIY ethos, enabling you to enhance snow removal efficiency while fostering a resilient operational approach.
Foundations in Steel: Gathering Materials for a DIY Truck Snow Plow
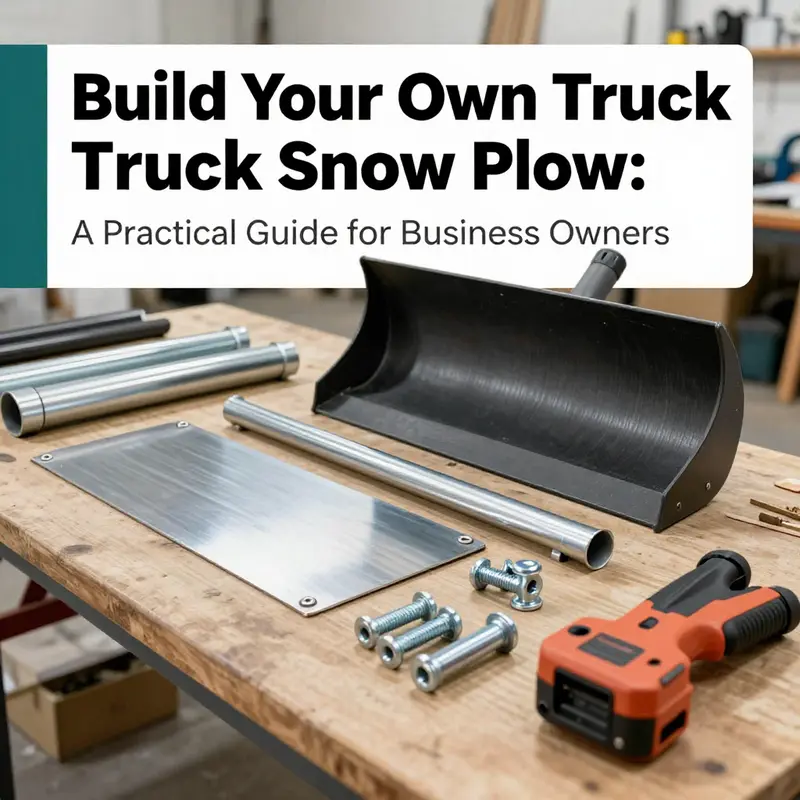
When you set out to build a DIY truck snow plow, the materials you choose aren’t just supplies; they shape how well the machine will perform through long winters, through packed drifts, and along narrow driveways. Durability, functionality, and safety begin with what you collect, how you assess each piece, and how thoughtfully you assemble them. The base frame must endure constant push, vibration, and sometimes rough terrain. The blade needs to shed snow smoothly while resisting wear. The mounting hardware and lift system must translate your effort into reliable force without flex or slip. In short, gathering the right components is the foundation of a plow that can be trusted to clear paths when it matters most, not just a weekend project that looks impressive in a shop. Your material choices set the tone for performance, noise, and maintenance long after you first bolt everything together.
A sturdy base frame is the first consideration. Start with a metal frame strong enough to bear the load and the leverage of your plow as it pushes against snow and ice. Steel offers exceptional strength and stiffness, which makes it a familiar choice for a high-stress front attachment. Heavy‑duty aluminum can reduce overall weight, which may help on lighter trucks, but it can also demand closer attention to mounting rigidity and corrosion protection. A practical route for a DIY build is to source a combination of materials—perhaps a steel backbone with aluminum cross-members—to balance strength and weight. Scrap metal from old machinery or discarded vehicles can be a cost-effective option, but the decisive rule is to inspect every candidate piece for cracks, lamination, or signs of fatigue. A compromised frame will reveal itself under load, often through hairline fractures or flexing where it should be rigid. By selectively selecting timbers of known integrity and avoiding parts with visible damage, you build a frame that can tolerate repeated plowing cycles without sudden failure.
The plow blade itself is the second pillar of reliability. For most DIY applications, the blade should be constructed from high‑strength, abrasion‑resistant material. A common starting point is a 1/4‑inch thick steel plate, chosen for its balance of rigidity and wear resistance. A reinforced polyethylene blade is another route, offering reduced weight and excellent impact resistance, though it may wear differently than steel. The intended use should guide your choice: lighter residential snow can be handled with a polyethylene blade, while heavy, packed drifts demand steel’s toughness. The blade length and height should be matched to the vehicle’s width and the terrain you plan to tackle. A longer blade fans out the clearing path but introduces more leverage, so plan your geometry carefully to avoid undue stress on the frame and mounting points.
Mounting hardware constitutes the third pillar of a safe, stable install. The ruggedness of your bolts and brackets matters every time you start the engine and engage the plow. Choose grade 8 bolts and heavy‑duty brackets built to hold significant loads without loosening under vibration. U-bolts, backing plates, and reinforced brackets should be sized for your vehicle’s frame and bumper design. The mounting system must secure the frame to the vehicle with minimal flex while distributing the load across stronger points of the chassis rather than concentrating stress in one area. If your truck has a solid front bumper, you can bolt directly to it; if not, you’ll want to fabricate robust brackets that spread load into the frame and radiator support. Whatever the configuration, ensure all fasteners are clean, properly torqued, and protected from corrosion with appropriate coatings. The aim is a mount that stays tight under winter conditions, yet can be inspected easily for any developing wear.
A lift system, whether hydraulic or mechanical, is where practical engineering meets real‑world usability. Hydraulic lift offers smooth, powerful motion and precise control. If you pursue hydraulics, assemble a compact system that includes a pump, a cylinder, hoses, and a reservoir. Salvaging these components from old equipment can significantly cut costs, but verify cylinder seals, hose integrity, and pump output before installation. A fully functional hydraulic circuit should provide reliable lift and tilt, enabling you to raise and lower the blade with modest effort and predictable behavior in cold weather. If you opt for a mechanical system, cords, cables, and a safe winch provide a simpler path that many DIY builders prefer for its transparency and ease of repair. In any case, plan for a control mechanism that responds quickly and feels intuitive to operate from the driver’s seat—whether through a joystick, a lever, or a simple pull‑to‑lift setup. The choice of lift technology will steer the kind of maintenance you’ll face in the field, so weigh reliability and ease of service as heavily as initial cost.
Control mechanisms bring the system to life. A robust control setup must translate raw force into controlled movement with safety and accessibility in mind. A driver‑accessible control panel should house a lever or joystick linked to the lift mechanism, with clear feedback so you know that the blade is in the position you intend. Incorporate a simple fail‑safe or emergency stop to prevent accidental operation, especially when you’re clearing sidewalks, curbs, or near pedestrians. A well‑placed control interface reduces fatigue and helps you keep full attention on the road and the snow ahead. Remember that the reliability of the control system also depends on clean wiring, secure shielding from moisture, and a straightforward route for diagnostics in case a switch or sensor begins to fail during a storm.
Skid shoes and a trip‑edge feature are often overlooked but quietly essential for protecting both your plow and the surfaces you clear. Rubber or polyurethane skid shoes along the bottom edge of the blade help minimize wear on pavement and keep the blade from scraping unevenly as you begin a pass. A trip edge—implemented via a hinge, spring, or other pivoting mechanism—allows a section of the blade to drop or give way when it encounters an obstacle. This feature protects your truck, the plow, and the surface beneath from sudden impact and helps prevent misalignment after minor impacts. These elements may seem subtle, but their effect on the longevity of the setup and the quality of the plowed path is substantial over the course of one or more harsh winters.
Beyond the mechanics, the sourcing approach matters as much as the design. The discipline of gathering parts is as much about improvisation as it is about careful engineering. If you’re drawn to repurposing, look for structural steel that’s free of cracks and safe for cutting and welding. Old machinery frames can yield heavy components for the base and supports, provided they’re thoroughly inspected. The blade and wear parts can come from salvage as well, but ensure you’re not trading durability for convenience. Treat every part as a candidate for a measured test: check for straightness, verify thickness, and confirm compatibility with your mounting and lift hardware before you start cutting. In the end, the most reliable DIY plow may be born from a balanced blend of reclaimed material and new, purpose‑chosen pieces that address your specific snow clearing needs.
As you assemble your material plan, it helps to visualize how the components will work together under load. The frame should present a rigid, U‑shaped silhouette when viewed from the front, with vertical supports anchored to the blade ends and crossbars tying the structure together to resist bending. The blade should sit flush with the frame, allowing the cutting edge to track straight and true along the pavement. The mounting brackets must maintain alignment even as you raise or tilt the blade, and the lift system should offer predictable resistance to help you modulate depth. In practice, this alignment begins with careful cutting, welding, and curing of welds; it continues with precise bolt torque and tested joint integrity; and it ends with a test run in a safe area where you can observe how everything behaves when the snow begins to fly. The goal is a plow that holds its geometry through repeated use, returns cleanly to neutral when you lift, and never surprises you with sudden misalignment or dangerous looseness.
To help keep this process grounded, consider consulting accessible resources that reinforce your understanding of safe fabrication and assembly. For instance, a widely referenced guide demonstrates how to repurpose common household scrap into a functional plow, emphasizing stability, lift mechanics, and safe installation. While not a full truck‑mounted version, it captures the essence of low‑cost, high‑efficiency snow removal using scrap parts and clear engineering thinking. For a broader look at practical, up‑to‑the‑minute guidance, you can explore the Accessories page for compatible hardware and mounting options that fit a range of frame designs. Accessories can help you locate brackets, fasteners, and supports that align with the scale of your build, keeping you focused on the task of turning salvaged metal into a dependable snow‑clearing tool rather than chasing parts endlessly.
In addition to the hands‑on craft, it’s helpful to understand how others in similar settings approached the problem. Real‑world inspiration is abundant: communities that assemble scrappy plows from leftover metal and simple mechanisms have demonstrated that resilience often comes from careful planning, steady hands, and a willingness to reuse what’s already available. Those stories remind us that a robust plow does not need to break the bank; it needs to be thoughtfully designed, properly reinforced, and tested in a controlled space before facing a storm. The calm, disciplined path from scrap to street readiness mirrors the calm we seek when winter storms arrive—efficiency born of necessity, safety born of attention to detail, and results that keep the neighborhood moving when highways grind to a halt.
As you push forward, remember that the journey from material gathering to finished plow is not merely an exercise in metalwork. It is a test of foresight: selecting components that tolerate cold, moisture, and heavy loads; choosing connections that stay tight under vibration; and engineering a plow that remains controllable as you navigate tight turns and uneven pavement. It is a plan that respects both the vehicle’s capabilities and the environment in which it operates. And above all, it is a process that rewards careful prep, measured experimentation, and a willingness to adapt parts when a design constraint reveals itself under real snow conditions. The goal is not just a tool, but a reliable extension of your winter operations—a small but meaningful way to keep pathways clear and communities moving when the storm rages outside.
External resource: How to Build a Snow Plow from a Recycled Hot Water Tank, published January 2026, offers additional step‑by‑step insight into transforming salvage into a durable plow design. https://www.instructables.com/How-to-Build-a-Snow-Plow-from-a-Recycled-Hot-Water-Tank/
Engineering the Backbone: Designing a Robust Blade Frame for a DIY Truck Snow Plow
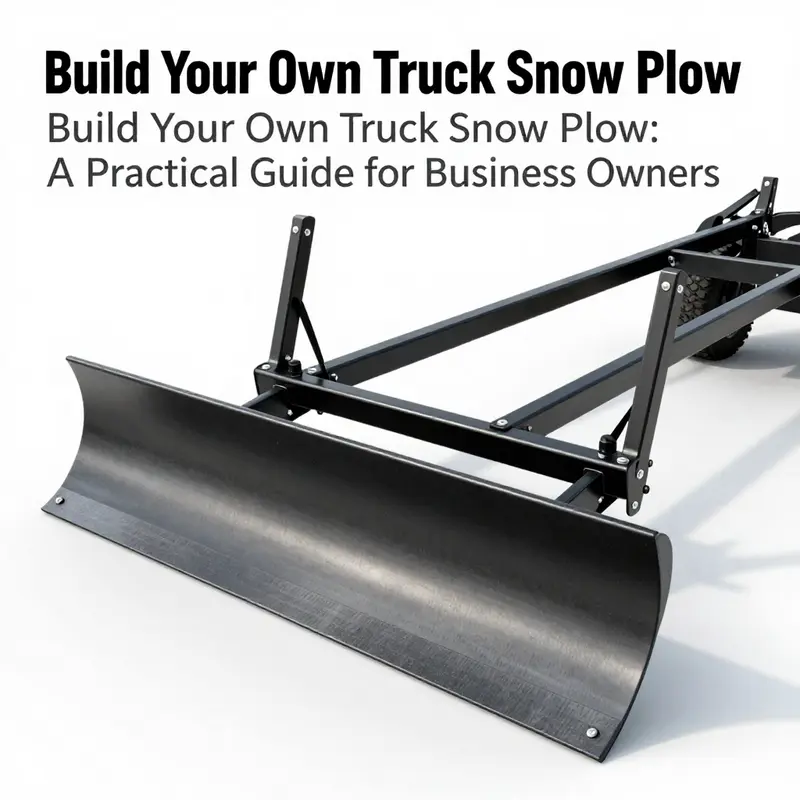
The blade frame is more than a mounting point or a decorative shell; it is the backbone of a DIY snow plow, the part that must translate vast winter forces into controlled, predictable pushing action without buckling, bending, or failing at a critical moment. When you design this frame, you design the machine’s reliability, its ability to clear a driveway, a lot, or a narrow rural road after a heavy storm. The goal is a structure that can absorb lateral pushes against packed snow, vertical loads as the plow bottoms out on the surface, and the occasional encounter with curbs, rocks, or buried debris, all while staying attached to the vehicle and maintaining safe operation under load. Because the frame is the platform that transfers force into the vehicle’s chassis, it deserves careful material selection, geometry that minimizes flex, and joints that resist fatigue after many hours of use in cold weather and variable snow density. In practice, the design begins with the choice of material and the overall geometry that will form the frame’s silhouette on the front of the truck. Heavy‑duty steel tubing is a natural starting point. A common guideline is to select tubing in the vicinity of 40 millimeters in cross‑section, forged into a rigid rectangle or a trapezoid that can bracket the blade and connect securely to the truck’s tow bar or hitch receiver. The exact size should reflect the truck’s width and the snow volume you anticipate, but the underlying principle remains constant: a stiff, welded skeleton that resists twisting and bending under load. The frame must also incorporate strong reinforcements at the joints. Diagonal bracing or gussets at key intersections dramatically reduce flex when the blade meets resistance. These supports are not decorative; they’re load paths that keep the frame from yawing under lateral pressure or from bowing when the blade rides over a stubborn snowbank. The choice of welding technique matters here as well. MIG welding offers speed and good ductility for typical steel sections, while stick welding can provide deeper penetration in thicker joints when you’re anchoring the frame to heavier brackets or to a reinforced bumper area. The result should be joints that feel solid to the touch and perform reliably in subzero temperatures, where a marginal weld can become a point of failure as metal contracts and expands with the cold. Force management is a critical theme in shaping the blade frame. You need a design that handles both the horizontal push of the snow and the vertical load that occurs as the blade presses into the surface. The forces are not uniform; they spike when you strike a compacted patch or catch an obstacle, then drop as the blade climbs over a mound of snow or digs deeper into softer drift. A robust frame channels these forces into the vehicle rather than letting them radiate into delicate mounting points or the bumper itself. To achieve this, many builders rely on a high‑strength steel option, such as ASTM A36 or an equivalent grade, and they reinforce the load paths with welded gussets and cross‑members that tie the lower edge of the blade to the frame with minimal play. The pivot mechanism, a sometimes overlooked but essential element, provides a controlled way for the blade to tilt slightly as it travels. A well‑designed pivot reduces stress in both the frame and the vehicle, allowing the blade to ride with the contour of the surface, maintaining better ground contact and reducing the chance of gouging or dragging. The simplest path is a heavy‑duty pin or ball joint that connects the blade to the frame at a defined axis. The tilt capability helps when you must negotiate curbs or sidewalks or when you want to strike a shallow angle to push snow into the curb line without burying the wheel wells. This pivot must be sized for axle‑to‑frame loads, hardened where exposed to wear, and accompanied by a straightforward adjustment method so you can dial in the angle of attack during operation. A practical blade frame also accommodates a replaceable wear edge. This feature is a smart investment because the bottom edge of the blade takes the brunt of abrasion against pavement, ice, and debris embedded in the snow. A wear edge made from hardened steel or even a flexible material like polyurethane can extend the life of the main blade while protecting the frame and the surface you’re clearing. It gives you a cheap, quick barcode to the blade’s service life: when the edge wears thin or chips, you swap it without reworking the primary structure. Sizing the frame is about balancing the vehicle’s footprint with the snow load you expect. A broader frame clears a wider swath, which is advantageous on wide drives or in rural settings where time matters, but it also increases the bending moment at the mounting points and raises the bar for the structural strength of the assembly. A reasonable target range might be a frame width that approaches the vehicle’s overall width, with a blade thickness in the 3–8 millimeter band to resist bending and maintain rigidity. The blade itself is not the whole story; it is the biscuit to the frame’s loaf—the area where material choice, geometry, and compatibility with the vehicle’s mounting system converge. In practice you’ll design the frame to integrate with the vehicle’s towing system, and you’ll test those mounting points under load to verify that bolts, brackets, and welds stay tight during real clearing work. A careful approach is to anchor the frame to a solid portion of the bumper or the frame rails with heavy brackets that are they are reinforced with additional plates and through bolts. If your truck has a solid front bumper, bolting directly to it is feasible, but many DIY builders find it worth fabricating a custom bracket using thicker steel plates and stronger bolts, so the load transfers to the chassis rather than bending a lighter bumper skin. The mounting arrangement should be tested with the blade mounted and the vehicle on a stable surface; you want to simulate the downward force and lateral shove the plow will experience when pushed through dense snow. Given the hard nature of winter conditions, it is useful to plan for a quick inspection routine: every mount, every weld, every bolt should be checked after initial use and after substantial snow events. This is not merely a maintenance ritual; it is a safety assurance that prevents the frame from loosening or the blade from shifting during operation. A successful design also anticipates future upgrades; the simplest forward step is to enhance adjustability without compromising rigidity. A pivot at the base is the entry point for tilting, which helps when you need to clear around obstacles or align the blade with curbs. A winch or chain system can raise or lower the blade slightly to control clearance depth, while more advanced setups may integrate a hydraulic cylinder to enable automatic lifting and angling. A hydraulic system adds complexity but yields precision and fatigue reduction for the operator, a worthy trade‑off for recursive clearing tasks in stubborn storms. If you decide to pursue this path, plan for the hydraulic components, control valves, lines, and a power source that can operate in cold weather, with redundancy for safety. The philosophy guiding all of these choices is resilience: a design that performs with minimal fuss, uses readily available materials, and remains repairable with basic shop tools. The narrative of real‑world ingenuity reinforces this aim. In bustling urban environments or rural back lanes alike, people have constructed functional snow plows from scrap metal and common shop gear, proving that the hardware is often less important than the method and mind behind it. The practical takeaway is to treat the blade frame as a living structure that you can refine as you gain experience, not as a finished sculpture that cannot be adjusted. This mindset pushes you to design for serviceability: removable wear edges, accessible bolts, and modular cross‑members so you can swap parts, upgrade edge materials, or adapt to a different vehicle later on. As you contemplate the frame’s integration with the vehicle’s towing system, it’s wise to explore related topics that can broaden your options without complicating the core design. For example, the Accessories section of the TrucksDIY resource suite can offer complementary components—from brackets and reinforced mounting hardware to lightweight, purpose‑built add‑ons that extend your plow’s reach or durability. See the relevant page here: trucksdiy.com/blog/accessories/. This link, while simple, anchors practical knowledge about compatible add‑ons that you might not initially consider when focusing purely on the blade frame. The design approach described here is not about reinventing the wheel but about building a reliable platform that you can grow with. It is a philosophy of method over momentary aesthetics, a belief that good frame design pays dividends in cleaner driveways, clearer rural lanes, and safer streets during severe winter conditions. By prioritizing material strength, reinforcing geometry, a thoughtful pivot, and a replaceable wear edge, you lay the groundwork for a plow that successfully translates heavy snow into controlled, manageable movement. The story of the Luoyang example—where individuals repurposed scrap metal into a functional snow plow that cleared alleys during a major storm—echoes this principle: clever, economical solutions can outperform expensive, specialized gear when skill, patience, and a willingness to iterate are present. The practical aim remains unwavering: to move snow efficiently while protecting the truck, the operator, and the road surface from unnecessary wear. In the broader arc of DIY projects that respond to real community needs, a well‑designed blade frame demonstrates what happens when engineers, welders, and neighbors collaborate around a common problem. It is a testament to resilience, to the notion that a hammer, a welder, and a well‑considered plan can keep neighborhoods moving even when professional equipment is scarce or cost prohibitive. If you wish to explore further visual guidance, a detailed step‑by‑step, video‑based example exists in a long‑form instructional resource that walks through blade frame construction and related considerations for a DIY truck snow plow. For a detailed visual walkthrough, see this external tutorial: https://www.instructables.com/Designing-a-DIY-Truck-Snow-Plow-Blade-Frame/.
Securing the Frontline: A Practical, Confidence-Driven Guide to Attaching Your DIY Truck Snow Plow
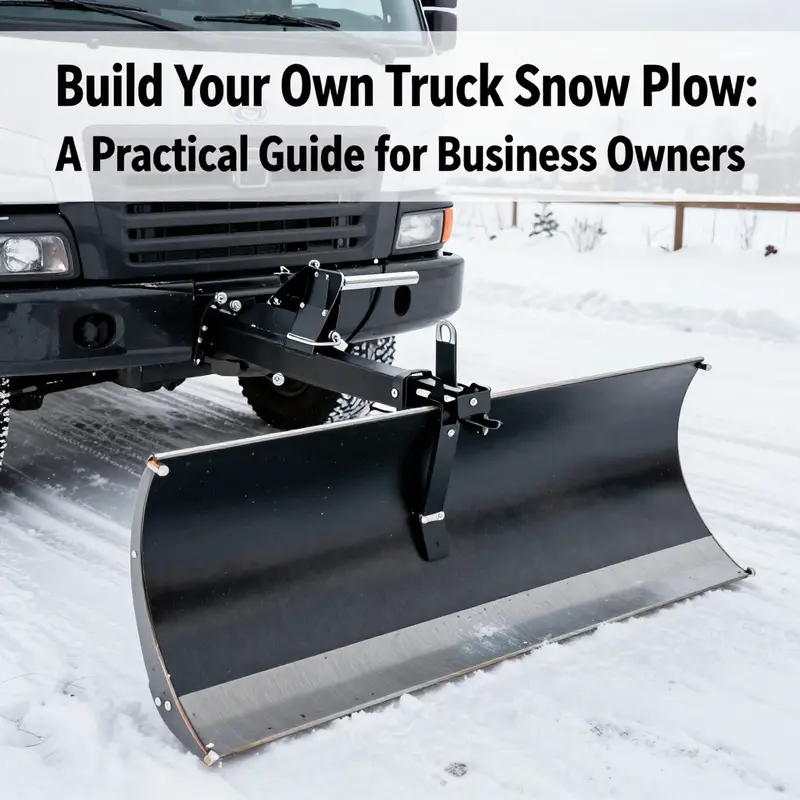
The moment you lift a homemade snow plow from the bench to the front of your truck is more than a mechanical step; it is a leap in resilience. Attaching a DIY plow correctly blends a careful eye for weight, balance, and geometry with the practical craft of brackets, bolts, and alignment. It is, in essence, a test of preparedness: can you trust your own rig to move heavy, packed snow without compromising control, steering, or the other systems your vehicle relies on? For those who have built a plow from scrap metal or repurposed parts, the answer hinges on a clear, methodical approach that respects both the vehicle’s structure and the brutal demands of winter weather. In the following narrative, the focus is not on the glamour of the build but on the quiet, essential work of attachment—getting everything onto the truck in a way that is solid, adjustable, and safely operable. Along the way, a thread of resourcefulness runs through the process, echoing generations of DIY engineers who have learned to convert found parts into dependable snow removal tools.
Compatibility is the first gate to pass. Before you lift the blade and frame into place, confirm that your truck’s make, model, and year align with the mounting system you intend to use. The mounting brackets, hitch type, and weight capacity all matter. If your plow design relied on a particular receiver or frame connection, double-check the receiver’s class (for example, Class III or Class IV) and whether your vehicle can bear the load when the blade is angled and pushed through dense snow. A mismatched system is a safety risk that can cause rapid wear or, worse, cause the plow to detach under load. This is why the initial assessment is not a ritual of form but a practical test of fit, weight distribution, and the remaining margin you have to maneuver.
Preparation begins with the vehicle. Park on level ground and apply the parking brake. If you’ve integrated hydraulic lifting, ensure the system is charged and free of leaks. With the engine off and the battery at rest, you can plan the alignment without the car shifting unexpectedly. In many DIY setups, the frame or the mounting bracket is bolted to the truck’s chassis or a reinforced section of the bumper. This is where the integrity of your attachment will be proven, not in the dry, clean shop but in the rough, snow-salted driveway or street during a heavy storm. The first practical checkpoint is to ensure that there is a clear, unobstructed path for the blade to swing, tilt, and travel without rubbing against tires, suspension components, or the bodywork.
The actual mounting bracket is the spinal column of the whole operation. When you attach the plow’s mounting bracket to the truck’s frame, you are anchoring the plow to the vehicle’s life-support systems. Use the driver’s manual as your compass for torque specifications and bolt sizes, and supplement those numbers with the bracket manufacturer’s guidelines if you have them. A torque wrench becomes an essential companion here. Overtightening can pinch metal and damage threads, while under-tightening invites movement and eventual loosening under snow pressure. Take the bracket and align it so that the blade sits square with the road. The blade itself should point straight ahead when the vehicle is parked, and the frame should be square to the bumper line. In practice, this often means mapping a temporary geometry with chalk marks or painter’s tape, then rechecking with a level as you tighten multiple mounting points to avoid a warped frame.
Attach the plow to the hitch. If your plow design uses a dedicated front hitch or a receiver that slides into the truck’s hitch, ensure the connection slides smoothly and seats fully. The locking pin is not a mere formality—it is a safety hinge that keeps the plow connected through accelerations, decelerations, and the occasional jolt from a stubborn snowbank. Before you slide the blade into place, verify that the receiver is clean of dirt and rust that could undermine a solid fit. With the plow engaged in the receiver, insert the locking pin, and give it a gentle tug to confirm it cannot walk out under typical driving conditions. Some builds employ a secondary pin or a cotter pin to guard against accidental release; if your design uses them, set them in place with the same care you apply to the primary bolt work.
Electrical connections, when present, are the quiet, invisible lifeline of plowing efficiency. If your DIY system has lights, blade angle adjusters, or hydraulic functions, you will need a clean, weatherproof wiring harness that connects to the truck’s electrical system. Start with a visual check: ensure there are no exposed wires, that all connectors are dry, and that the harness won’t be strained by the motion of the blade. Route the wiring to minimize exposure to heat, exhaust, or road debris. If you are wiring the blade to angle the plow or to raise and lower it, test each function at a slow, safe pace during the initial check. Confirm that the lights on the plow align with the truck’s signals to avoid confusion for other drivers. The aim is not only functionality but consistent signaling and predictable behavior under winter conditions. If you are unsure about electrical work, consider a professional assessment; a small error here can lead to burned fuses, shorts, or, in worst cases, a loss of control during operation.
Incorporate a sense of balance into your installation. A plow that is front-heavy or poorly centered will behave unpredictably on uneven surfaces or when negotiating curbs and potholes. Ideally, the blade should be positioned so that it stubs out slightly above the bumper line, with the center of gravity close to the vehicle’s center, to preserve steering feel and to reduce the risk of axle or suspension stress. A practical way to check balance is to perform a static lift test: with the plow in the fully lowered position, wiggle the blade and frame gently from side to side and verify there is minimal play. Then, with the blade raised to a neutral height, push the truck forward a few feet at a gentle speed to feel for any looseness or binding. All the while, keep a careful eye on the clearance to the front tires and suspension—if the blade rubs, you must adjust the brackets or perhaps add shims to bring the assembly back into alignment.
A sense of seamanship emerges as you tighten and tune. Once you have achieved a symmetrical setup, return to the mounting points with the torque wrench and re-check every bolt. If your design uses more than a handful of bolts, make a checklist but avoid turning the assembly into a cockpit of competing fasteners; the goal is a solid, clean, easy-to-service installation. This is where the value of a well-thought-out plan becomes evident. The best DIY solutions are not the loudest or flashiest; they are the most reliable under pressure—the moment the first heavy snow hits and the wind begins to bite. To maintain reliability, inspect the welds and fasteners after the initial use and at regular intervals thereafter. Small hairline cracks can grow if left unattended, particularly where the frame bears the load of the blade and the repetitive impact of dense snow.
Once the mechanical attachment is sound, you must verify the plow’s interaction with the vehicle’s broader ecosystem. Check that the installation does not intrude on steering input or rider comfort; that the blade’s motion is unimpeded by the hood, grille, or any underbody components; and that the raised position clears the ground with ample clearance for the front bumper and radiator air intake. If your frame design includes tilt or angle functionality, test these at idle, then again at a slow, controlled speed in a clear area. A well-tuned tilt system should respond crisply to control input without excessive lag or drift. If your setup includes a hydraulic cylinder from an older machine, ensure hoses are secured and protected, with no pinched lines that could fail under pressure. The safety logic here is simple: if something feels off, stop, reassess, and adjust. Rushing an attachment phase can lead to misalignment, sudden shifts, or a dangerous detachment later.
A few hard-won pragmatics can help bring this through-line of safety and reliability. First, make sure you have the right kind of maintenance schedule for your plow. Mark a calendar reminder to check bolts, pins, and welds after the first heavy snow and periodically thereafter. Second, protect your own lighting and visibility: ensure taillights and indicators remain visible even with the plow elevated or angled. Third, keep the path around the vehicle clear during operation; winter weather can mask loose parts or tools that could fall loose during bending and scraping. The best installers treat the process as a disciplined ritual rather than a quick hack. The difference between a plow that simply exists and a plow that serves through an entire winter season comes down to meticulous alignment, careful balancing, and patient testing.
Inspiration can come from unexpected places. Real-world examples show that improvised plows can be both simple and effective when built with common sense and craft. They demonstrate that the core principles—compatibility, solid mounting, secure hitching, clean wiring, and balanced load—are universal. A simple, scrap-derived frame attached to a small utility vehicle can clear alleyways and driveways when a major snow event tests the resilience of a community. Those stories underscore that a well-executed DIY solution is about more than saving money; it is about showing up for neighbors when the weather closes in and maintaining momentum where every cleared path keeps a neighborhood moving. For readers who want a broader view of how to integrate plow components with other vehicle accessories, a practical guide to truck accessories can broaden the horizon. (Truck accessories guide) Truck accessories
As you complete the installation, forethought in the details becomes your best ally. The alignment you achieved in the shop will translate into performance on the street. The blade will ride evenly, push with consistent pressure, and resist unwanted wiggle as you traverse plowed surfaces. This is not merely about making a tool work; it is about building a working system that respects the vehicle and the environment. The mindset is practical: plan, fit, test, verify, and maintain. It is the same ethos that underpins the most resilient DIY snow-removal efforts, where people repurpose scrap into functional solutions, turning winter’s challenges into opportunities to serve the community. If this approach resonates, carry the same attention to detail into every future modification or upgrade. And when you next face a storm, you’ll know that the front line you built—your DIY plow and its mounting—stands not as a risky experiment but as a reliable extension of your own hands, tools, and patience.
External resource: for a broader, professional-oriented perspective on mounting a snow plow on a truck, you can consult a formal installation guide available online. It offers additional safety checks and procedural clarity that can complement the DIY approach without replacing the need for careful, hands-on verification during your own work: https://www.truckplow.com/installation-guide
Safeguarding the Front Line: Thorough Safety Protocols and Rigorous Testing for Your DIY Truck Snow Plow
A robust safety program for a DIY truck snow plow begins with the most tangible and immediate line of defense: personal protective equipment, or PPE. When you work with metal, electricity, and heavy moving parts, PPE isn’t optional; it is a baseline habit. Put on sturdy gloves that provide a solid grip and protect the knuckles when you handle cutting edges or rough steel. Wear safety glasses or a face shield to guard against sparks, shavings, and the occasional loose bolt that tries to escape its threads. Sturdy, closed-toe footwear with non-slip soles is essential, especially when you’re moving or lifting steel in slick spaces. Depending on the task, hearing protection is prudent during grinding and welding, and a welding helmet becomes mandatory whenever you strike the arc. Welding and cutting generate radiant heat, flying particles, and glare that can injure eyes and skin in seconds. The work area itself should be organized, well lit, and free of distractions. A clean bench and a defined workflow reduce missteps and help you notice fatigue before it becomes a hazard. Handling tools and materials demands a similar discipline. Inspect tools for wear or damage before each session, and keep a tidy workspace. A loose wrench or a cracked hammer can become a dangerous projectile if the plow shudders under load. When you assemble the blade frame and mount it to the vehicle, secure everything with high-strength bolts, brackets, and proper welding where indicated. Don’t rely on improvised fasteners or temporary fixes. The frame and mounting points should feel solid to the touch, and you should be able to move the blade only with deliberate force, not with the momentum of a misaligned assembly. Torque, fit, and alignment should be checked with the same care you would apply to any critical vehicle modification. This careful approach—paired with patience—minimizes rebound effects, reduces vibration, and makes the plow more forgiving in uneven snow conditions. It also reduces the risk of fatigue-induced mistakes during long plowing sessions. The moment you begin, remember that secure components are not a one-time chore. If you rely on locks, bolts, or welds to carry forces, you must plan for periodic checks. Operations in winter bring moisture, road salt, and subfreezing temperatures that can creep into crevices and loosen connections over time. A routine, pre-use inspection is the simplest safeguard, and it should become as automatic as checking your tires and lights before a trip. The inspection should look for loose parts, signs of wear at the blade edge, and any bending or cracking in the frame. It should verify that the pivot points move freely but without slop, that the angle mechanism locks securely, and that the mounting brackets aren’t wincing under load. You should also confirm that any hydraulic lines or mechanical linkages are free of leaks or kinks and that protective covers or shields are intact and properly seated. When you put the plow on the truck, the alignment of the blade relative to the bumper is crucial for predictable behavior. A misaligned blade tends to pull or drift, requiring more steering input and increasing the risk of a collision with objects or pedestrians. The value of a deliberate, measured approach here cannot be overstated. It’s not enough to engineer a plow that can push snow; you must engineer one that can be controlled with confidence, even when a gust of wind or a deeply packed drift forces a change in direction. Once the mechanical side is secure, the focus shifts to functional testing in a safe, controlled environment. Start at a gentle pace with minimal downward force on the blade. This initial operation is not merely a test of the motor or hydraulic pump; it is a test of the controller, the linkage geometry, and the way the plow interacts with the ground. Listen for unusual sounds—grinding, knocking, or a tone that seems out of place—while paying attention to the feel through the steering wheel and chassis. Check that the blade responds promptly to input, and that the vehicle remains stable as the plow asserts its load. If you introduced a tilt or angle adjustment, confirm that the mechanism returns smoothly to center when you release control. Whether you use a hydraulic system or a manual lever, the first runs should be performed at low speeds and with light loads. The objective is not to clear a dense drift on the first try; it is to confirm that the plow remains attached, that the motion remains predictable, and that the mounting points do not exhibit any movement that could presage a misalignment or a detach event. As you gradually increase load, pay close attention to how the blade behaves along the curb or driveway edge. The snow’s density changes with temperature and moisture, and a blade that buckles or stalls under a modest push signals a problem that needs addressing before it sees real duty. In addition to mechanical checks, you must consider the electrical or electronic systems if your setup includes them. Moisture protection is critical because snow and road spray can infiltrate connectors, relays, and switches. Insulate exposed electrical conductors, and ensure that moisture barriers are intact. If your plow uses a winch or motor to raise and lower the blade, simulate cold-weather operation to verify that the system maintains performance under typical winter conditions. A battery, power controller, or motor can behave differently when temperatures drop; a test that mirrors cold weather helps ensure the system won’t fail when you most need it. If you’ve wired a daytime running light or visibility feature into the plow, test it as part of the safety regime. A bright, focused light can improve awareness in low-visibility conditions, but only if the wiring and switches are robust enough to withstand moisture, vibration, and salt. Safety mechanisms deserve special attention. Emergency stop devices should function instantly, stopping the blade’s movement under any adverse condition. Limit switches are also valuable; they prevent overextension that could damage hydraulic cylinders or mechanical linkages. If your design includes a blade-lock or detent system, test it under load to ensure it engages reliably and holds the blade in the desired position without creeping. The testing sequence should be deliberate and repeatable. Start with a basic motion test, then move to combined operations that simulate real-world plowing: changing angles while the blade is pressed against the ground, lifting slightly to skim the surface, and returning to a neutral or home position. Each phase should run in a controlled area away from people, vehicles, and obstacles. If you encounter wheel spin, traction issues, or unexpected vibrations, step back and reassess. Quieter, smoother operation is not a luxury; it is a sign that your plow is well-balanced and correctly mounted. The testing phase is also an opportunity to refine safety practices. You should document any adjustments, track the performance of each component, and schedule additional checks after the first few uses. The goal is to build a routine that translates into reliability in the field, not a one-off test that proves the contraption works in theory. Documentation matters. Keeping a simple log of maintenance actions—bolts tightened, weld integrity checked, wear on the blade edge observed—helps catch patterns that could otherwise go unnoticed. The log becomes a record you can consult after every storm, and it reinforces a culture of responsibility around the vehicle and the plow alike. Real-world inspiration, such as communities that repurpose scrap metal into functional snow-clearing devices, underscores the value of resilience and careful engineering. These stories remind us that the best DIY solutions emerge from patient work, not hurried improvisation. They also highlight a broader truth: safety and effectiveness grow from disciplined practice, not from sheer force. As you integrate the plow into your vehicle, you’ll likely discover small adjustments that improve balance, reduce strain on the frame, or enhance visibility for the operator. Embrace those refinements with the same care you applied at the outset. If you incorporate an adjustable tilt or angle mechanism, ensure it locks firmly and clears obstructions without binding. If you use a manual winch, confirm that the line has adequate tension capacity and that the winch housing remains protected from salt and moisture. If you’ve installed any hydraulic components, check hoses and fittings for signs of wear or leakage after testing. A surface coating or protective layer can slow corrosion, extending the life of critical parts. The moral of this chapter is straightforward: safety is not a separate phase that ends when the plow is mounted; it is a continuous practice that begins before the first test drive and continues through every storm you face. A plow is only as trustworthy as the care you invest in it. When you link the process of building, mounting, and testing to a mindset of vigilance, you transform a DIY project into a reliable tool that your community can depend on during the winter. For broader context on add-ons and safety considerations, see the truck accessories hub. This resource helps frame how additional components—such as brackets, protective shields, or simple monitoring devices—fit into a larger, safety-first approach to vehicle customization. While it’s tempting to push forward once a basic test passes, resist the urge to skip rechecks after any adjustment. Each modification deserves its own cycle of inspection and testing, because even small changes can alter how a plow handles wind, drift, and uneven pavement. Finally, remember that safety is a shared duty. If the plow is used in a cooperative setting—on a community drive, a private driveway crew, or a shared property—it benefits every user to standardize checks and procedures. A short, written primer on startup checks, emergency stopping, and returned-to-neutral behavior can be handed to others who operate the plow. It ensures consistency, reduces error, and reinforces the culture of safety that makes DIY snow removal both effective and trustworthy. When all those elements come together—the PPE discipline, the rigorous inspection routine, the measured testing sequence, the thoughtful integration of controls, and the ongoing commitment to maintenance—the result is not merely a plow that moves snow. It is a dependable system that respects the highway, the neighborhood, and the people behind the wheel. For additional safety resources and a practical, step-by-step safety framework, you may consult established guides that offer working examples and diagrams to complement your own field testing and refinement process. If you’d like to explore further practical ideas on how to approach this kind of project with safety as a constant companion, see the linked external resource below. The real measure of success is not how quickly you can complete a build, but how reliably you can use it when a storm arrives, how clearly you can see, and how steady your hands remain as you clear a path for others to follow. That is the essence of a well-executed DIY snow plow—functional, responsible, and ready for the next winter front. For more practical context on related add-ons and safety considerations, refer to this internal resource on truck accessories and modular upgrades: truck accessories. The approach outlined here positions safety at the core of every decision, turning a clever project into a trustworthy tool that serves a community when it matters most. External reference: for additional safety guidelines and a comprehensive, real-world method to validate your plow’s readiness, consult How to Build a Snow Plow for Your Truck. https://www.familyhandyman.com/project/snow-plow-for-truck/
Final thoughts
Creating a DIY truck snow plow is not just a cost-effective solution for business owners; it’s about creating a practical tool tailored to your operational needs during winter. Through understanding the materials, designing the frame, ensuring proper attachment, and focusing on safety, you’re not only enhancing your vehicle’s capabilities but also boosting your resilience against harsh weather conditions. With the right preparation and knowledge, your business can navigate the challenges of winter effectively.