Crafting a monster truck piñata is more than just a fun project; it’s an engaging way for businesses involved in event planning and party supplies to offer unique experiences. With a growing trend towards personalized decorations, creating a piñata that matches a birthday or celebration theme can attract customers and create memorable moments. This article breaks down the process into five key chapters: from designing your truck to the construction of its frame, shaping the body, decorating, and finally preparing for the big reveal. By the end, you’ll have a comprehensive understanding of how to execute this DIY project while also enriching your business offerings.
From Cardboard to Crashing Color: Designing a Monster Truck Piñata DIY
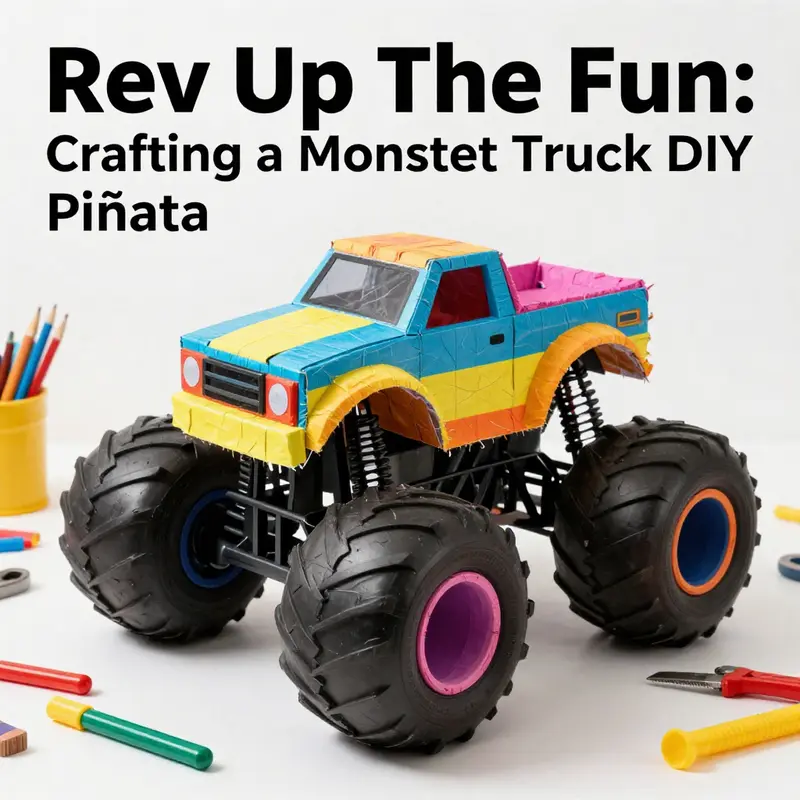
The moment you decide to turn a party staple into a memory-making centerpiece is when creativity takes the wheel. Designing a Monster Truck Piñata DIY is less about following a rigid pattern and more about translating the electric energy of a rally into a playful, shareable moment. The core idea is simple: craft a sturdy, vehicle-shaped frame, clothe it in a vivid, cake-light surface, and fill the hull with candy, small toys, and a little surprise that makes the moment of breakage feel earned rather than random. When you start with that mindset, the process becomes a conversation between structure and color, weight and whimsy, safety and spectacle. You’re building a display piece that doubles as a party game, a keepsake, and a small carnival that arrives at your door on party day.
Inspiration is your accelerator. The look of a monster truck is defined by two things: massive wheels and a bold silhouette. In a DIY context, you can lean into oversized tires by sculpting wheels from foam, cardboard tubes, or thick card stock, then attaching them with sturdy adhesive so the piñata maintains a confident stance even before the first swing. The body should read as a single, sculpted form rather than a collection of flat panels. For that, cardboard remains your friend. Layer boxes, trim edges, and use masking tape to blend joints. Cover the entire frame with a flexible skin—paper mache works well, but fabric, tissue, or stacked layers of thick crepe paper can offer texture and color depth. The surface should feel substantial to the touch yet crackle invitingly when struck. The aesthetic payoff relies on bold color blocking, racing stripes, and small decals that echo real-life branding without treading into trademark territory. In this sense, the piñata becomes a tribute to the sport of monster trucks, translated through a kid-friendly, party-ready lens.
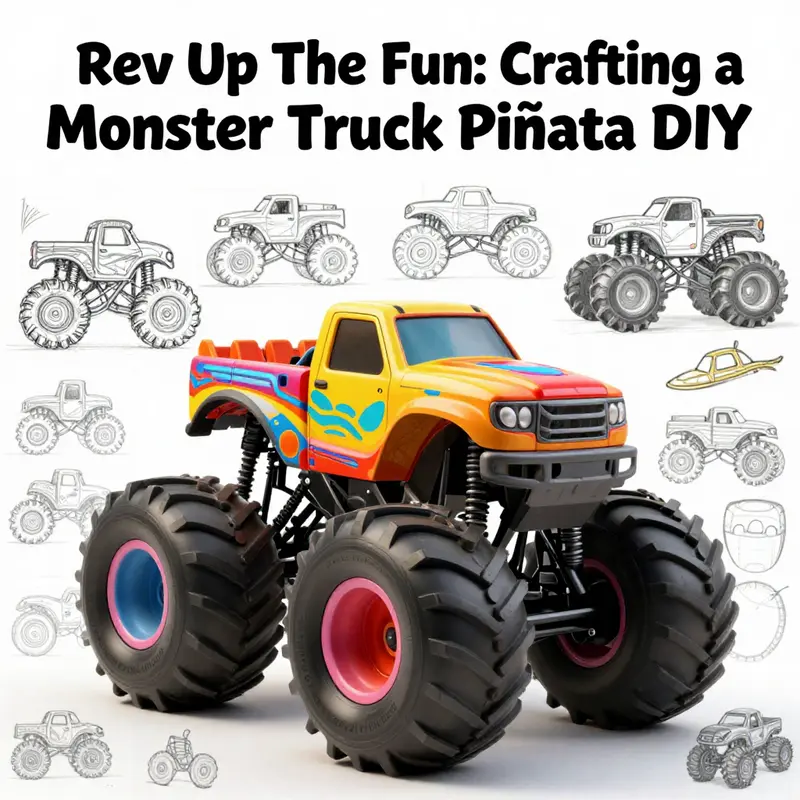
The look you chase is aggressive but approachable. Think giant wheels, a fierce face, and a chassis that looks ready to roar. Cut the wheels from foam or cardboard and mount them so they project outward, which makes the truck feel dynamic even when it sits still. For the face, consider a stylized grille and eyes carved or drawn onto the front to give the vehicle personality. Paint choices should be high-contrast and celebratory: electric reds, cobalt blues, neon greens, and glossy blacks that reflect light as children swing. If you want a small narrative you can tell aloud at the party, describe the truck as if it’s a character stepping onto the arena floor, unrolling a story with every stripe and emblem. This storytelling angle heightens excitement and makes the act of breaking the piñata feel like the climax of a mini-rally.
Design freedom flourishes when you mix inspiration with practical constraints. Pinterest, as a wellspring of visual ideas, shows a spectrum from purely toy-like, soft textures to more dramatic, 3D masterpieces complete with moving parts or LED accents. One standout concept many families enjoy is a Megalodon Monster Truck Piñata, a fusion of sea predator and gravity-defying vehicle. The idea invites fins or a finned tail, toothlike projections along the bumper, and a roaring mouth crafted from crumpled paper or layered tissue. The thrill lies in the silhouette: a vehicle that feels ready to leap off the table and into the air in a burst of confetti and candy. If you’re drawn to more specific vehicle homage, you can reference familiar model shapes or team logos in a playful, non-branding way. The point is to let the theme swing between homage and fantasy, so kids recognize the monster truck vibe while the design remains accessible and safe as a party prop.
Two strands of design emerge from this approach: customization and interactivity. Custom touches—like sponsor names or playful team logos—let you tailor the piñata to the party’s guests. You might sketch tiny decals and apply them with stencils, or paint hand-drawn emblems that feel like stickers. Customization also extends to the feel of the surface. The piñata can read as a slick, glossy truck or a rugged, battle-worn racer, depending on your texture choices and shading. Interactivity, meanwhile, is where the design becomes a party game. Consider light harnesses or simple LEDs tucked behind translucent tissue for a gentle glow that appears when the lights go down. Hidden compartments add a playful twist: a smaller prize or clue tucked inside a separate cavity that encourages a second round of play after the initial burst. Lightweight materials help with handling and safety, but the outer shell should still have a satisfying crack when struck, the way a real piñata announces success to a crowd.
Safety threads through every decision. Because this is a children’s activity, you want a structure that is sturdy enough to hold its shape during exploration but delicate enough to break in a controlled way. Use child-safe, non-toxic paints and glues, and avoid sharp edges by sanding or rounding corners before the skin goes on. The frame should be reinforced where it matters: the wheel hubs, the chassis joints, and the top hanging point. When you’re experimenting with paper mache, allow long drying times between layers—24 hours or more is not excessive in a warm room, and longer drying times reduce unwanted sagging. If you choose fabric or tissue surfaces, seal the edges with a thin layer of glue to prevent peeling during play. The final opening for filling is best placed on the bottom or side, sealed with a lightweight patch of paper mache or layered tape that can be removed by the adult handler when it’s time to reveal the goodies.
The construction sequence can read like a steady, careful performance rather than a rush. Begin with a simple frame: a rectangular core that defines the cab, a slightly raised bed for the truck’s back, and a protruding nose that anchors the silhouette. Reinforce the corners with extra cardboard “knees” — little gussets that keep the shape rigid. Attach the wheels in a way that allows them to sit flush against the frame while projecting slightly. Then lift the entire form with a generous layer of newspaper strips dipped in a light paper mache paste. Work in sections, smoothing the strips with your hands or a soft brush so the texture reads as deliberate, not chaotic. The patience you invest at this stage pays off later, because the surface will be easier to paint and decorate when the base is strong and dry.
As the shell takes shape, the decoration phase begins. Bold, blocky color fields define the truck’s personality. Masking tape can help you achieve crisp edges for racing stripes and color blocks. If you’re painting by hand, lay down a light base coat that acts as a primer, then build up the design with deeper colors and highlights. Details like a chrome grille or shiny hubcaps come to life with metallic paints or a simple dab of silver to catch the light. The sense of scale matters: oversized tires should never appear fragile. If you want to push this further, small, tasteful embellishments such as faux sponsor stickers or a driver’s name across the cab can be stitched by hand using a fine brush and steady hand. Each detail contributes to the story you tell when the piñata finally stands on the party floor, ready to be celebrated and opened.
Hanging and play are the final performance. The piñata should hang from a sturdy, tested anchor—something anchored to a ceiling beam or a robust tree branch with a backup knot. The string or rope must be able to bear the weight of the piñata and any movement during the party. If you’ve included compartments or small LEDs, test them first to make sure everything remains secure during active play. Consider scheduling the event so kids can take two or three swings, stepping away for a moment to let the candy settle, then returning for one or two decisive final hits. The beauty of this approach is that the monster truck remains a visual centerpiece until the moment it bursts; the reveal is almost ceremonial, a shared payoff that makes a party feel like a victory lap.
Everything about a Monster Truck Piñata DIY can be customized to fit your space, your time, and your guests. It’s a craft project that doubles as a party game, a keepsake, and a memory in motion. The process invites you to balance bold design with practical construction, to treat safety as a design constraint rather than a chore, and to let imagination drive your choices as much as any template would. The result is more than a decoration; it’s a narrative marker for the party—an invitation to all ages to cheer, collaborate, and celebrate the moment when color, cardboard, and candy collide in a single, satisfying crash.
For additional DIY ideas and a broader sense of how to integrate vehicle-inspired projects into celebration themes, see the Accessories section for related inspiration and practical tips. This cross-pollination of ideas helps keep your party fresh while staying true to the spirit of the Monster Truck Piñata DIY.
External inspiration and visuals can deepen the experience. If you want to explore a broader gallery of ideas, the Megalodon Monster Truck Piñata concept and related explorations offer a vivid reference point for texture and form, all adapted to a kid-friendly scale. You can find more visuals and step-by-step explorations at https://www.pinterest.com/pin/1234567890/.
Strong Bones and Big Wheels: Building the Monster Truck Piñata Frame
Materials and method combined: building a frame that holds shape and survives the party
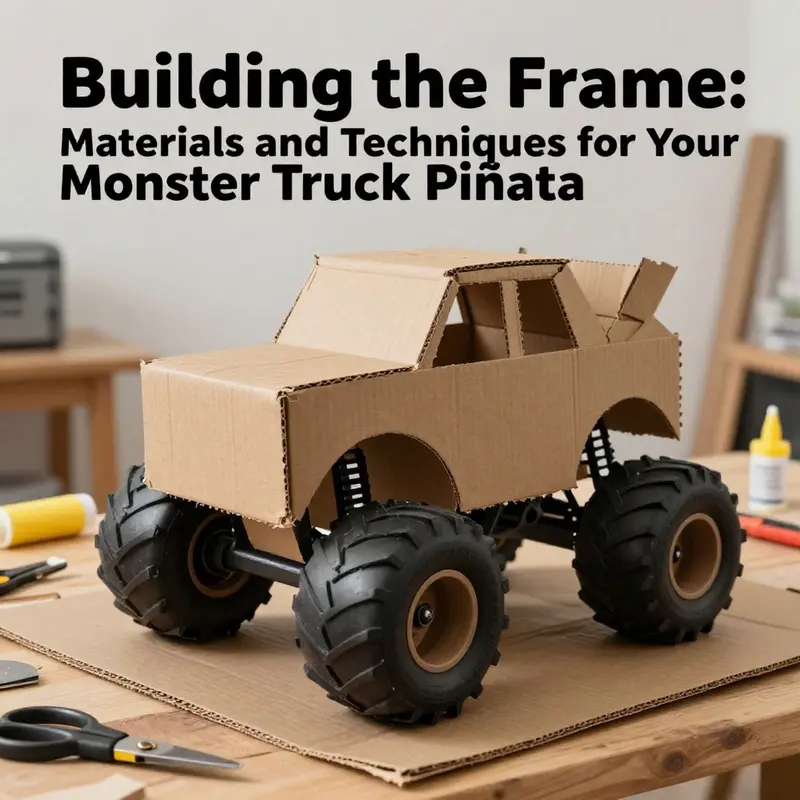
A monster truck piñata needs a frame that balances lightness with strength. Think of the frame as the skeleton. It should define the truck’s silhouette, support heavy candy, and take hits without collapsing too soon. Start by gathering materials that are easy to shape but rigid enough for a large form: several layers of corrugated cardboard, cardboard tubes from paper towel or wrapping paper, a few wooden dowels, hot glue, and heavy-duty tape. Keep a tub or small toolbox of tools nearby: a sharp craft knife, scissors, a ruler, a pencil, clamps or clothes pins, and disposable gloves. Prepare paper mache supplies for the next stage: torn newspaper, white glue or a flour-and-water paste, and a shallow bowl for mixing.
Begin the frame with a simple plan drawn to scale on paper. Sketch the truck’s side profile first, showing the cab, bed, and exaggerated wheel wells. Decide on overall dimensions based on where you will hang the piñata and how many treats it should hold. Translating those measurements to cardboard lets you cut consistent panels. Cut two matching side panels from double-walled cardboard. These panels form the truck’s outer skin and keep the frame symmetrical. Use the side panels as templates for aligning other parts.
Construct the chassis with cardboard tubes and dowels. Use a long cardboard tube or a flattened, rolled strip of corrugated cardboard as the central spine. Attach the spine to the inside edges of the side panels with hot glue and reinforce with tape. Place wooden dowels across the width as cross-members. These dowels act like axles and internal braces. If you plan visible wheels, position the dowels where the wheel centers will be. Secure dowels in notches cut into the side panels or tape them firmly to the inside. Wherever joints meet, add a scrap of cardboard as a triangular gusset to spread stress. Glue the gusset in place and tape it over for extra strength.
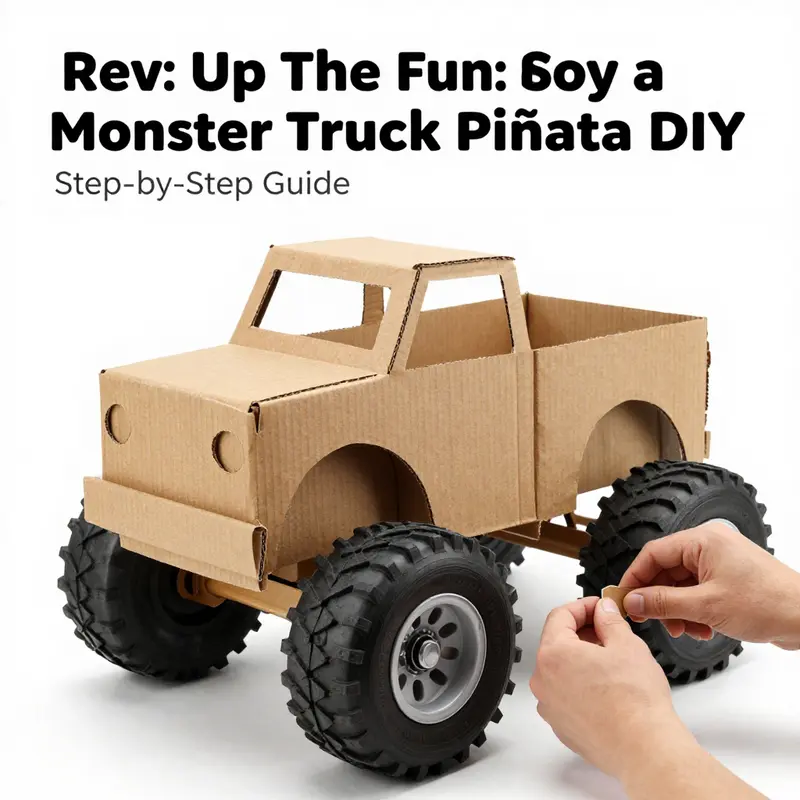
Wheels are a monster truck’s signature feature and must look big while staying lightweight. For realistic tires, roll multiple layers of corrugated cardboard into rings and glue them together. Alternatively, use stacked foam discs or cut wheel shapes from thick poster board. Slide each wheel onto its axle dowel or axle tube and secure it with a dab of hot glue. If you want rotating wheels, leave a small gap so the wheel can spin on the dowel. Add washers fashioned from cardboard or bead caps on either side to stop lateral movement. When wheels are attached, test the frame’s balance by lifting it at the intended hanging point. If the body tilts, adjust the axle positions or move dowels slightly until the truck hangs level.
Reinforce key stress points. The hanging point will see the most force, both from the weight of treats and from impacts during the game. For the hang point, use a short section of wooden dowel or a small block of reinforced cardboard between the side panels. Drill or punch two holes slightly apart and thread a strong cord through them. Tie secure knots and cover the area with heavy tape or a strip of layered cardboard for load distribution. If you prefer a hanging loop, twist a length of rope into a loop and hide its ends inside the roof structure, glued and taped in place. Reinforce door seams, wheel wells, and any decorative protrusions, like a grille or bumper, with extra strips of cardboard and tape.
Create the candy access and filling method thoughtfully. Cut a flap on the roof or the underside of the truck large enough for comfortable filling. Score the edges so the flap sits flush after closing. Reinforce the flap with tape and glue around the seam to preserve the truck’s silhouette. To keep candy secure but accessible, insert a small inner bag that can be removed for refilling. A lightweight fabric bag or a paper pouch works well. Attach the bag inside with glue dots or tape so it doesn’t shift when the piñata swings.
Paper mache gives the frame a unified, paintable surface and increases strength. Use strips of newspaper dipped in a paste of white glue and water or flour and water. Remove excess paste with two fingers and apply strips in long, overlapping layers. Cover structural junctions and flat panels first to lock the frame in place. Apply at least three layers, allowing each to dry fully. Drying can take a day per layer in humid conditions. Use fans or low heat to speed drying but avoid direct heat that could warp cardboard. After the final layer dries, the surface should feel rigid to the touch. Lightly sand any rough edges for a smooth finish before painting.
Plan for impact and repairability. No matter how well built, piñatas can tear unpredictably. Design the frame so common tears occur in replaceable sections. For example, make the roof flap a separate, reinforced panel. Attach it with tape so it can be repaired quickly with duct tape between rounds. Keep a small repair kit ready at the party with tape, glue, and spare cardboard shapes. If you prefer a pull-string piñata that opens without heavy breaking, install a reinforced closure and a set of strings connected to a locking patch. Otherwise, distribute thicker paper mache near structural spokes and thinner layers where you want breaks to occur.
Balance the thrill of durability with the need to break. A piñata that never breaks is disappointing. Gauge thickness by testing scrap panels you made during construction. Strike them lightly to simulate the party, adjusting paper mache layers until you achieve the desired firmness. Aim for a structure that yields after a few solid hits, not after a single swing. This makes the experience rewarding and safe.
Think about finishing touches that strengthen and streamline the build. Apply an undercoat of white paint to seal the paper mache and provide a good base for colors. Paint the truck with vibrant, durable acrylic paints. Add foam or cardboard flares around wheel wells for personality. Mount decorative pieces with tabs tucked inside the shell, glued and taped to distribute force. If you want the piñata to be reusable, coat its surface with a thin layer of diluted glue mixed with water as a sealant. This adds resistance to accidental moisture and helps the paint last longer.
Transport and hanging logistics matter. Measure the doorway and vehicle space before final assembly. If the piñata is large, plan to keep some internal braces removable for transport. Use a strong, adjustable strap or rope to hang the piñata from a beam or tree branch. Check the hanging anchor, rope knots, and surrounding area for safety. Keep the swing area clear and a safe distance from hard surfaces. Finally, always supervise the game and maintain repair supplies nearby.
For inspiration on shaping wheels and using precision-cut details, see this visual guide that shows step-by-step techniques and offers creative variations. https://www.tiktok.com/@crafty_taylor/video/1234567890
For related tips on truck-themed details and DIY add-ons, explore this page about truck accessories: https://trucksdiy.com/blog/accessories/
Shaping the Monster: Crafting a Gigantic Monster Truck Piñata from Cardboard to Celebration Centerpiece
The moment a party unfolds around a gobsmacking monster truck piñata begins with a single spark of imagination and a long, careful sequence of hands on work. The aim is not merely to hide candy inside a shell but to conjure a vehicle that looks ready to rev its engines, rumble across a pretend dirt track, and crash through a wall of cheers when it finally bursts open. The shaping of the body is the heartbeat of the project, where ideas about scale, balance, and drama meet the practical demands of a child friendly, party ready prop. You start with a design that feels substantial even in stillness. Imagine a wide, powerful frame, oversized tires that dominate the sides, a raised chassis that suggests height and resilience, and a bold front that reads as a true monster truck even from a distance. You can sketch your own lines, or you can borrow a template from a rough plan you find online, but the core intention remains the same: a silhouette that carries a sense of motion, even while stationary, and a surface that invites touch and play without compromising safety.
The materials you gather set the foundation for that effect. Picture sturdy cardboard boxes salvaged from large items, layered and reinforced to resist the inevitable bumps of a live party. Add extra cardboard for shaping details like the wheel wells, the raised hood, and the distinctive grille that anchors the vehicle’s face. You will need tape or glue to lock the joints, sharp scissors or a utility knife for clean cuts, and a plan for embellishment that includes paints, markers, and perhaps decals. Optional hinges or small fasteners can introduce interactive elements without turning the piñata into a fragile sculpture. Paper mache paste and newsprint strips are your friends for sealing and strengthening, and tissue paper or lightweight fabric will give you texture and color without adding unmanageable bulk. The goal is a strong skin that can take the occasional poke and the gentle swat of a partygoer, yet still feel playful and vibrant when the candy rains down.
The base of the truck should be built first as a sturdy platform from which all other details spring. Start by cutting a rectangular base from your cardboard stash. It should be wide enough to accommodate dramatic tires and a cockpit that reads as a cab, yet compact enough to be hung safely from a ceiling or placed in a roomy party area. Reinforce every joint with additional layers of tape. Think of these joints as the bones of your creation; if they buckle, the entire structure wobbles. Once the base feels solid, you begin shaping the body around it. Add exaggerated fenders that flare outward, a raised chassis that creates a sense of height and power, and bold lines that delineate the body panels. Use extra cardboard pieces to fashion a front grille and a pair of headlights that glow under the paint job. If you want a playful touch, sketch a simple monster face on the front or along the sides, and use markers or paint to bring it to life. The tires should look massive next to the chassis, so roll cardboard tubes into wheel shapes and attach them securely with a strong adhesive. If you want the piece to have a bit of a mechanical vibe, consider small, decorative hinges for a hood or hatch that can be opened or swung, but keep the mechanism lightweight and safe for curious hands.
Color and decoration are where the piñata becomes a visual event. Bold color is your friend here. Bright red, sunlit yellow, electric blue, or a combination of high-contrast blocks will read clearly from across the room. Paint the base in a solid, even coat before adding details, then layer on racing stripes or checkered accents along the sides to echo real life monster trucks while keeping the look friendly for kids. You can draw a front grille that anchors the vehicle’s face and add simple sponsor-like decals that nod to the sport without copying any real trademark. The finish should be smooth enough to accept a final coat of papers or a light wash that creates a slightly weathered, metallic texture. If you want extra texture, press crumpled tissue paper into recessed areas or along the wheel arches to mimic creases in metal and give the surface a tactile, authentic feel without heavy application.
Interactive elements can elevate the experience without complicating the build. A simple flap on a door or a hood that lifts with a gentle tug creates moments of discovery as kids poke around the piñata to guess what might pop out when it finally gives way. You can fashion these with small hinges or a strip of reinforced tape that allows a tiny, safe motion. Remember that the more moving parts you add, the more you must account for durability and safety. The aim is to delight, not to gamble with strength when a sturdy swing of a stick is applied. With each add-on, check the overall balance of the truck; the piece should feel stable at rest and not topple with a light gust of movement. The shaping phase is a careful negotiation between artistry and engineering, and it rewards patience with a sculpted look that makes the piñata feel alive rather than merely decorative.
As the body takes shape, you head toward the binding stage. Paper mache is the classic method that unifies the surface and hardens the external skin. You apply paste with a roller or brush in thin, even layers, laying down strips of newsprint that wrap around corners and seams. Dry time matters a lot here; a well dried layer prevents warping and keeps the surface from cracking under the stress of a party. You may need several rounds, allowing a full dry-out between layers. The finished shell should be sturdy enough to withstand handling, yet not so rigid that it feels like a sculpture. If you opt for tissue paper rather than newsprint, you still want to achieve a smooth surface and to seal the texture you have built with the paper mache. The result should be a surface that holds paint evenly and can take additional decorative touches without flaking off.
With the shell complete and the surface cured, you move into the paint and finishing steps. The color choices should feel intentional and celebratory, not chaotic. Decide whether you want a high-contrast look with sharp color blocks or a layered, nuanced palette that suggests weathered metal and sun-warmed tires. Use a lighter base coat to anchor shadows and highlights, then go back with darker tones along the curves to emphasize the chunky, squared-off geometry of the profile. This is the moment when you carve personality into the piñata. A bold stripe along the side can read as speed lines; a set of painted headlights can glow in the imagined daylight; a stylized logo or emblem—carefully designed and not copying any real branded marks—can give the piece a sense of identity. A final gloss or matte finish can seal the color and add durability against humidity or accidental touch. You might add a touch of texture by layering thin tissue in particular patterns or by dry brushing a metallic hue across certain edges to mimic chrome and wear.
Hanging and safety considerations are the practical spine that supports the whole project. Decide where you will hang the piñata and ensure the anchor point is robust. A ceiling beam or a strong tree branch can work, but you must test the point with a gentle pull before the party starts. The rope or string should be thick enough to resist fraying and should be threaded through a reinforced point at the top. If you anticipate children grabbing and tugging, consider a backup tether or a quick release mechanism that prevents accidental falls. The shell’s weight distribution matters here; a large, heavier front can tilt the piñata forward, so you might mount a light tail or adjust the position of the anchor to keep the piece level. The finishing touches should include a neat seal around the opening used for filling, so the seam remains invisible after the treat release. The design, the construction, and the ride from concept to canopy all hinge on this careful attention to safety and stability.
Finally, the filling and reveal. You may fill the piñata with a mix of candies, small toys, and confetti, but be mindful of weight and balance so the act of breaking remains dramatic rather than risky. The opening should be easy to access for filling yet discreet once sealed. After sealing, the moment arrives when the sport themed vehicle becomes a harbinger of celebration rather than a mere model. The kids take turns; the rope strain gives a sense of anticipation as the crowd counts down. When the piñata bursts, the candy rains down like confetti, and the room fills with laughter and cheers. The monster truck becomes more than a craft; it becomes a memory, a piece of the party’s story that parents and children will revisit in photos and later chats about the day when a cardboard behemoth turned into a centerpiece that drove the party forward.
To keep the creative thread intact, think of the shell as a durable, reusable structure that can be tailored for future events. The shaping principle remains the same: start with a sturdy base, build a bold form, and apply color and texture with confidence. If you ever need a quick visual reference for a robust shell idea, you can explore durable shell concepts in the truck boxes approach, which provides practical insights for reinforcing the main body with strong joints and modular surfaces. Truck Boxes
Size planning matters as well. If you are inviting a large guest list, scale up the piñata to create a focal point that commands attention as soon as guests enter the room. A bigger silhouette naturally carries more surface for color and texture, and it also creates a sense of theater as children line up to take a swing. For smaller parties, a compact version can still deliver drama, especially if you concentrate the paint and texture on a few key features such as the hood, grille, and oversized tires. The balance between visual impact and safety is a constant negotiation, but with deliberate planning you can achieve a piece that feels immense yet remains friendly to participants who will be leaning in for a closer look during the reveal. The final result should be a coherent piece that communicates strength and playfulness in equal measure, a vehicle that invites touch, heightens anticipation, and ultimately delivers a satisfying, candy-filled ending to a day of celebration.
As you contemplate the full arc of this build, remember that the shaping of the body is not just about a single moment of cutting and gluing. It is a narrative thread that ties design, engineering, color, and interaction into one living thing. The piñata becomes a stage prop that grows with the party, a sculpture built from common materials that carries the energy of the children who helped to shape it and the memories of the moment when it finally bursts open. The process invites collaboration, experimentation, and the joy of creating something memorable from simple, everyday items. When the last piece of tissue is crumpled into a final creased edge, and the hanging rope is secured with a reassuring tug, you will see the wild grin of a monster truck looking back at the crowd, a symbol of play that is both bold and safe, a centerpiece born from cardboard, patience, and a shared love of celebration.
External inspiration: https://www.tiktok.com/@diy_dreams/video/7234567890123456789
Decorating Your Monster Truck Piñata DIY: Painting and Personalization Tips
Transforming a sturdy cardboard frame into a show stopping monster truck piñata begins with color. Painting is not only about choosing bold hues but about building momentum on the surface that will carry the party energy across the room. A well executed paint job makes the piñata feel like a moving, roaring vehicle rather than a static sculpture. Start with a base coat that matches your primary color choice. The base sets the stage for the vibrancy of the layers to follow and helps conceal the underlying seams from the paper mache. Use a broad brush or a foam roller to apply an even layer, allowing each side to dry before turning the piece. The drying time is not a hindrance but a design decision; it preserves the crisp lines you will lock in later and prevents muddy colors from bleeding into the next stage.
Next comes the fun of detailing. Monster trucks are all about contrast and texture, so plan a sequence that builds depth without clutter. Lay down tire treads and grill lines using a fine brush or a stencil for precision. If you prefer a more personal touch, freehand sketch the outline of racing stripes that race along the hood and sides, following the truck’s imagined motion. The key is balance: bold features should pop against the base, yet not overwhelm the silhouette you built. For shades, mix a vivid electric blue, a neon green, or a fiery red as your core colors. These tones photograph well, read clearly from a distance, and stay lively under party lights. Apply a lighter shade along edges to simulate light catching the contours, then deepen the recessed areas with a slightly darker hue to suggest shadows around wheel wells and under the cab.
Tires anchor the vehicle’s presence, so give them careful attention. Paint the tires a rich, charcoal black with a satin finish to mimic rubber, then add lighter gray highlights along the tread patterns to convey texture and grip. The rims deserve a metallic gleam; a touch of chrome or brushed silver can transform a flat circle into something resembling real wheel hardware. If you want extra realism, do a thin wash of a darker pigment along the inner rims to imply dirt from recent stunts. Keep the chrome accents restrained; a little reflection is more convincing than a mirrored surface that overwhelms other details. The headlights are another focal point. A pale yellow or warm white dot with a small white halo can simulate reflective bulbs, making the piñata appear ready to burst into headlights-first action once it is struck.
Once the base and main features are in place, you can begin to layer the personality that makes your piñata unique. Stencils are valuable for accuracy, but a freehand approach can yield character that feels handcrafted and heartfelt. If stencils, select clean, simple shapes for racing stripes, a bold logo on the hood, and symmetrical chrome accents along the bumper. If freehand, let your lines breathe; slightly imperfect curves often read as authentic, especially in a party setting where spontaneity shines. In either case, think about color blocking. A two-tone scheme can look striking against a bright body color and helps the design read clearly from a distance. A white or light gray outline around letters or stripes can sharpen edges and prevent colors from merging when the piñata moves through catching light.
After you are satisfied with the color blocks, safety comes next in the form of sealing. A clear, matte or satin spray sealant protects the paint from moisture, minor splashes, and the inevitable handling during a game. This layer should be light and even to avoid puddling or dripping that could distort lines you spent time perfecting. Allow the sealant to cure in a well ventilated area, turning the piece occasionally to ensure an even finish on all faces. When the seal is dry, you will notice the paint colors appear a touch richer and the surface gains a subtle, professional glow. The piñata is now not only visually striking but more durable for the party’s activity—hitting, swaying, and occasional contact with hands and props without losing its shapes or colors.
Personalization is where the design truly becomes a memory. A name across the hood, a favorite number on the doors, or a playful slogan along the side panels transforms a decorative prop into a keepsake that the guest of honor will treasure. If you choose to add text, plan the typography before painting. Use masking tape to lay out rough letter shapes, then fill with a bold color that contrasts with the background. For a more tactile effect, consider raised elements like small foam decals or paper mache letters affixed with a strong adhesive. However you do it, the goal is to preserve readability during the party and after the piñata breaks open. A simple name in a blocky font is often most legible from a distance, especially when balloons, banners, and the crowd create dynamic lighting around the display.
Another layer of personalization can be achieved with thematic details that nod to the spirit of monster trucks without becoming a logo showcase. Mini decals, glitter accents, or tiny foam spikes can be added along the edges to imply speed and aggression in a playful way. Glitter works best in small quantities and as an accent rather than a cover for larger surfaces; it catches light and adds whimsy without appearing overpowering. For an extra interactive twist, try a removable driver figure tucked inside the piñata. Create a tiny cardboard silhouette wearing a helmet and goggles and position it behind an opening that can be accessed when the piñata is broken. The driver element creates a surprising reveal and invites guests to imagine the vehicle’s story beyond the party moment.
Designing the piñata with the audience in mind also means considering the flow of the celebration. If the event is outdoors, you may want extra durability in the paint and a weatherproof seal, especially behind the wheels and under the cab lip where dust and moisture can accumulate. Indoors, a sealant with a softer sheen can age more gracefully under bright lights and the heat of the room. In either setting, the painting should maintain its crisp lines even as the piñata moves and absorbs light. A final touch can be a subtle, clear gloss over specific accents for a polished look, but use gloss sparingly; it can reflect glare or look sticky under certain lighting conditions.
To integrate this chapter with the broader DIY journey, think of painting and personalization as the bridge between construction and celebration. The structural work you completed in the frame and shell provides the canvas, while the color and details bring the personality to life. The result is not just a piñata shaped like a monster truck but a vivid centerpiece that mirrors the energy of a high-octane event. If you are seeking more ideas that align with accessories and finishing touches for toy-like builds, you can explore the Accessories page for related ideas and components that complement a DIY project like this. Accessories
For further inspiration beyond the camera and the brush, a visual guide can illuminate techniques that prose alone cannot fully capture. A short, visually driven resource explores how to craft a tire piñata that you can adapt into a monster truck by adding bold colors, oversized wheels, and switchable accents. This kind of reference demonstrates how simple shapes can be transformed with color and texture into a dynamic, event-ready piece. The point is not to copy but to learn the rhythm of layering, line work, and finishing that makes the final product pop on the day of the party. For more comprehensive, visual guidance, you may explore the external resource linked here. How to Make a Monster Jam Truck Piñata – TikTok: https://www.tiktok.com/@lourdestinydiy/video/739854123456789012
Rigs and Rallies: Secure Hanging Systems and Party Flow for a Monster Truck Piñata
Hanging smartly, playing safely
A great monster truck piñata needs two things to make a party memorable: a strong, dependable hanging system and a party plan that keeps energy high while risks low. Think of the hanging mechanism as the chassis and suspension of your piñata rig. It must carry the full load of treats, survive the impact of swings, and give predictable behavior when kids take their turns. At the same time, the party layout and schedule must funnel excitement toward the piñata moment without chaos. The two concerns belong together: a robust rig lets you run the game smoothly, and clear planning ensures everyone enjoys it safely.
Start by assessing the weight and size of your finished piñata. A typical monster truck-shaped piñata of moderate size will hold up to three pounds of candy and favors once filled. The empty structure, reinforced with cardboard and paper mâché, may add a pound or more. Plan for a working weight of at least five pounds to include extra reinforcements, paint, and attachments. Always select hardware with a load capacity well above the expected weight, and allow an additional safety margin for dynamic forces. When a swinging stick connects with the piñata, the forces multiply. Choose attachments rated for at least four times the static weight.
Where you hang matters as much as how you hang. For indoor setups, use a ceiling joist or other structural member, not a hollow panel or light fixture. If a suitable overhead anchor does not exist, create a freestanding rig. A simple A-frame built from two sturdy ladders or a portable tripod can keep the piñata safely suspended without stressing building structures. Outdoors, use a tree branch that is thick and healthy. Avoid limbs that show decay or excessive sway. When anchoring to a tree, distribute the load with a wide strap that will not cut the bark.
The mechanism itself can be straightforward. A heavy-duty hook into a joist, a length of rope tied through a reinforced loop in the piñata, and a short section of webbing for adjustability often suffice. For more control, add a small pulley or block-and-tackle. A pulley system allows you to raise and lower the piñata between turns. This is especially useful when very young children are participating or when you want to start with the piñata higher and lower it gradually. Use hardware designed for hoisting, not household picture-hanging hooks, and inspect every knot and connection before the first swing.
Making the piñata connection secure begins inside the structure. Reinforce the internal hanging point with doubled cardboard, a small wooden dowel, or a thick strip of craft foam sandwiched between layers of paper mâché. Run the rope or webbing through this internal patch and knot it with several secure hitches. Avoid gluing the rope to the surface; adhesive alone will fail under shock loads. If you plan to reuse the piñata frame, consider adding a metal eye bolt through the reinforced area and secure it with a washer and nut. Protect the interior of the piñata from tearing by covering sharp edges with tape or extra paper mâché.
Safety design is non-negotiable. Set a clear, roped boundary around the strike zone. Position supervising adults at both ends of the hitting line to guide turns. Give each child a soft bat or foam stick rather than a rigid wooden cane. Tape the bat handle to improve grip and reduce slippage. If you use a pulley system, assign one adult to control the hoist, lowering the piñata a few inches after each successful hit. Ensure the hoist operator stands outside the swing arc and communicates clearly—count heads, call out the next hitter, and keep the bat in a safe place between turns.
Consider a pull-string option for very young guests or indoor events where breaking the piñata is impractical. Instead of letting children strike the piñata, attach multiple strings to a flap that covers the candy chamber. Only one string releases the treats. This method eliminates swinging hazards while preserving excitement. If the pull mechanism is used, make sure the strings run through secure channels inside the piñata and that adults test the release many times before the party.
Testing is critical. Before children arrive, hang the empty piñata and give it a series of controlled taps. Look for any sign of tearing at the hanging point, loose seams, or unstable swinging behavior. Fill the piñata afterward and repeat the test with a slightly firmer tap. If you used a pulley, rehearse raising and lowering a few times to smooth out rope friction or unexpected jerks. Replace any frayed rope or suspect hardware. Keep a backup rope and a roll of strong tape on hand during the party.
The play area layout should support circulation, visibility, and emergency access. Place seating for parents and watchers in a semicircle well outside the swing zone. Keep the path to the piñata clear for the hoist operator and an adult assistant who can steady the base of any freestanding frame. If you create side attractions, like a mini monster truck racing track or obstacle course, situate them away from the central striking area. This prevents collisions and keeps attention-focused on the main event.
A well-paced piñata moment shines when every child feels included. Use a simple rotation system: group kids by age or size, and call them in order. Give each child a set number of gentle swings or a short time at the strings. If the piñata holds a lot of candy, consider a two-stage distribution. First, let each child collect one small treat after their turn. Second, after the piñata breaks, help in an organized way so everyone leaves with a fair share. This avoids stampedes and keeps smaller children from being left out.
Decoration and concealment of the hardware help maintain the illusion. Paint and paper accents can hide webbing, knots, and eye bolts while still leaving the hanging point accessible. Use removable decoration around the reinforced interior so repairs remain possible. If the piñata will be reused, plan repair patches and store them with the structure. Recycle the materials where you can; cardboard and paper mâché are easy to repurpose into future craft projects.
Finally, prepare for minor incidents. Keep a basic first-aid kit nearby. Brief supervising adults on what to do in case of a scraped knee or bump to the head. Make sure cell phones are charged and adults know how to reach local emergency services if needed. A calm, prepared adult team will keep kids safe, and it will let the piñata moment stay fun.
For inspiration on sturdy mounting and load distribution techniques applicable to DIY overhead rigs, consult resources about vehicle roof hardware and load-bearing systems. These visual guides can help you translate real-world load management to a party-safe setup—use them to inform anchor choices, not as direct hardware recommendations: roof racks for trucks
External reference for step-by-step visual inspiration and adaptations for tire-shaped piñatas: https://www.pinterest.com/pin/123456789012345678/
Final thoughts
Creating a monster truck piñata is not just a craft project; it’s a way to enhance your business and offer customers a unique experience at their events. By following the steps outlined in this guide, from design to decoration, you can provide a memorable, customizable item that delights both children and adults alike. As businesses look for creative ways to engage clients, a DIY piñata can become a staple offering, ensuring fun and excitement on special occasions. Start crafting today and watch as your events come to life with vibrant personality and energy.