
For business owners who frequently transport bicycles—be it for deliveries, events, or outdoor adventures—having a reliable bike rack is crucial. A DIY truck bed bike rack not only provides a cost-effective means of securing your bikes but also allows for customization suited to your specific needs. This article delves into the design considerations for a bike rack, the materials best suited for the build, a detailed step-by-step guide on constructing your bike rack, and crucial safety and maintenance tips to ensure longevity and functionality. With this knowledge, you’ll be able to create a bike transport solution that fits seamlessly into your business operations.
From Blueprint to Bed: Designing a Robust DIY Truck Bed Bike Rack
A DIY truck bed bike rack is more than a welded frame and a row of brackets. It is an exercise in translating weight, motion, and weather into a practical, repeatable system that protects bikes and preserves the vehicle’s finish. The design challenge is not simply to hold bikes in place; it is to create a stable, user-friendly carrier that respects the truck bed’s structure, accommodates a range of bike sizes, and withstands the realities of road travel. When you begin, you are balancing safety, functionality, durability, and vehicle compatibility. The result is a modular, thoughtfully engineered solution rather than a single-purpose gadget. The core idea is straightforward: a frame that anchors securely to reinforced bed points, cradles the bikes with minimal frame contact, and offers quick, reliable access for loading and unloading. Yet the path from concept to finished rack is where design decisions accumulate, layer by layer, much like the cross-bracing that will eventually hold the whole system steady on a rough highway.
Structural strength sits at the top of the list. The rack must bear the combined weight of the bikes, the riders, and the inevitable jolts of long trips. In practice, that means choosing materials and joint details that resist bending, fatigue, and corrosion. Galvanized steel offers a corrosion-resistant profile with high load capacity, while aluminum alloys provide a lighter yet sturdy alternative. The choice affects not just weight but also how the rack behaves under flex and vibration. A lighter frame might be easier to handle and install, but it must not bow or loosen under typical road conditions. Conversely, a heavier steel frame requires careful attention to the bed’s reinforcement points to avoid overstressing any single attachment. Either path benefits from a frame that is cross-braced and gusseted; these features distribute load more evenly and reduce the chance of catastrophic failure if a single bolt or weld begins to loosen.
The method of attachment to the truck bed is a decisive factor in overall performance. Bolted connections to reinforced beams offer a robust, serviceable solution that can be disassembled for storage or reconfiguration. Welded joints, while very strong in their own right, can complicate on-site repairs and limit adjustability. For a DIY project, a hybrid approach often makes the most sense: weld or fabricate a solid center section for rigidity, then bolt on removable end pieces or crossbars that can be swapped as needs change. Whatever the approach, the interface with the truck must be designed with redundancy in mind. Relying on a single attachment point is a recipe for disaster; multiple anchors, properly distributed along the bed, greatly reduce the risk of shifting or detaching during transit. In addition, anti-slip surfaces at contact points—rubber pads, neoprene liners, or thin rubberized coatings—protect the bike frames from scratches and dampen vibration, keeping the precious paintwork intact through years of use.
Placing the bikes themselves adds another layer of consideration. Bicycle securing methods must accommodate a broad range of sizes and geometries. A practical strategy uses adjustable clamps or brackets that grab the frame’s top tube or down tube without squeezing too tightly or deforming the material. When the frames are secured, the wheels should be immobilized to prevent wheel spin or rolling between contact points. Front-wheel chocks or wheel straps help anchor the front wheel, while a secure rear-wheel cradle or strap keeps the rear end from flapping against another bike. The securing system should be forgiving enough to fit mountain, road, and hybrid bikes alike, yet secure enough to hold the load during sudden maneuvers. For heavier bikes, such as downhill or enduro builds, extra attention must be paid to load distribution. A well-balanced rack distributes weight across multiple contact points rather than concentrating force at a single buckle or clamp, reducing the risk of frame damage and shifting during acceleration or braking.
The layout of the rack matters as much as the materials. A practical plan begins with precise measurements of the truck bed interior, including bed width, wheel well projections, and tailgate clearance. The number of bicycles to be carried and the expected frequency of loading and unloading guide the spacing and orientation of the cradles. It is wise to allow a small, consistent gap between bikes to prevent frame contact and to avoid crowding the front wheels or handlebars. In a busy lifestyle, ease of use becomes a core criterion. The rack should enable quick loading and removal, even when the truck is not perfectly aligned with a workbench or driveway. Removable or foldable sections can simplify storage when a full bed is needed for cargo or when the bikes are not in use. An additional consideration is the tailgate: the rack should not prevent it from opening fully, nor should it require a special sequence of moves to access the tailgate latch. Thoughtful layout reduces the chance of accidental damage to bikes or the truck while performing routine tasks like tying down gear or cleaning the bed.
Compatibility with the vehicle’s existing architecture is non-negotiable. If the bed has a liner, a spray-on coating, or a composite coating, the mounting approach must avoid compromising its waterproofing and structural integrity. Drilling holes in the bed is sometimes unavoidable, but placement should minimize exposure to water intrusion and potential rust points. A well-executed plan keeps paint intact and avoids interference with spray-on bed liners and anti-slip mats that may already be present. In addition, consider how the rack might affect other accessories on or near the bed, such as tie-down anchors, bed covers, or cargo nets. A truly durable DIY solution anticipates these interactions rather than reacting to them after the fact.
Maintenance and ease of operation are not afterthoughts but essential design inputs. The rack should require minimal maintenance in the face of harsh weather, road salt, and repeated assembly and disassembly. Corrosion-resistant fasteners, such as stainless steel or coated bolts, reduce upkeep. The design should favor standard hardware that is easy to source and replace, keeping the project affordable over time. Modularity helps here as well: if a section wears or a bracket becomes misaligned, you can swap that part without reconstructing the entire rack. A clean, simple disassembly also serves practical needs when you need to switch from bike-hauling mode to a flat cargo configuration. Material choice for coatings matters, too. A painted or powder-coated surface can dramatically extend life, while careful edge treatment prevents sharp corners from catching clothing or snagging bike components during loading.
Safety, of course, underpins every decision. Even in a hobbyist project, stability is non-negotiable. The design must prevent bikes from shifting or detaching at highway speeds, reducing risk to passengers and other road users. The chosen fastening system should maintain a clamping force over the life of the rack, resisting loosening from vibration or thermal cycling. The geometry of the rack should avoid creating leverage points that could pry open a bed liner seam or, worse, tear a mounting hole. Acknowledging these realities early helps avoid costly retrofits after the first road test. While DIY racks are not governed by formal regulations, treating them with the same respect you would give any heavy, mobile cargo ensures safer, longer-lasting results for every trip.
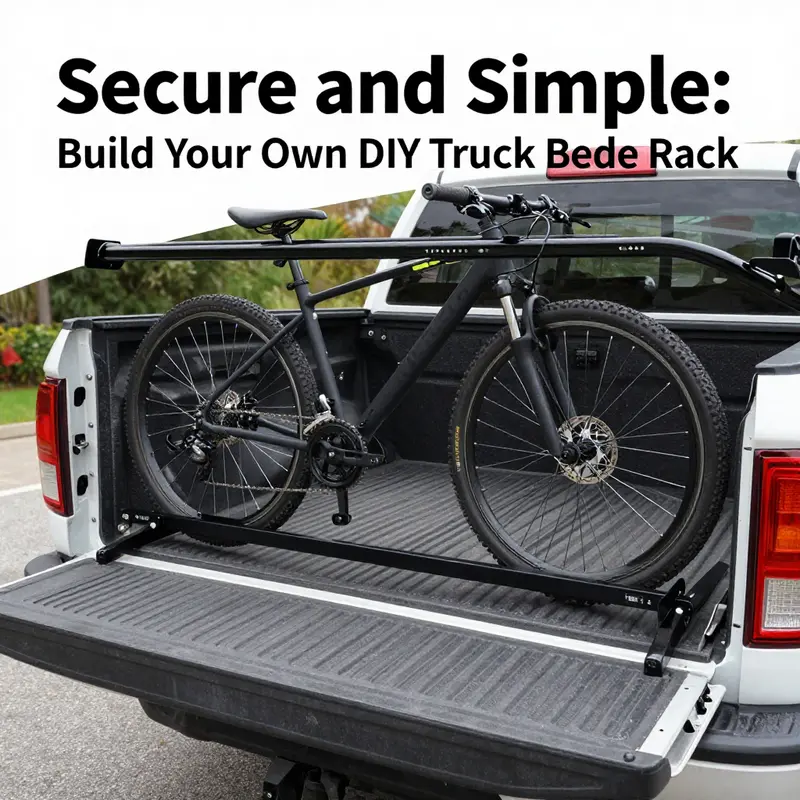
In practice, a successful DIY truck bed bike rack links engineering rigor with real-world usability. Start with a simple, sturdy frame that anchors to reinforced bed locations, then add crossbars and clamps that can be adjusted for different bikes. Build in anti-slip interfaces to protect frames, and design a layout that maintains tailgate access and cargo flexibility. Consider a modular approach: a base frame with removable or adjustable end blocks can accommodate future changes in biking gear or truck styling. The result is not a one-off gadget but a small system that integrates into daily routines with the same confidence as a factory-installed carrier, only more economical and customizable.
For readers who want a practical analogue to these principles, a related concept is explored in the broader family of vehicle racks and bed-mounted systems. While this chapter focuses on the bike-specific considerations, it sits alongside a broader conversation about the best mounting strategies and protective interfaces for vehicle accessories. For a related discussion that delves into mounting philosophies and cross-compatibility with other rack systems, you can explore this resource on roof racks for trucks, which offers additional context on secure mounting, load distribution, and user-friendly attachment schemes: Roof racks for trucks.
Design decisions, then, become a dialogue between form and function. The frame must be robust enough to withstand the road, yet approachable enough for a DIY hobbyist to assemble, adjust, and repair without specialized tools. It should respect the vehicle’s coatings and structural features while preserving the beauty of the finish that keeps the truck looking good after years of travel. The best DIY truck bed bike racks achieve a quiet balance: they don’t shout about their presence, but they earn their keep through reliability, ease of use, and peace of mind during every mile. A well-planned rack does not merely hold bicycles; it becomes an extension of the vehicle itself, a functional system that travels with the owner rather than a bulky add-on that complicates daily driving.
As you translate these principles into a concrete project plan, consider drafting a simple bill of materials and a sequence of fabrication steps. A practical starter kit might include a few lengths of sturdy tubing, a handful of crossbars, a set of adjustable clamps, some anti-slip contact pads, and a set of corrosion-resistant fasteners. Don’t rush to perfect the entire design in a single pass. Start with a minimal frame that accepts two bikes and then gradually add features—additional mounting points, optional wheel trays, or a removable rear rail—based on real-world feedback from your first test runs. The incremental approach reduces the risk of wasted material and gives you a clear path to refinement. The end result will be a rack that not only holds bikes securely but also fits your routine, your truck bed’s geometry, and your budget, all without compromising the vehicle’s integrity or the rider’s peace of mind.
External resource for broader context can be found here: https://www.alibaba.com/product-detail/How-to-Build-a-DIY-Truck-Bed-Bike-Rack_1600489243775.html
Choosing the Backbone: Material Choices and How They Shape Your DIY Truck Bed Bike Rack
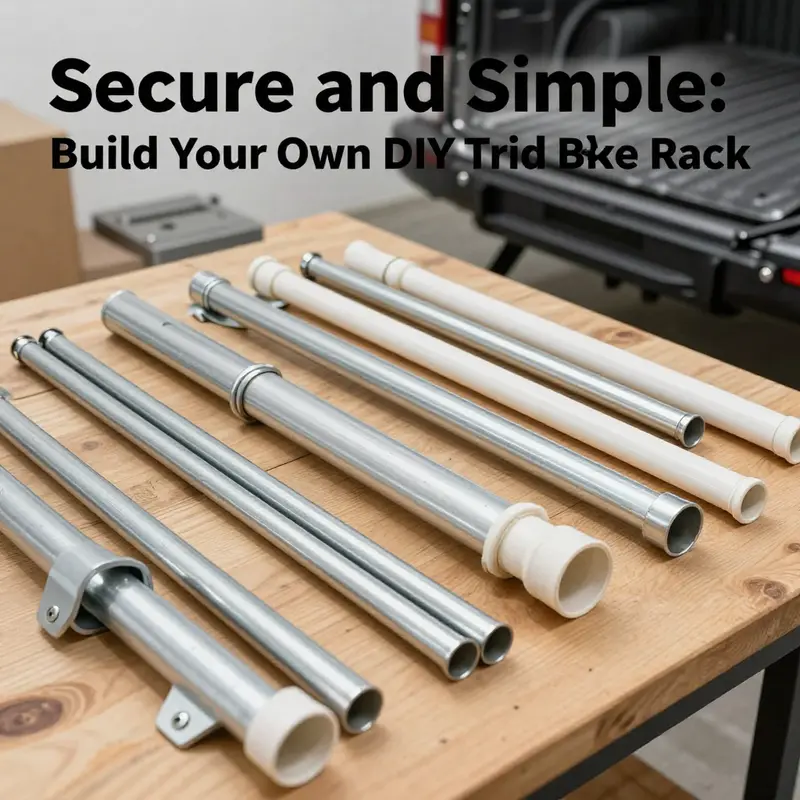
Selecting the right material for a DIY truck bed bike rack is more than choosing what is on hand. It is the backbone of safety, reliability, and long-term satisfaction. The material you pick will influence how many bikes you can carry, how easy it is to assemble and service, and how well the rack stands up to weather and road wear. Start by defining your actual needs: how many bikes, typical riding conditions, exposure to water or salt, and whether you want a lightweight prototype or a robust, long-lasting build. Then map those needs to three core material strategies: PVC piping, wood, and carbon steel, each with distinct tradeoffs in weight, cost, strength, and maintenance. In practice, durability and weight often pull in opposite directions. A heavier, stiffer rack can handle more bikes but may be harder to install and affect fuel economy. The art is to balance strength, weight, and ease of handling while staying within your budget and space constraints. A well-chosen material also makes iterative improvements feasible; if you misjudge capacity or fit, you can upgrade the backbone rather than rebuilding from scratch. Plan a measured approach: measure the truck bed interior, locate anchor points, and think about how bikes will be clamped and padded to protect finishes. Looking at examples from DIY builds and roof rack guides can offer practical lessons on spacing, padding, and load distribution. For example, understanding how load is distributed across contact points helps translate design choices into real-world stability. With that context, explore PVC piping, wood, and carbon steel as three pathways toward a secure, usable rack, then weigh how each aligns with your needs and climate. PVC piping is a popular budget option for quick prototyping; it is light and inexpensive, but its joints and wall thickness limit long-term durability. If used carefully, 1″ furniture-grade PVC can support typical bikes in low to moderate use, while recognizing that plumbing-grade PVC may crack under vibration or sustained stress near joints. Joints should be reinforced and sleeves or brackets used to distribute stress. Wood offers stiffness, familiar tool access, and larger contact surfaces for support. But wood requires weather protection and annual maintenance; sealing, painting, or coating slows water ingress and reduces warping. Wood frames can be heavier, increasing load on bed anchors and affecting handling, but they can be very durable when properly braced and protected. Carbon steel provides maximum strength and predictable performance for heavier loads, but weighs more, costs more, and demands corrosion protection. A steel backbone benefits from bolted joints to allow serviceability and modular upgrades, while welded joints can be more rigid but less forgiving for field repairs. Regardless of material, plan for joints that distribute stress, padded contact areas to protect bikes, and maintenance routines to prevent wear. Start with a two-bike prototype to learn what works and what does not, then iterate with added bracing or a differently configured backbone as needed. Finally, align your material strategy with your environment: if you frequently ride near salt air or in wet climates, emphasize corrosion resistance; in dry climates you may push more toward wood or PVC as a starting point. The goal is a cohesive system that holds bikes securely, minimizes frame damage, and remains adaptable as needs evolve. If you want to learn more from other builders, seek out guides on truck bed or roof rack design to broaden your understanding of layout, spacing, and mounting strategies.
From Blueprint to Bed: A Hands-On Guide to Building a DIY Truck Bed Bike Rack
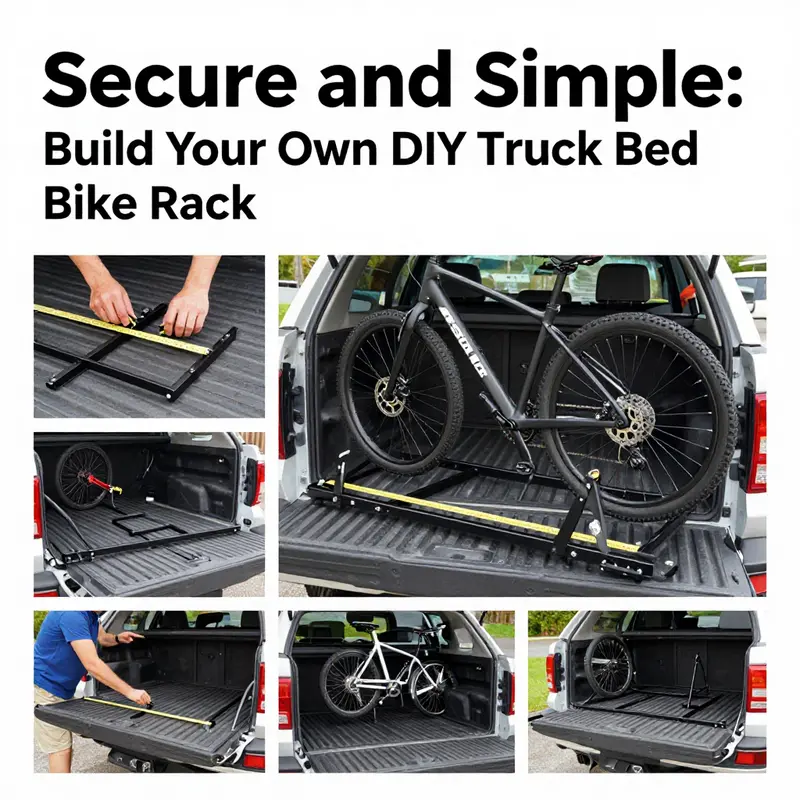
Begin with planning and measurement. Start by measuring the interior dimensions of the truck bed, noting the width between the wheel wells, the overall length, and the height at which a rack would sit relative to the bed rails to determine mounting height. Sketch a simple frame that can hold two bikes without crowding them and decide how bikes will rest on supports with pads to prevent chafing. Choose materials that balance strength with workability; PVC is good for light use and quick prototyping, while steel or aluminum offers greater durability with brackets or clamps for strong joints. Do a dry fit to verify alignment and clearances before permanent assembly, and simulate weight distribution with mock bikes to check stability. Finally, plan for attachment to the bed (through bed bolts or clamps), test the setup with a light load, and schedule periodic maintenance to keep joints tight and pads in good condition.
Guarding the Ride: Safety, Maintenance, and Longevity for Your DIY Truck Bed Bike Rack
A DIY truck bed bike rack can transform how you travel with bikes, but safety is not a one-time check. It starts with design choices and ends with disciplined maintenance. When you build a rack for the back of a pickup or similar platform, you’re creating a load path that must withstand vibrations, jolts, and wind. A rack that neglects weight, alignment, or corrosion can compromise vehicle handling, damage bike frames, or create hazards for other drivers. The aim is not cleverness at the expense of reliability, but a system that holds fast, protects each bike, and stays predictable across miles of travel. Understanding safety means looking at how the rack is built, how it is used, and how it ages over time. The material you choose, the joints you weld or bolt, and the manner you secure bikes all matter. The best DIY designs balance strength, simplicity, and accessibility from first cut to final tightening.\n\nThe core of safety begins with material selection. If your load includes heavier bikes or multiple frames, match or exceed that weight in the rack itself. Undersized components are a real risk. A common pitfall is using tubing that seems adequate but is quickly overwhelmed by dynamic loads. If you choose a larger diameter, steel or aluminum offers advantages in load capacity and rigidity. Steel delivers strength but requires rust protection, especially in wet or salty environments. Aluminum resists corrosion but can suffer galvanic issues if paired improperly with other metals or coatings. PVC is affordable and easy to cut, but better suited for light-duty uses; wall thickness and joint design are critical. A 3/4 inch PVC pipe can perform better under load than a 1/2 inch variant, but joints and supports must be robust. In practice, some builders blend a steel frame with PVC fittings to ease prototyping. The takeaway: materials should reflect use—how many bikes, their weight distribution, road conditions, and desired longevity.\n\nBeyond materials, the dry-fit process is crucial. Dry-fitting means assembling the rack without final fasteners to verify alignment with the truck bed, even loading channels, and clamp spacing. Skipping this step leads to trouble. Without a dry-fit you risk misaligned frames, uneven bite on clamps, or gaps that let bikes shift. A thoughtful dry-fit also helps you plan how you will secure bikes: straps, clamps, or pads. Testing load distribution during dry-fit prevents frame dents, paint damage, or instability on the road. The pace of DIY culture may tempt rushing, but the careful rhythm of dry-fitting mirrors professional practice. It is a small investment that pays off with peace of mind and fewer roadside repairs.\n\nTools and techniques matter as much as the design. Cutting, drilling, and assembly require safety protocols. Use eye protection, gloves, and hearing protection. Measure twice, cut once. Use lubricants to ease bolt assembly and reduce wear. Tighten fasteners with a torque wrench to avoid stripping threads or crushing mounting surfaces. Under-tightening allows movement that can cause rattles or loosening over time. The discipline of proper tools and a dry-fit creates reliability you can depend on.\n\nInspection after installation turns a DIY build into a durable system. Regular checks are proactive maintenance, not paranoia. Visually inspect for corrosion, frayed straps, or rust near joints. If the rack sits in moisture or near road salt, corrosion can creep in before you notice it. Joints and fasteners are most vulnerable because they endure repeated stress. If you see loosening or cracking, address it promptly. Each inspection should notice subtle changes in alignment; a wobble can grow under load. Lubricate moving joints or clamps to keep operation smooth and reduce wear.\n\nMaintenance includes routine cleaning. Wash with mild soap and water after rides with dirt, mud, or road salt to reduce corrosion and remove debris. Avoid harsh cleaners near joints unless compatible with your materials. Dry thoroughly after washing to avoid damp crevices. For metal parts, apply a light coat of protective lubricant on threaded connectors and moving clamps. This reduces friction and eases disassembly. Weight limits remain central: stay within rack and hitch ratings and reassess if bikes or configuration change.\n\nLocal laws and visibility matter. A rack should not block license plates, tail lights, or rear visibility. Laws vary by location, so verify lighting, reflectors, and plate illumination requirements. Design with visibility in mind from the start. If mounting points obscure signals or plates, redesign routing. A design that keeps lights, plates, and reflectors visible is safer and reduces the chance of a citation.\n\nUsability and routine maintenance go together. Document quick weekly checks: looseness, strap wear, and secure clamps. Monthly checks can be more thorough: inspect the entire frame for cracks, test dry-fit alignment, and look for corrosion. If you use mixed materials, monitor how each behaves with temperature changes; polymers can stiffen in cold or soften in heat, affecting grip. Treat the maintenance as a regular routine, not a one-off event.\n\nThe ongoing practice is a learning loop: test, observe, adjust. Small refinements—like adding a cross-brace or repositioning contact points—can improve stability and reduce wear. Refine how you secure bikes to distribute load evenly. If you want broader ideas about safety and practical storage, you can explore related truck bed accessories for general principles that apply to bike racks. See the cataloged guidance on Accessories.\n\nIn the end, safety and maintenance are about stewardship of your gear and vehicle. A thoughtful design, careful dry-fitting, disciplined use, and diligent upkeep create a system that performs reliably across seasons and miles. The cycle of plan, build, test, inspect, clean, tighten, and repeat leads to a calmer, more predictable driving experience and preserves your equipment. For readers seeking a formal perspective on safe DIY pickup racks, external resources provide structured guidance on legal and safe practices.
Final thoughts
Building a DIY truck bed bike rack is an empowering project that not only enhances your capacity to transport bicycles securely but also fosters creativity and resourcefulness. By understanding the design considerations, selecting the right materials, following a structured building process, and prioritizing safety and maintenance, you are well-equipped to craft a rack that meets your business needs. As you embark on this project, remember that the right approach will not only ensure safe transport for your bikes but also contribute to the efficiency and professionalism of your operations.