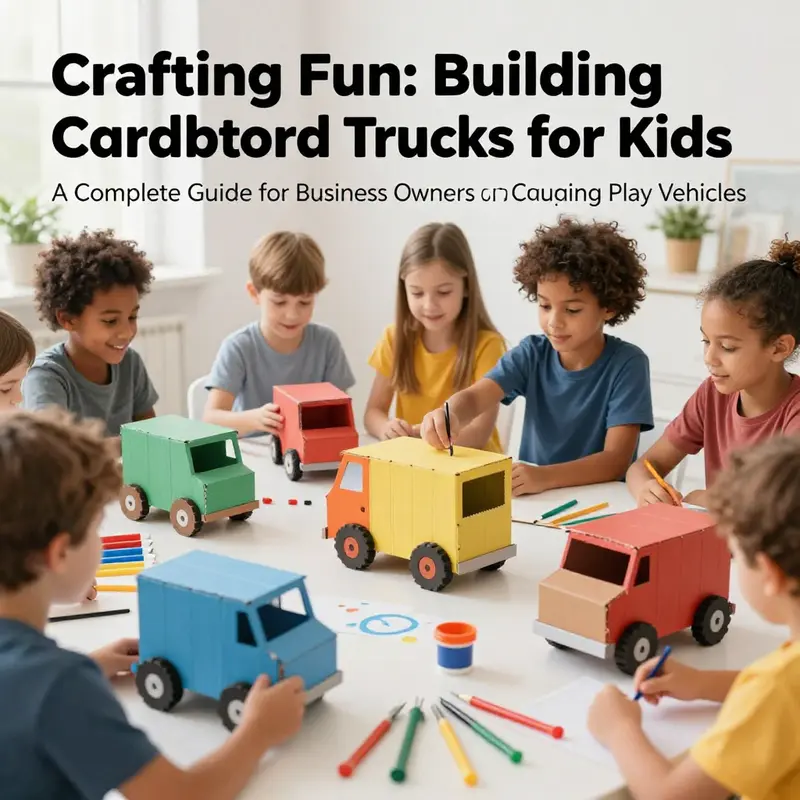
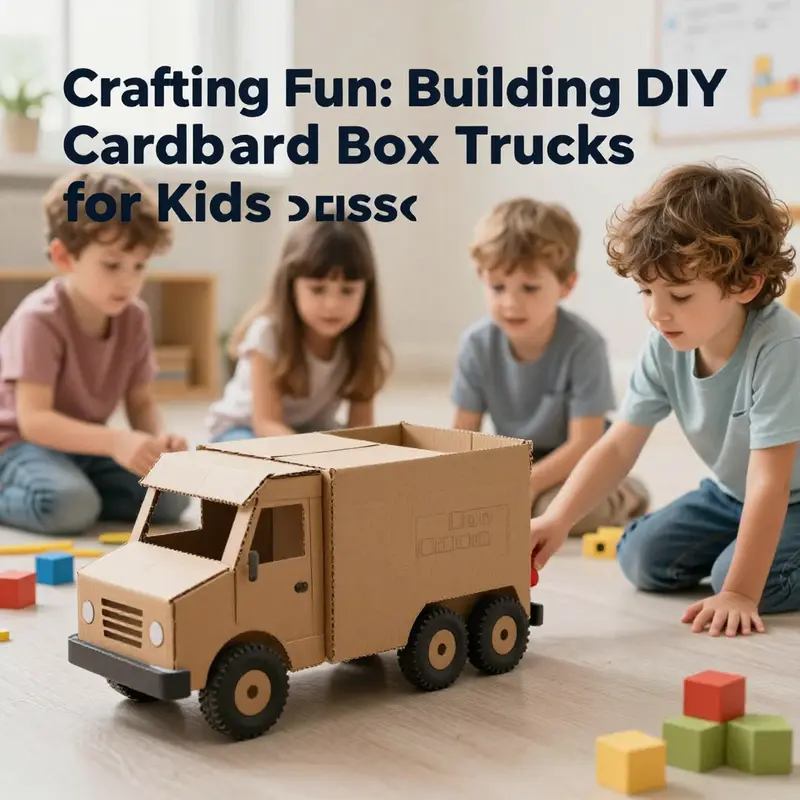
Engaging young minds through hands-on activities can significantly enhance creativity and motor skills. One fun way to achieve this is by making DIY cardboard box trucks, perfect for kids’ playtime. This article will walk you through the necessary materials and preparation steps, step-by-step construction methods, creative decoration techniques, and safety practices for testing the final product. By following these chapters, business owners can create an entertaining and productive project that encourages family bonding and imaginative play.
From Box to Cruising Machines: Materials, Preparation, and the Practical Build of DIY Cardboard Box Cars and Trucks for Kids
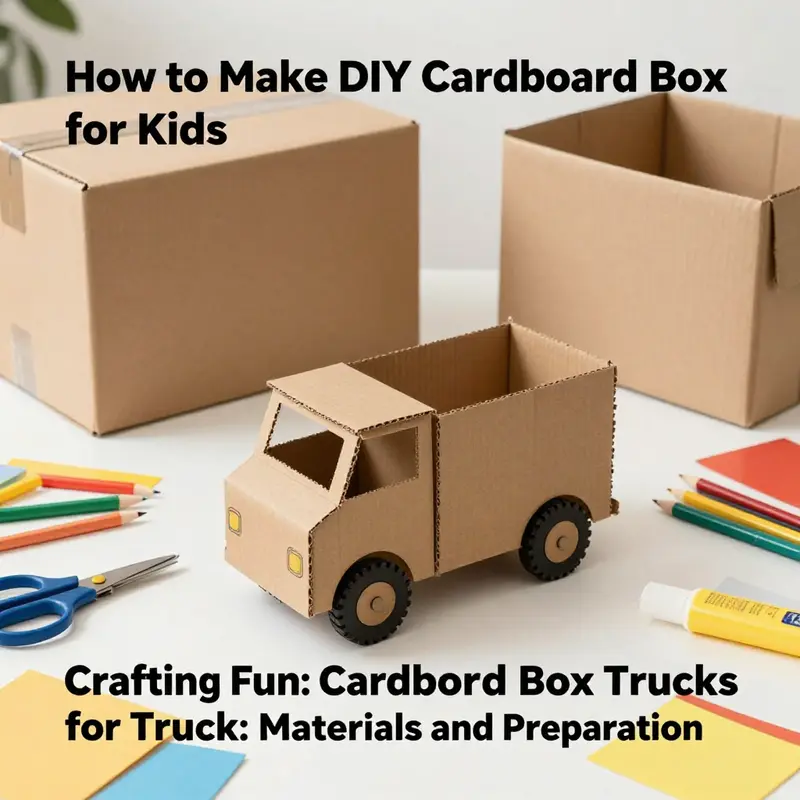
A cardboard box, once flattened and stored after a move or a delivery, can become a portal to motion, imagination, and hands-on learning. The act of turning a plain shipping or appliance box into a car or a truck for a child is more than a craft; it’s a small workshop in which planning, measurement, and careful assembly meet play. The goal is not just to produce something fun, but to nurture confidence, fine motor skills, problem-solving, and a sense of ownership that comes from building something with your own hands. When approached with deliberate materials and a thoughtful prep phase, the project stays sturdy enough for daily pretend drives, while remaining forgiving enough for young builders who want to reimagine every corner after each test run. The journey from a box to a cruising machine begins with choosing the right box and ends with a test drive that confirms the work you invested will hold up to enthusiastic play for days or weeks to come. Along the way, the preparation steps—planning, cutting, attaching, reinforcing, and decorating—form a rhythm that blends creativity with practical safety and durability.
The first choice sets the tone. You want large, undamaged cardboard, ideally corrugated, that can support a child’s weight and the inevitable bumps of a real driveway or carpeted floor race track. A box that measures at least 36 inches by 24 inches by 24 inches provides enough surface area for a car’s silhouette or a truck’s cab and trailer, while leaving room for wheels, seats, and windows without crowding edges. If you don’t have a box of that size in your reach, you can combine two or more boxes, reinforcing seams with sturdy tape or glue. The goal is a solid, rectangular base that won’t buckle when kids push, pull, or climb in and out. Strong tape—duct tape for heavy-duty seams or packing tape for quick fixes—becomes your friend here. The preparation phase rewards the careful hand and the patient eye: measuring twice, cutting once, and planning the layout before you ever pick up scissors or a knife.
As the project begins to take shape, the design phase becomes a playful negotiation between fantasy and physics. Sit with your child, lay the box flat, and sketch the vehicle’s outline with a pencil. Think about a typical car’s silhouette, but don’t be afraid to borrow a truck’s signature elements: a cab that feels like a driver’s space and a trailer that reads as cargo or extra seating. For younger kids, simplicity often wins—clear front and back ends, a couple of windows, and a smooth line for the roof. For a truck, a distinct cab and a longer trailer invite the imagination of deliveries, caravans, or even a fantasy rescue vehicle. If you want the most accurate scale, measure your child’s height and plan a seat that allows a comfortable, upright posture with a steering wheel within easy reach. The design step blends math with storytelling: every line you draw has a purpose, whether it marks a wheel well, a door, or a decorative stripe that will become a character’s insignia or a racing livery.
With the basic shape planned, the next phase emphasizes safe, precise cutting. Scissors work for small, controlled cuts, but many families find a box cutter or an X-Acto knife more precise for straight lines and hinge cuts. Always supervise children during any cutting activity, and consider using safety tips on scissors for younger kids. Score first, then cut. Scoring makes the cardboard predictable and reduces ragged edges, while pre-scored lines help you create doors that either stay attached like flip panels or open with a gentle hinge. When you cut windows, you can cut them directly from the main piece or, for a more polished look, cut the window shapes from a separate piece of cardboard and glue them in place later. In a truck build, plan where the cab will connect to the trailer. That joint—whether a simple glue-and-tape connection or a more integrated fold—needs extra attention so the two sections move as a single vehicle rather than two loose parts.
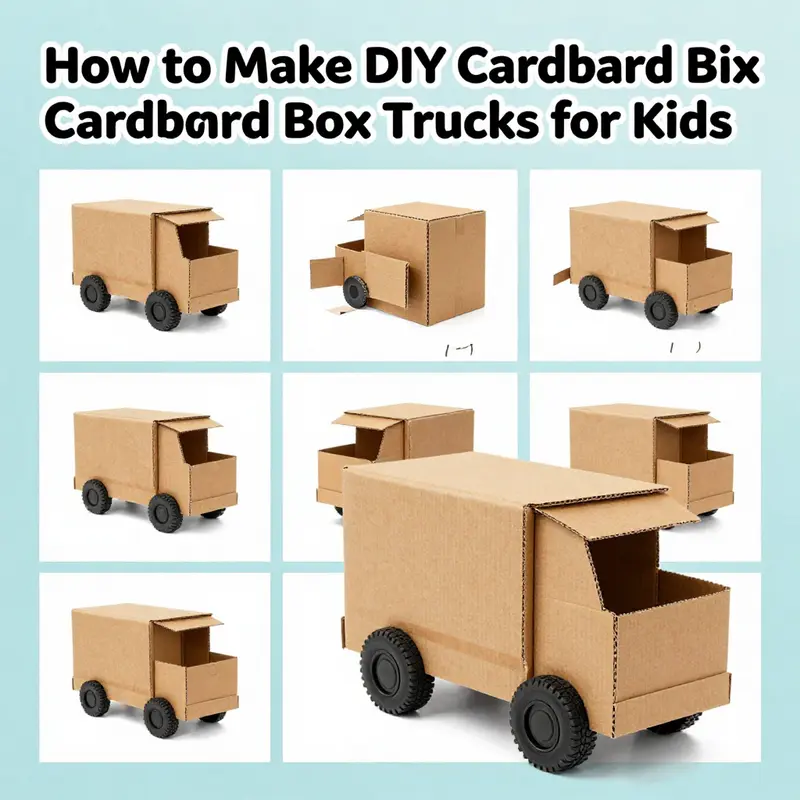
Wheels and axles anchor the vehicle’s playability, and the materials you choose for them shape the vehicle’s performance. Cardboard wheels cut from the same box can work, but many builders find usefully durable wheels in the form of bottle caps, plastic lids, or even small wooden discs. The axle mechanism is the heart of movement. A simple, reliable method uses either a wooden dowel or a sturdy plastic rod as the axle. You’ll want each wheel mounted with a small hole through its center, so you can thread the axle through and secure it at both ends, using tape or glue to minimize wobble. If you have a drill and a steady hand, pre-drilling smaller holes through the box body where the wheels will attach can keep the alignment clean. The axle should allow the wheels to spin with minimal resistance while remaining firmly attached to the chassis. For a car, the wheels sit near the lower edges of the box to mimic a real vehicle’s clearance; for a truck, you might place the wheels wider apart to reflect the broader stance of a cargo hauler. Test fits are essential at this stage. If the wheels wobble or rub, adjust by adding thin washers of cardboard or adjusting the axle’s position, then reinforce the joint with extra tape so everything stays in place during rough-and-tumble play.
Reinforcement is the unglamorous but crucial craft that transforms a playful project into a durable toy. The joinery—where the body pieces meet, where the cab attaches to the trailer, and where the wheels mount—needs more than a single layer of tape or glue. Layering cardboard strips along seams strengthens corners against daily wear. Reinforce wheel mounts with extra patches of cardboard or multiple layers of tape on the outside, especially around high-stress joints. If the design includes a fold-down door or a dashboard feature, consider adding a thin reinforcing strip at the hinge line so the door doesn’t split from repeated opening and closing. This is not about adding weight; it’s about spreading load to prevent edges from peeling and edges from tearing under stress. In practice, you’ll often hear the mantra: more tape, more patience, more confidence in the build. The result is a chassis that can take the rough handling of a hallway race or a yard sprint and still come back for another round of imaginative driving.
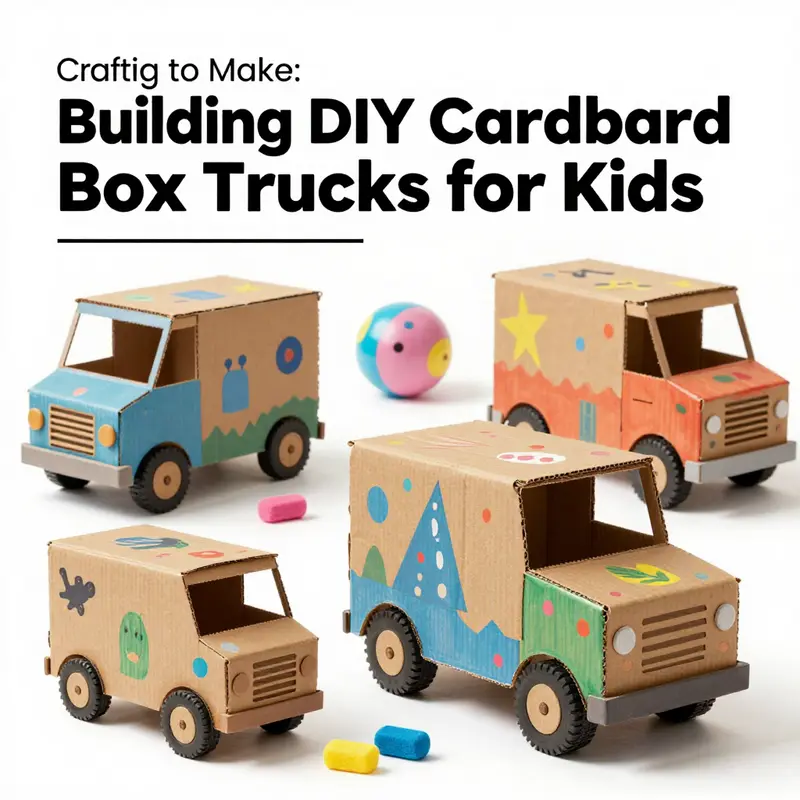
Decoration is where the project blossoms into personality. With the car or truck’s structure secure, you begin to tell its story. Markers, crayons, or paints allow you to establish a color scheme—and the choice can reflect a favorite family theme, a pretend delivery service, or a fantasy racing league. You can decorate the body with stripes, checkered patterns, or bold logos that your child creates. For a more realistic feel, use paper plates for steering wheels or dashboards, craft headlights and taillights from small circles of craft foam or cut shapes from bottle caps, and add a grille made from ribbed cardboard or a lattice pattern drawn with a marker. Small details bring the vehicle to life: a license plate using a square piece of cardboard with hand-drawn letters, a sticker or drawing that signals the vehicle’s purpose, or a tiny driver’s seat created by folding a small cardboard panel and attaching it inside the cab. For extra flair, fabric scraps can imitate upholstery on a tiny seat, while glitter and stickers add whimsy. The decorating phase is a shared moment of study and storytelling—how color choices reflect speed, safety, and the family’s brand of play.
Safety remains a guiding compass throughout construction. Supervise the cutting and gluing, especially with young builders who are curious about every corner. Avoid sharp tools for the youngest hands, and use safety scissors or blunt blades when possible. Ensure wheels are securely mounted and do not protrude past the box edges in a way that could snag clothing or toes. Check that all joints are firmly connected and that edges are smoothed to prevent splinters or tears. Before any ride or push test, give the car or truck a thorough once-over: push gently to see if wheels turn freely, listen for any creaks, and watch for any loose flaps that could catch on clothing. A quick test drive on a carpet or smooth floor will reveal if a wheel needs realignment or if a seam needs reinforcement. The safety check isn’t a one-and-done moment; it’s a recurring practice as confidence in the build grows and the vehicle undergoes new play scenarios.
As you and your child approach the end of the build, you transition from maker to conductor of a little fleet. If you’re planning a family session around a city of cardboard vehicles, you can introduce a simple system that teaches responsibility and care. Assign roles—design lead, cut supervisor, glue captain, and test driver—and rotate tasks from one session to the next. This routine helps kids internalize project management skills while preserving the joy of creation. When you introduce a truck version, you may find that it’s helpful to design the cab and trailer as two connected modules that can detach and reattach. The cab might house a small seat for the child, while the trailer becomes a cargo bay. In your planning, you’ll consider how the two portions connect—by a simple hinge made of reinforced cardboard or by overlapping tabs that can be secured with tape. The beauty of this approach lies in its adaptability: as your child’s play needs evolve, you can remake the trailer into a camper, a delivery van, or a monster-truck hauler, using the same basic materials and techniques with only minor design refinements.
A note on sharing and inspiration: even as you converge on a plan, don’t be afraid to borrow ideas from other cardboard builds to spark your own. The aim is to translate a two-dimensional sheet of cardboard into a three-dimensional vehicle that sparks movement and narrative. If you want more on truck configurations and accessory ideas, our guide to truck boxes offers additional pathways for experimentation and expansion. For an ongoing source of inspiration and practical techniques, you can explore related ideas in our internal resources, such as the truck boxes guide, which can help you think about how to expand your cardboard fleet with shelves, racks, or storage compartments that turn play into a small, imaginative workshop.
The final flourish is the moment the vehicle truly becomes a vehicle: the first drive. A gentle push on a smooth surface should give the wheels a spin that’s steady and predictable. If the vehicle runs well on a carpet, test it on a hard floor to see if the wheels require more clearance or a re-alignment. If the ride feels sluggish, recheck wheel alignment, ensure axle ends are securely taped, and verify that the wheel wells aren’t binding on the body. If the ride is bouncy or unstable, consider adding a light touch of reinforcement around the wheel mounts or slightly repositioning the wheels to lower the vehicle’s center of gravity. After a successful test, you have a tangible, durable toy that your child will reach for again and again, a symbol of the day you transformed a box into a personal vehicle. The learning embedded in that effort—planning, measurement, iteration, and collaboration—becomes the story you tell whenever you watch your child push a little car around the room or yard.
In the end, the project is less about a finished object and more about the process that brought it to life. The box offers a flexible canvas, and the family’s time together turns a simple craft into a shared achievement. By selecting the right box, planning the layout, cutting carefully, reinforcing important joints, attaching wheels with simple axles, and celebrating the customization through thoughtful decoration, you set the stage for countless rides and story-driven adventures. The model you create can be a car today, a truck tomorrow, or a fleet of vehicles the week after. And as your child grows—learning to measure, cut, glue, and test—these early cardboard builds become a foundation for curiosity, resilience, and creative confidence. For families who want to continue building, expanding, and improving, a quick follow-on project could be to experiment with different wheel sizes, add a springy suspension look with layered cardboard struts, or create modular accessories—like a roof rack, a simple steering wheel that can be rotated by hand, or a front grille that glows with LED-safe lights on a future cardboard upgrade. The possibilities are limited only by imagination and the care you invest in teaching safety and craftsmanship.
To sum up, materials and preparation for DIY cardboard box cars and trucks are not just a shopping list or a to-do sequence. They are a blueprint for a collaborative, open-ended project that rewards planning, patience, and play. The right box, the right tools, and the right mindset transform a humble rectangle into a tiny vehicle that travels across carpeted highways and imagined landscapes. The next time you see a shipping box lying idle, recall that it holds the promise of a driveway, a racetrack, or a weekend’s worth of storytelling. And remember, the process of turning it into a car or truck—step by careful step, with your child by your side—becomes a memory that stays with them long after the first test drive ends. If you’d like more ideas on how to extend the build or to connect it to broader vehicle-themed projects, explore related concepts in our truck boxes guide, and keep the momentum going. For external readers seeking a clear, step-by-step demonstration of the core technique, this external resource offers visuals and tested methods that complement the approach described here: https://www.instructables.com/How-to-Make-a-DIY-Cardboard-Box-Car-for-Kids/.
From Box to Fleet: A Playful, Hands-On Guide to Building Kid-Size Cardboard Trucks
A cardboard box carries more possibility than simply shipping a gift. When a child and caregiver sit with a large box, the space between imagination and action narrows to a heartbeat, and the box becomes a vehicle for pretend travel, a learning workshop, and a shared project that stretches small hands and curious minds. Building kid-size cardboard box cars and trucks is not merely a craft; it is a chance to practice planning, problem solving, and fine motor control while keeping play light, inclusive, and eco-friendly. The process invites both children and adults to move through phases of design, cutting, assembly, decoration, and testing; through each phase, a sense of ownership grows, turning a simple container into a personal fleet that can cruise across living rooms and backyards alike. The beauty of this activity lies in its openness: no single perfect design exists, only possibilities that adapt to the materials on hand, the child’s interests, and the shared time you invest together.
To begin, consider what kind of vehicle will take shape from the box. A dump truck offers a straightforward silhouette with a big, practical cargo box above a compact cab. A tractor-trailer introduces a longer, more intricate construction, hinging two separate boxes to create a cab and a trailer. A flatbed truck, by contrast, invites exploration of open space for loading pretend cargo. Each option supports different levels of challenge and storytelling, so the choice can align with a child’s age, dexterity, and curiosity. Sketch the plan directly on the box with a pencil. Mark where the front and back ends will be, where the doors and windows go, and how the cab, cargo area, and any hitch or connection points will join. If your child is older, you can turn the planning into a mini engineering exercise: estimate proportions, think about weight distribution, and anticipate where extra tape or a support brace might be needed. If younger children are involved, keep the plan simple and flexible, emphasizing the fun of design rather than precision.
Gathering materials is the step where practicality meets creativity. You’ll want a large, clean cardboard box—ideally a shipping or appliance box that stays stiff under handling. Smaller boxes can become the cab or the trailer, contributing realism without demanding precise cuts. Scissors or a utility knife are useful for clean lines, but adult supervision is essential when sharp tools are involved. A ruler helps with straight cuts and even edges, while a pencil keeps marks reversible as changes arise. Tape—duct tape or packing tape—provides the backbone of sturdiness, though white glue can handle lighter bonds for doors and windows. Decoration supplies like markers, crayons, and paints awaken color and personality, while cardboard scraps can become details such as doors, grilles, and mirrors. Think about wheels early. Bottle caps, circular discs, or thick cardboard circles work well, and you can upgrade to small wooden or plastic wheels if you have them. Optional extras—straws for axles, sticks for reinforcements, or fabric scraps for seat cushions—add texture and tactile variety. Safety considerations guide every choice: keep edges smooth, avoid small parts that could detach and pose a choking hazard for very young children, and ensure the vehicle’s weight is balanced so it doesn’t tip easily during play.
The cutting and shaping phase is where the box begins to resemble a real vehicle. Start with the main body: cut the front and back ends of the largest box while keeping the sides intact to preserve structural strength. For a cab, repurpose a smaller box into a driver’s compartment. You can cut a window and cover it with clear plastic wrap or a thin film to simulate glass, or simply leave a window opening for airflow and light. The goal is to capture the vehicle’s essence without sacrificing sturdiness; if a parent or caregiver worries about a near-perfect cut, remember that rough edges can later be reinforced with tape and still function beautifully in play. Add details by cutting out doors, windows, and vents from extra cardboard pieces. For a two-box tractor-trailer, you’ll cut a second box for the trailer and plan a hinge-like connection or a simple taped joint at the back so the cab and trailer read as distinct yet connected parts. The design language matters more than exact realism here—children respond to recognizable shapes and the sense of a purposeful vehicle rather than a museum-quality replica.
Assembling the vehicle merges creativity with engineering, and this is where a project becomes suddenly tangible. Attach the cab to the main body with generous layers of tape or glue, ensuring the junctions are robust enough to withstand enthusiastic play. For a tractor-trailer, connect the cab and trailer with a flexible joint along the back so the two sections can move in concert, much like a real semi-truck. If you choose to hinge the two boxes, a simple fabric strip or a strip of strong tape can act as a rudimentary hinge, giving the trailer a little tilt and a sense of movement that kids naturally respond to. Reinforcement is key: go over every edge where pieces meet and layer extra tape along seams where stress might occur as little hands push, pull, or lean into the vehicle during imaginative scenarios. The emphasis is on durable play, not perfection at the design stage.
Wheels and axles bring the box to life and invite motion. Cut four circles from bottle caps, thick cardboard, or sturdy discs and prepare axles from straws, sticks, or skewers. The trick is to punch a hole in the center of each wheel, thread the axle through, and secure the ends so the wheels can rotate smoothly. Position the axles into the bottom of the vehicle, one wheel on each side, and secure with tape or glue so the wheels stay aligned and don’t wobble dangerously. If a child wants extra speed or a smoother spin, think about incorporating tiny rubber bands or small gears to create a simple gearing effect, always balancing fun with safety and avoiding overpowering the structure with fragile mechanisms. The axle placement matters as well; placing wheels slightly outward from the main body and ensuring equal distance on both sides helps prevent tipping when the car is pushed or pulled across carpet, pavement, or grass. The wheel size should be proportionate to the scale of the box: too-large wheels can overwhelm the chassis, while too-small wheels might not provide enough grip for the chosen floor surface. A simple, reliable setup often looks less like a finished toy and more like a sturdy, go-anywhere vehicle that children can believe in, which is exactly the point of the exercise.
Decoration is where imagination becomes a personal signature. With the shell of the vehicle secure and the wheels turning, the car or truck can be painted, colored, and detailed to reflect a child’s dreams. Bright colors often invite immediate playtime, while bold graphics—such as headlights painted with white or yellow accents, a grille drawn on the front, a license plate, and a steering wheel interior—give the vehicle identity. You can add stickers, fabric scraps for texture, or even recycled buttons and rings for decorative touches that invite tactile exploration. Encourage storytelling through labeling: a big, friendly name like “Big Rig,” “Forest Runner,” or “Sunset Sprinter” can transform an ordinary cardboard build into a character with a backstory. A steering wheel can be fashioned from a cardboard circle glued inside the cab to suggest control, and a window can be enhanced with a strip of clear plastic wrap to mimic glass. The beauty of this phase lies in the child’s agency: the color choices, the logo designs, and the placement of decorative elements reflect their personality and interests, reinforcing a sense of pride in the final product.
Play and exploration follow once the vehicle is visually complete. The cardboard car or truck becomes a prop for endless scenarios: a delivery run through a pretend neighborhood, a rescue mission to reach a stranded stuffed animal, or a music-filled parade with brothers, sisters, or friends steering from the driver’s seat. When children are allowed to narrate the journey, they develop language skills and storytelling abilities alongside motor coordination. You might invite them to load pretend cargo into the trailer, perhaps stuffed toys or soft blocks, and then “drive” to a destination with careful, deliberate motions that mimic real driving—turns, straightaways, and careful parking on a designated mat or tape line. The play itself reinforces the practical lessons of planning ahead, estimating how much cargo a box can carry, and adjusting the design if the pretend route demands more space or a different shape. These moments of guided play can evolve into longer sessions that weave in math by counting wheels, measuring the length of the trailer, or forecasting how changes to the cab’s height affect stability.
As children take the lead, the project morphs into a collaborative exercise between imagination and engineering. If a youngster asks for a dump bed instead of a flat cargo area, you can re-tape and reassemble the top as a new feature, teaching resilience and adaptability. If another child wants a taller cab to make a driver’s-seat view easier, a simple additional box spacer can provide a glimpse of a higher vantage point. The process is cyclical and forgiving; even a modest rework teaches problem solving and design thinking. The goal is not to create a flawless replica but to cultivate a tangible sense of capability. Each cut, each glued seam, and each wheel alignment becomes a small achievement that can be celebrated with a triumphant test drive across a rug, a dirt patch outside, or a smooth hallway line of tape roadways carved by a parent’s or caregiver’s gentle guidance.
In reflecting on why this project resonates beyond mere recreation, several threads emerge. First, the act of repurposing a box reduces waste and demonstrates practical sustainability. Instead of discarding packaging, a box becomes a vehicle for play, a tangible example of how everyday materials can be transformed through imagination. Second, the activity supports diverse developmental needs. Fine motor skills are honed as children cut, fold, glue, and tape; spatial reasoning advances as they visualize how the components fit together; language and social skills flourish during collaborative planning and shared play. Third, the open-ended nature of the build invites ownership. Children who help sketch the plan, choose colors, and decide on the vehicle type feel invested in the outcome, which increases their willingness to engage with the project from start to finish. The result is not just a toy but a platform for ongoing exploration—an invitation to dream up new designs, test them, and enjoy the process as much as the product.
If you’re curious about expanding this idea into other designs, you can explore variations and related projects that emphasize the same core skills and ecological mindset. For additional inspiration, check out the truck box projects, where creators experiment with different configurations, materials, and decorations to suit a range of ages and playspaces. This linked resource complements the hands-on approach described here and can spark new questions for future sessions. truck box projects provide a repository of ideas you can adapt to your own boxes, revisiting the basics while layering on new challenges as confidence grows. The beauty of the method lies in its scalability: today’s dump truck can become tomorrow’s tractor-trailer with a few simple modifications, a hinge added along the back, and a longer trailer section that still fits within a familiar cardboard frame.
Alongside the domestic, cozy play at home, this project also serves classroom or group settings where children can collaborate on a shared build. In a classroom, you might introduce a “design-and-build” rotation where small groups each take responsibility for a different section—cab, cargo area, wheels, or decorative details. Students can compare approaches, reflect on what worked well and what didn’t, and collectively decide how to adjust the design for durability and safety. The same principles apply: sturdy joints, thoughtfully sized wheels, and attention to edge safety. By embedding social collaboration in a creative task, the activity becomes a micro-labrication lab that supports teamwork, patience, and mutual respect. And because the materials are low-cost and readily available, such activities scale up without pressure, allowing children to explore multiple iterations within a single project window.
In closing the practical loop, you can reframe the experience as a story of transformation. A simple shipping box travels from storage to the hands of a child, who then reimagines it as a vehicle that navigates imagined cities and countryside. The process teaches more than how to cut, glue, and decorate; it teaches how to see potential in everyday objects, how to manage materials with care, and how to turn a quiet moment into an active, collaborative adventure. The cardboard becomes a stage for choice and voice, and the child’s input drives the design, color, and texture choices as much as the parent’s guidance does. This mutual creation—where problem solving, storytelling, and making converge—lays the groundwork for future projects that reuse, reimagine, and relish the craft of building. When the final vehicle rolls across the floor, the moment feels less like an end and more like a beginning; a child’s imagination has learned to steer, while a caregiver’s hands learned the language of support that makes such play possible.
For a broader spectrum of ideas and to see how others translate similar materials into varied builds, consider exploring related designs like the versatile truck box projects. This resource offers additional angles on scale, function, and aesthetics that can inspire fresh experiments with your own cardboard fleet. Exploring these ideas helps ensure that the joy of making endures beyond a single finished model, inviting ongoing play, learning, and shared creativity. If you want to extend the conversation with a quick visual guide, there are many simple tutorials that capture the rhythm of this build—step by step—so you can re-create or adapt the process with new tools or different boxes. A short video tutorial can be a helpful complement to the written instructions, especially for younger builders who benefit from seeing the sequence in action. External resources can enrich understanding without overshadowing the hands-on joy that comes from molding, attaching, and driving a vehicle made from a box you once opened for a routine unboxing.
External resource: For a concise walkthrough that translates the same principles into a quick, visual demonstration, you can watch an illustrated step-by-step tutorial here: https://www.youtube.com/watch?v=examplecardboardtruck. This video offers practical tips on safe cutting, simple frame construction, and reliable wheel attachment, reinforcing the ideas described above while providing a helpful model for new builders to emulate. Remember, the most meaningful parts of this project come from shared effort and the pleasure of turning ordinary materials into extraordinary playthings. When you include a child in the design decisions, the construction becomes a conversation as well as a craft, a lesson in balance, and a celebration of invention that kids will remember long after the last wheel has been tightened and the final design has driven off the shelf from imagination into action.
From Cardboard Box to Bold Truck: Creative Decoration Techniques for DIY Kids’ Box Trucks
A cardboard box is not just a container; it is a doorway to a child’s imagination and a stage for hands on discovery. When we transform a plain, likely bent shipping box into a working truck with a cab, a cargo bed, and a set of wheels that actually turn, we are inviting a child to see through the lens of design, engineering, and storytelling. The magic emerges not from the novelty of a fancy material but from the careful blending of simple techniques with bold, playful details. This chapter explores how decoration becomes a language all its own in a DIY truck project, turning a sturdy surface into a canvas for personality, function, and safe, open-ended play. In the heart of this process lies a quiet engineering practice: planning before cutting, symmetry where it matters, and textures that invite touch as well as look. It is a process that rewards patience and curiosity in equal measure and yields a vehicle that can carry stories, toys, and a child’s aspirations down the hallway, across the living room, and out into the yard for an afternoon of road trips and imaginary highway adventures.
The project begins with a sturdy box chosen for its proportions. A large rectangular box provides the most forgiving canvas. The goal is not to recreate a precise car or truck from a blueprint but to capture the essential silhouette and to give the child room to improvise. Before any scissors meet cardboard, the grownup and child sit together with paper, pencils, and a sense of play. They sketch the basic shape—where the cab sits, where the cargo area begins, and how the front might hint at a grille or headlights. This planning stage is a chance for a child to voice preferences: a roomy cab for a pretend driver, a long cargo area for carrying blocks, or a boxy silhouette that screams old-fashioned work truck. The drawing on paper acts as a map, and then the real work begins as the plan moves from concept to cardboard.
When the design is ready, the transfer to cardboard happens with care. The windshield and side windows are cut to give an open-air driving feel, letting light pour in and making the driver feel present in the moment. Cutting should be done with adult supervision, as the edges can be sharp, and the use of a utility knife or strong scissors requires steady hands and clear communication about safety. As the blade traces the lines, the child can trace their own lines, too, learning how shapes transform as they become part of a three-dimensional object. The result is not just a cut-out but a window into the story that will unfold in the cab and along the length of the truck body.
Decoration begins where the box still holds its structural strength. The first rule of decoration is contrast. A truck gains personality when the cab and cargo area are defined with different colors or textures. Cardboard scraps from other boxes, old cereal boxes, and construction paper become the paint and trim of this construction. A long, flat rectangle can become the cab roof, attached with glue or tape to form a two-part structure that gives the illusion of depth. A slightly larger piece tucked in front can serve as a hood, providing a sense of motion and a touch of realism that invites the eye to linger. A raised back wall or a folded back edge can become a robust cargo bed, especially when the back is folded upward and secured with sturdy tape. The cargo bed creates a data point for imagination: a place to load toys, blocks, or plush cars, turning the play space into a miniature world with a clear purpose.
The wheels and axles transform the box from a static sculpture into a vehicle that feels real when kids push it across the floor. Here the most approachable method uses simple, everyday materials. Cardboard circles cut from the same box or from contrasting scraps can serve as wheels. The axles can be wooden skewers, dowels, or sturdy straws threaded through pre-punched holes in the sides of the box. The axle system is not intended to be a model of precision engineering but a pragmatic solution that allows the wheels to spin freely while the box remains light and safe. The wheels are attached with a touch of glue or a loop of tape at the center to hold them in place while leaving the outer rims able to rotate. If you want a bit more realism, paint the wheels black and add a simple tire tread pattern with a marker or a thin paint line. This combination of simple mechanics and bold decoration creates a vehicle that feels robust despite its cardboard construction.
Decoration then shifts to identity and whimsy, with color and texture guiding the eye. The chassis becomes a canvas for the story the child wants to tell. Markers, crayons, paints, and colored paper are employed to craft a distinctive grille, headlights, taillights, mirrors, and a steering wheel. A grille can be drawn with bold lines or created by gluing a separate piece of ribbed paper or corrugated cardboard to simulate the metal lattice found on many trucks. Headlights and taillights can be simplified circles or small patches of reflective tape to catch the light in the room as the toy moves. A license plate can carry a family name, a favorite number, or a playful slogan that personalizes the vehicle. The steering wheel, cut from cardboard and attached to the front, invites a child to imagine steering the truck through morning traffic or a late-afternoon delivery run. The dashboard can be a collage of small scraps—buttons from old fabric, tiny stickers, or printed numbers—that hint at controls while staying safe and soft to touch.
The experimentation thrives when contrasting shapes and materials meet. A long rectangle cut for the cab roof can be topped with a second, smaller piece to suggest a cabin’s curve or a roof rack for extra storage, even if it is just a decorative element. A larger piece placed in front of the cab can become a hood, and its edge can be rounded to soften the silhouette and invite friendly play. The cargo bed can be enhanced with extra flaps or tabs that mimic a real truck’s tailgate or side rails. Creating a two-part structure—cab plus cargo area—not only adds visual interest but also gives children a tangible way to think about how different sections of a vehicle connect and support each other. It teaches a little about proportion as well; a wide cargo bed should balance the box’s overall shape to avoid a top-heavy look that might make the truck feel unstable in pretend play.
An important part of the creative process is the way the structure grows stronger as decoration fills in. A lightweight project can become surprisingly sturdy when fabricators reinforce seams with tape or a dab of glue along joint lines. A thin layer of tape along edges can make corners feel secure while keeping edges smooth to touch. Strength comes not from making every edge double-thick but from thoughtful placement of reinforcement where play will be most vigorous, such as at wheel wells and at the joint where the cab meets the cargo area. A small extra support under the base can also improve stability, especially if the truck will be rolled across carpet or hardwood floors. The emphasis is on durability through practical, child-friendly construction rather than on bulk or weight.
Beyond the visual and tactile details lies the opportunity for functional play. A cardboard steering wheel is a simple but effective prop, and a dashboard crafted from scrap paper or fabric with pretend dials invites imaginative driving. A doorway cut into the side of the box can become a driver’s access point, reinforcing the sense of foraging for a new route or a fresh destination. A cargo area filled with soft blocks or plush toys becomes a mobile load, enabling a child to stage a delivery run or a rescue mission depending on the moment’s story. This is where decoration loops back into play value: the child sees that a truck is more than shape and color; it is a vehicle with a purpose, a story to tell, and a mission to accomplish.
In keeping with the idea that decoration should empower rather than overwhelm, the project invites personalization at every turn. Markers and paints offer a palette to match the child’s favorite colors or a mood they want to convey. Glitter glue can make headlights sparkle or a chrome grille gleam in the light. Stickers and fabric scraps lend texture and character, while a few carefully cut pieces of colored paper can function as mirrors, doors, or badges bearing playful messages. The more cohesive the color story, the more the child will engage with the truck as a character rather than a toy. The goal is to achieve a balance where decoration highlights the vehicle’s form, supports the child’s imagination, and remains safe for little hands to explore.
As the truck grows in personality, practical details come into sharper focus. A basic but effective approach is to craft a tiny steering wheel and a simple dashboard from circles of cardboard or scraps of stiff paper. This combination invites the child to pretend to steer, turning the vehicle into a dynamic element of the daily pretend world. The cargo space can be filled with soft blocks or fabric scraps to simulate a haul, a feature that is particularly satisfying for children who enjoy organizing and sorting. The vehicle’s lines can be accentuated with bold color blocks that mirror real trucks’ branding without overstepping into a commercial look. A playful license plate bearing the child’s name or a favorite phrase can anchor the personal connection and make the truck feel uniquely theirs.
All these elements come together in a seamless flow where design informs play and play informs design. The box is no longer a box but a vehicle with a clear silhouette, a robust yet gentle skeleton, and a personality that reflects the child who built it. The process teaches patience, spatial reasoning, and basic construction skills in a way that does not require perfection. It rewards careful handling, testing, and rethinking. A well-made cardboard truck invites repeated use, not because it lasts forever but because it remains a source of delight and a stage for ongoing stories. Each session can introduce a new scenario: a delivery to a pretend town, a rescue mission, or a road trip across a painted map laid out on the floor. The truck’s simple mechanics—folds, tapes, and wheels—become a toolkit for creative problem solving that will translate to other crafts and projects later on.
If you want to explore variations that align with different play themes or truck types, you can think in terms of proportion and function. A cab-forward truck with a short cargo bed might suit quick, nimble plays, while a longer trailer creates a prop for more elaborate storytelling and role play. The key is to let the child lead the direction. Provide supportive materials and a safe workspace, then step back and watch how a single cardboard box becomes a stage for a child’s ingenuity. When the design and decoration align with a child’s interests, the play becomes more immersive and meaningful, and the craft itself becomes a shared memory that families can revisit and redesign for future projects.
For families seeking a related but distinct route, consider a related project that shares a similar spirit of exploration and hands-on making. You can explore another posts in this space by visiting the related truck box ideas hub, which can offer additional angles on structure, decoration, and play value. See the truckbox guide for further inspiration and a related approach to crafting a rolling cardboard vehicle that complements the methods described here. truckbox
The journey from a plain cardboard box to a bold, kid-friendly truck is less about technical exactness and more about curiosity, collaboration, and safe hands-on practice. The skill set that emerges—planning, measuring, improvising with available materials, and turning a rough idea into a tangible object—extends beyond the craft room. It builds confidence in spatial reasoning, introduces basic problem solving, and encourages kids to articulate their ideas visually and verbally. The decoration process, in particular, fosters color theory awareness and design thinking in a playful context. Kids learn by doing: they see how a design choice affects the overall look, how different textures catch the light, and how a small change can alter the vehicle’s perceived speed and sturdiness. It is a gentle introduction to design thinking that respects a child’s pace and celebrates the joy of making with their hands.
As the project closes, the final product stands not as a perfect replica of any real vehicle but as a living artifact of play, learning, and family collaboration. The truck becomes a co-created object—a story-driven, physically interactive piece that still looks like a truck and still lives in the child’s imagination. The parent or caregiver provides a scaffold: safety guidelines, a clean workspace, and a calm rhythm that keeps the experience enjoyable. The child provides the imagination and the drive. Together, they produce something that is both a toy and a learning experience, a reminder that sometimes the simplest materials can yield the richest stories when hearts and hands are in harmony.
For those who want to see the broader landscape of related projects, a parallel shoebox car activity offers a useful point of comparison. It shares the same spirit of turning a simple box into a vehicle and emphasizes step by step execution with gentle guidance. This cross-reference can expand a family’s repertoire of DIY activities while keeping the focus on creativity, safety, and the joy of making together. External resources provide additional perspectives on simple, kid-friendly crafts that prioritize play value and process over perfection. To explore a related approach, consult a step by step guide on shoebox cars for kids, which aligns with the same principles of design, decoration, and imaginative play. External resource: https://www.britishcouncil.org/learn-english/creative-activities/step-by-step-guide-make-fun-functional-shoebox-car-kids
Sturdy, Safe, and Ready to Roll: Building and Testing a DIY Cardboard Box Truck for Kids
Cardboard is more than a medium for pretend play; it’s a portable workshop for creativity, problem solving, and early engineering. When a child and caregiver set out to craft a DIY cardboard box truck, the project becomes a shared experiment in balance, resilience, and practical design. The aim is simple on the surface—a movable vehicle for imaginative play—but the path to a sturdy, safe, and reliable build threads together careful material choices, thoughtful reinforcement, and a testing mindset that helps kids learn how to predict, test, and adapt. The truck version, particularly, invites a longer chassis and a more demanding joinery than a simple car, which underscores why safety and structural integrity must be front and center from the first planning heat of the project. This is not just about a craft; it’s about enabling kids to explore how weight, leverage, and friction influence movement, all while staying engaged in a hands‑on process that rewards patience and perseverance as much as speed and flair.
From the outset, safety governs every decision. The guide to building with cardboard always begins with the selection of the right box: clean, dry, and sturdy, ideally double or triple‑walled corrugated cardboard rescued from large appliances or furniture shipments. Boxes designed for retail packaging rarely offer the same strength, and they often carry sharp edge risks or tape residues that complicate finishes. When a child is involved in cutting, supervise closely. Even with child‑safe scissors, the act of cutting demands steady hands and clear instructions about what not to do. If a hot glue gun or a utility knife is part of the toolkit, these should be wielded only by an adult, and the child should observe the method and safety rules rather than use such tools unsupervised. Ensuring there are no protruding corners or edges is essential to preventing minor injuries during play. A simple yet effective safety addition can be lining the interior with soft materials—foam padding, old fabric scraps, or even a thin layer of felt—to cushion knees, elbows, or the head if the vehicle bumps against furniture or walls during imaginative driving.
The truck build expands on core cardboard craft by emphasizing reinforcement. The structural work happens not just at the outer shell but at the joints, the wheel hubs, and the connection between the cab and trailer. In a 2026 framework, the idea of flattening and storing extra cardboard as a resource for reinforcement becomes a practical rule of thumb. Leftover packaging becomes a stash of fenders, spoilers, and extra bracing you can tuck into seams or layer over weak points. The choice of adhesive matters here. A straightforward white school glue is reliable for many surfaces, and some builders blend glue with flour to create a simple, homemade paste that behaves like a slow‑set epoxy for cardboard. In higher‑tidelity builds, a hot glue routine can be used sparingly to fuse heavier pieces, provided the drying time is respected and the hot glue is kept away from small fingers. A robust chassis is the backbone of a sturdy truck, and this often means reinforcing the axle area with longer strips of cardboard or with a lightweight, lightweight wooden dowel or sturdy plastic straw to serve as a more secure axis. The wheels themselves can be made from cutouts of cardboard or sourced from bottle caps, lids, or other circular components. The key is to ensure the wheels rotate with minimal friction while remaining firmly attached so there is no wobble that would throw the vehicle off its course.
When it comes to the wheel system, the axle concept is where the essay begins to lean toward real engineering. The classic, straightforward approach uses a pair of axles that pass through the wheel centers and into the body of the box. The holes should be clean and slightly oversized to allow the wheels to turn freely but not so loose that the wheel slips or shifts under load. A simple toggle between materials—cardboard, wooden skewers, or plastic rods—can deliver the same result with different levels of durability and ease of assembly. The axles are reinforced when possible: tape the axle ends on both sides of the box to lock them in place, then add a second layer of cardboard around the joint to discourage wobble. If extra stiffness is needed, a cross‑brace laid across the underside near the wheel hubs can help distribute stress more evenly when a child sits inside or when the truck is pushed along a rough floor.
The design phase—often the most exciting part for kids—also requires a practical eye. In planning, a box can be designed to imply a cab and a trailer, or it can be simplified into a long, single body with a prominent front end to evoke a traditional truck profile. For a kid who enjoys a sense of realism, cutouts for windows and a grille can be added, then the pieces can be glued in place from separate cardboard panels to create a layered look. The cab and trailer can be connected with strong tape or glue along the rear seam, but this connection should be reinforced with extra layers of cardboard or small braces at the joint. In a well‑made truck, the cab is visually distinct from the trailer and offers a clear load path for the child’s weight when seated inside. The final touch is to ensure the interior is comfortable for a child who might sit inside briefly during play. A padded floor, a small cardboard steering wheel, and seatback shapes can help create a sense of containment and safety without adding excessive weight or bulk that would complicate rolling or stability.
The decoration phase is where imagination fully takes the driver’s seat. The rule here is to document the process in a way that respects safety and durability while inviting personalization. The exterior can be wrapped in colored paper, painted in bold hues, or decorated with markers, crayons, or stickers. Stripes along the sides communicate speed and life to the toy, while a simple license plate or a small emblem reminiscent of a favorite truck line can add a layer of personality. The interior, too, can carry details—the steering wheel cut from cardboard with a circular disc painted to resemble chrome, or a dashboard panel affixed with a few shapes. Glitter and stickers can be used in moderation; the aim is to avoid loose decorations that might detach and pose a choking hazard for younger siblings or pets.
A crucial point in both build and play is ongoing inspection. After assembly, a thorough safety check is essential. Run a gentle test to ensure edges are secure and joints do not shift under light pressure. Inspect the wheel hubs for cracks or loose attachments. Push the truck along a smooth surface to observe wheel rotation and ensure there is no binding or excessive resistance. If any area shows signs of weakness, reinforce it with additional layers of cardboard, a touch more glue, or a reinforcing strip along the outside edge of the wheel well. The more you test, the more you learn about where the design stands up to play and where it could benefit from additional bracing. This iterative process is a cornerstone of maker education; it teaches kids to observe, hypothesize, and adapt rather than assume a single plan will be perfect on the first try.
The project also benefits from a mindset of resourcefulness. Flattened packing material and scraps become a treasure trove for tangential needs—brackets, protective bumpers, or decorative trim that can be attached without adding much weight. The reinforcement strategy becomes a practical lesson on distribution of loads. A heavier cab paired with a lighter trailer will behave differently on a ramp or a slope, and children quickly notice how weight distribution affects stability. The testing phase becomes a dialogue rather than a monologue: if the truck tips when turning, perhaps the wheelbase is too short, or the weight is biased forward. If the wheels squeak or drag, the axle alignment or the wheel well clearance needs adjustment. These are not failures but steps in a learning arc that build confidence in problem solving.
In guiding a child through this process, it helps to emphasize that safety and durability are not hinderances to fun; they are the framework within which play remains creative and uninhibited. The design invites kids to imagine, and the act of building itself fosters hand‑eye coordination, spatial reasoning, and early engineering literacy. As the family engages in the activity, it becomes a shared story of how ideas take shape in real materials, how decisions have consequences, and how craftsmanship grows as a habit rather than a one‑time event. The experience can be extended by offering optional upgrades: a roof rack for holding imaginary cargo, a makeshift bumper made from extra cardboard layers, or a fun paint job with a color scheme that tells a story about the truck’s imagined world. For caregivers who want to expand play possibilities, a small set of accessories or attachments—such as a simple ramp for gentle testing of movement or a hidden compartment under the trailer for pretend cargo—can transform a single build into a durable, long‑lasting play vehicle.
If you want to see a broader ecosystem of related builds and ideas that tie into this cardboard vehicle approach, there are related guides and resources online that explore how such vehicles can be customized with additional features and accessories. For a practical look at related truck builds and the ways to outfit a vehicle for different play scenarios, you can explore a related guide on truck boxes that delves into accessories and add‑ons. This link provides a concise snapshot of how similar builds can be extended with modular components, while still keeping safety at the forefront: TruckBox guide.
As with any child‑centered project, the most valuable outcomes come from the process itself. The act of planning, cutting, gluing, and testing is where kids gain confidence in their own abilities. They learn to communicate ideas, negotiate a design, and enjoy the satisfaction that comes from seeing a plan turn into a tangible object they can touch, push, and drive. The truck becomes more than a toy; it becomes a symbol of collaboration, curiosity, and the skillful application of simple materials to create something that is both fun and functional
In the spirit of ongoing learning, you can document the journey with a small photo journal or a simple video—capturing the cab’s silhouette, the joint reinforcements, and the first successful test roll. This not only preserves the memory of the build but also creates a reference for future projects. The second or third iteration becomes a chance to apply what has been learned—how to make the chassis even more rigid, how to tune the wheel alignment for a smoother ride, or how to incorporate kid‑friendly aesthetics that reflect a favorite character or color scheme. The process becomes a circular loop of design, test, refine, and celebrate small victories together.
For readers seeking a deeper dive into related cardboard vehicle builds and practical safety checklists that complement this chapter, consider following the linked guide for a broader perspective on assembly details, wheel systems, and reinforcement strategies. The emphasis remains the same: safety first, then creativity, then durable engineering that supports hours of imaginative play. The joy of a cardboard truck built by a child and caregiver is not just in the final product but in the shared activity—the back‑and‑forth of ideas that makes a family feel like a team of engineers, artists, and problem solvers all at once.
External reference: For a more technical, external exploration of cardboard vehicle construction and safety considerations, see this step‑by‑step guide on cardboard car construction: https://www.alibaba.com/product-detail/How-To-Make-A-Cardboard-Box-Car-Step-by-Step_1600798583495.html
Final thoughts
In summary, making DIY cardboard box trucks is not only an enjoyable activity for kids but also an excellent opportunity for parents and caregivers to bond with their children. Each chapter of this guide has offered unique insights into materials, construction, decoration, and safety, ensuring your project is both successful and fun. Equip yourself with the skills to foster creativity in young minds and create lasting memories through this simple yet effective DIY project.