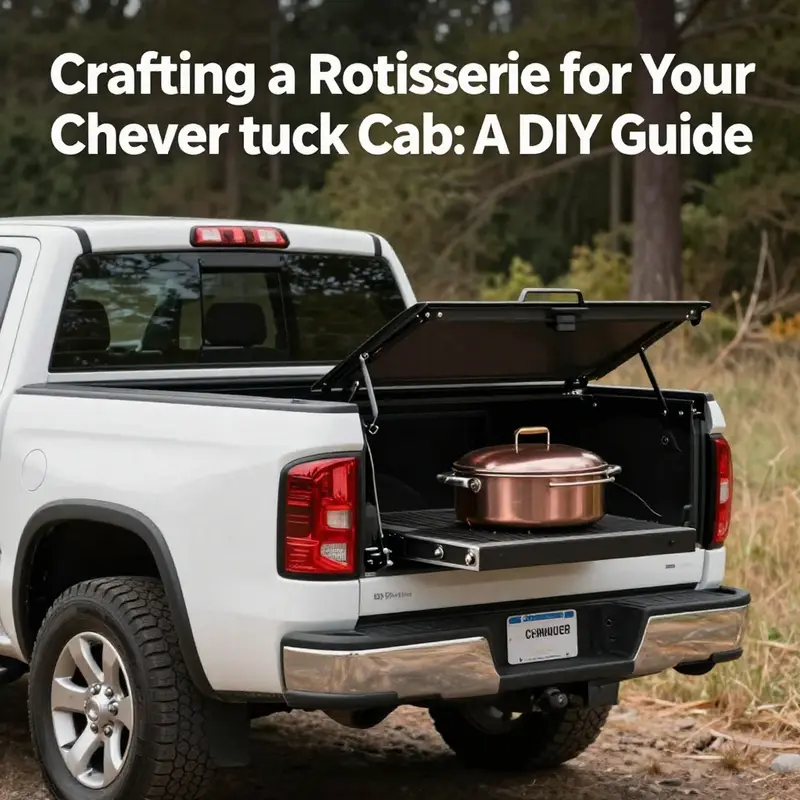
Creating a DIY rotisserie in your Chevy truck cab can unleash your culinary creativity while providing unique outdoor cooking capabilities. This project not only serves as a conversation starter but also empowers truck owners to embrace their passion for cooking on the go. Each chapter of this guide delves into essential components: understanding the purpose and safety considerations around the project, designing a robust rotisserie frame, ensuring an effective power supply and wiring, and identifying suitable cooking components and mounting stability. By following this structured approach, business owners can confidently transform their trucks into portable kitchens, optimizing their culinary ventures with safety and innovation at the forefront.
Turning the Chevy Cab: Designing a Safe, Bed-Mocused Rotisserie for 360-Degree Restoration Access
A rotisserie for a Chevy truck cab is less a cooking device than a carefully engineered work cradle that unlocks full, unhindered access to every seam, weld, and mounting point. The goal is not to turn the cab into a barbecue pit, but to rotate it on a robust, well-balanced platform that allows a shop team to work around every side without dragging heavy components in and out of the space. When approached with the same care you’d give a heavy-assembly jig, a cab rotisserie becomes a lifelike extension of your workspace, turning a stubborn restoration into a seamless, repeatable process. The project hinges on one clear principle: safety first. A cab that weighs anywhere from a thousand to several thousand pounds requires a frame that remains rigid under static load and dynamic movement, controlled rotation, and proper restraint. The bay where the build happens should be treated as a small, temporary fabrication shop within a garage or outdoor area—space clear of overhead obstacles, with good ventilation for any welding or grinding, and a floor that won’t buckle under load. The safety narrative runs through every decision from materials to fasteners, from mounting strategy to the choice of drive system. Understanding the purpose—whether you’re restoring a frame, painting, or installing components—helps define every subsequent step. In practice, the rotisserie’s purpose is to grant 360-degree access, a kind of translation table for the cab that stays anchored to a sturdy subframe and moves only via a controlled drive. This is especially valuable in frame-off restoration work where the cab must be removed and reinstalled without awkwardly rotating a lighter, insufficient stand. The same approach suits other heavy, awkward stages of a rebuild. The guiding default is to avoid any motion unless it is positively locked and controlled. The design starts by acknowledging the cab’s weight and the physics of rotation. A typical Chevy cab, depending on model and year, sits well into the one-thousand-pound range and can exceed that when the structure is stripped, welded, or reinforced. A useful rule of thumb is to plan for at least a factor of safety of two or more, ensuring there’s reserve capacity for dynamic loads, wind forces if outdoors, and the occasional bump during installation of a component. Material selection then becomes a conversation about forming a rigid, corrosion-resistant, and weld-friendly frame. Structural steel or heavy-grade steel tubing is a natural choice, with Schedule 40 or equivalent pipe offering predictable strength. Weld quality is non-negotiable; you’ll want clean, penetrating welds and a visible, methodical approach to inspection, especially at joints and load paths. The rotisserie frame must be anchored to the truck bed in a way that avoids interference with suspension travel or cargo space and includes a reliable locking mechanism to prevent any unintended motion. A common, practical method is to mount a subframe to the bed using reinforced brackets and high-torce bolts, then attach a rotating carriage that carries the cab’s footprint. The mounting strategy should consider how the cab will be lifted onto the rotisserie and whether the lift will be done with a hoist or a mobile crane. The system should also incorporate anti-slip surfaces and leveling features to compensate for irregular ground conditions or bed angles. A steady, level base is the difference between a smooth rotation and a wobble that fatigues welds and accelerates wear on bearings and bolts. The rotating mechanism itself is the heart of the system. A compact electric motor, ideally a 12V DC unit, can provide the continuous, low-speed rotation a restoration workflow needs. The drive train should be geared to achieve a gentle turn—roughly 0.5 to 2 revolutions per minute is typical for large, heavy loads. The simplest path is a direct drive with a gear reduction, but a belt or chain drive can be designed with a slip clutch or a braking/holding mechanism to prevent any drift when the operator stops or moves around the cab. A robust mounting shaft or spindle should connect the motor to a heavy-duty central rod that supports the cab’s weight. The design must prevent the cab from shifting on the carriage or slipping off the drive. A two- or three-point support approach, where the cab sits on saddles or rollers attached to the carriage, helps distribute load evenly and minimizes stress concentrations at any single point. When planning the cab’s interface with the rotisserie, it’s worth incorporating adjustable mounting points to accommodate different cab profiles and to help align the center of rotation with the cab’s overall mass center. The alignment task, though technical, pays big dividends in how smoothly the cab can be rotated. In addition to the mechanical path, you must design a safe power supply and wiring scheme. The truck’s 12V battery system is a reasonable source for a shop-built rotisserie, given the need for reliability and simplicity. A dedicated fuse block and a switch should control the motor, with a clearly labeled on/off path. Run wiring through conduit or cable trays to protect against vibration, heat, and occasional moisture. Heat-resistant insulation on the wires near any welding or metal edges helps avoid insulation breakdown over time. If you want to minimize benchwork on the vehicle battery, you can power the unit from a portable power bank or an inverter system that’s sized for short, steady operation. Either approach demands a clean grounding scheme and proper fusing. Safety devices deserve as much attention as the frame itself. Locking pins, secondary restraints, and a pair of locking clamps should be built into the rotation carriage. A pair of anti-rotation cables or safety chains can act as a failsafe against accidental rotation if a drive component fails. These features aren’t ornamental; they’re the primary risk mitigations that prevent a cab from slipping or becoming misaligned during a critical operation. As you develop the cab’s interface to the rotisserie, the issue of stability inevitably circles back to the mounting surface. The bed floor, with its crossmembers and bolts, must accept a secondary subframe; you don’t want a single bolt path to bear all the load. U-bolts, heavy brackets, and welded gussets can create a rigid, distributed foundation. Anti-slip pads under the carriage and leveling feet at the corners prevent micro-movements when the workshop floor becomes uneven or when you adjust the cab’s height during staging. The cab’s contact points to the carriage should be carefully chosen to minimize deformation. A combination of adjustable saddles and soft, high-friction contact surfaces—such as rubber or polyurethane pads—can cushion the interface and reduce wear. For those pursuing a restoration mindset, documenting every step is invaluable. A solid set of drawings, load calculations, and weld inspections makes future modifications easier and safer. It’s worth taking a page from professional standards: maintain traceable documentation on weld quality, material specifications, and test rotations with the cab supported but not fully loaded. In the broader context of DIY fabrication for vehicle projects, you can draw practical parallels from rotating platforms used in other heavy-duty tasks. The transformation from a concept to a functioning rotary is about controlled motion, robust anchoring, and predictable maintenance. If you’re seeking more practical, hands-on inspiration, a trusted resource that demonstrates turning mechanisms and motorized drives can be instructive; it offers a blueprint for scale and integration that can be adapted to a truck cab. For a sense of a complete, real-world approach, see the detailed guide that covers gear systems, motor selection, and safe mounting techniques. When you picture the final assembly, you’ll see a sturdy metal cradle that the cab sits on, with a quiet, patient rotation that makes work feel almost effortless. This isn’t a flashy showpiece; it’s a tool designed to save time, reduce handling risks, and produce a safer, cleaner workflow. The real payoff is the added accessibility: a 360-degree window into every seam, every nut and bolt, every mounting point, every line formed by welds and joints. The cab becomes a friendlier, more approachable subject, and the rest of the restoration follows with more confidence and fewer constraints. As you plan, don’t overlook a simple but critical detail: the cab’s interior should be safeguarded from any rotation-induced contact with interior panels, wiring, or dashboards. Use temporary padding or removable shields to guard against scratches and to prevent tools or fasteners from tangling with existing components. Finally, while the temptation to push ahead is strong in any hands-on project, the path to a safe, durable rotisserie is patient, methodical work. Measure twice, cut once, and treat every weld as if the cab’s weight depends on it—because it does. If you want to broaden your knowledge with more practical framing and mounting ideas, consider exploring related guides in the truck restoration space, such as general accessories and mounting solutions in the broader DIY ecosystem. For additional context on shop organization and hardware compatibility, you can consult the truck accessories section linked here: trucksdiy.com/blog/accessories/. This internal reference can help you align bolts, brackets, and mounting hardware with your specific cab and bed configuration, ensuring everything works together without surprises during the lift and rotation phases. As you move from design to fabrication, keep a checklist that centers on balance, alignment, and safety: confirm the center of gravity is within the rotation cradle, verify the bed framing can handle repeated cycles, test the locking mechanisms under load, and walk through a dry run with the cab supported but not yet attached to the drive system. When you’ve locked everything down, you’ll have a rotisserie that not only holds the cab securely but also makes restoration work more efficient, precise, and enjoyable. The final result is a functional instrument of work rather than a bulky fixture, a tool that yields cleaner welds, better paint coverage, and easier component installation because you can approach the cab from every angle without wrestling with gravity and weight. External standards and best practices will always be your guide rails, reminding you to respect engineering fundamentals, inspect regularly, and never compromise on safety. For professional references and standards that inform this kind of fabrication, SAE International offers technical guidance and reliability benchmarks that can help you calibrate your approach in a responsible, industry-aligned way: https://www.sae.org/.
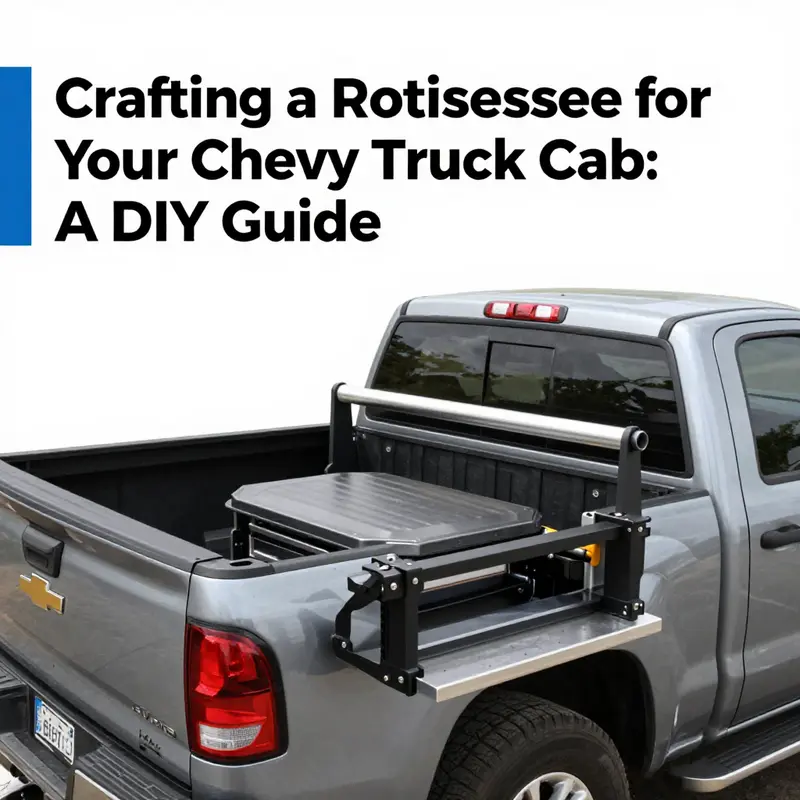
Designing a Safe, Sturdy Rotisserie Frame for Your Chevy Truck Cab
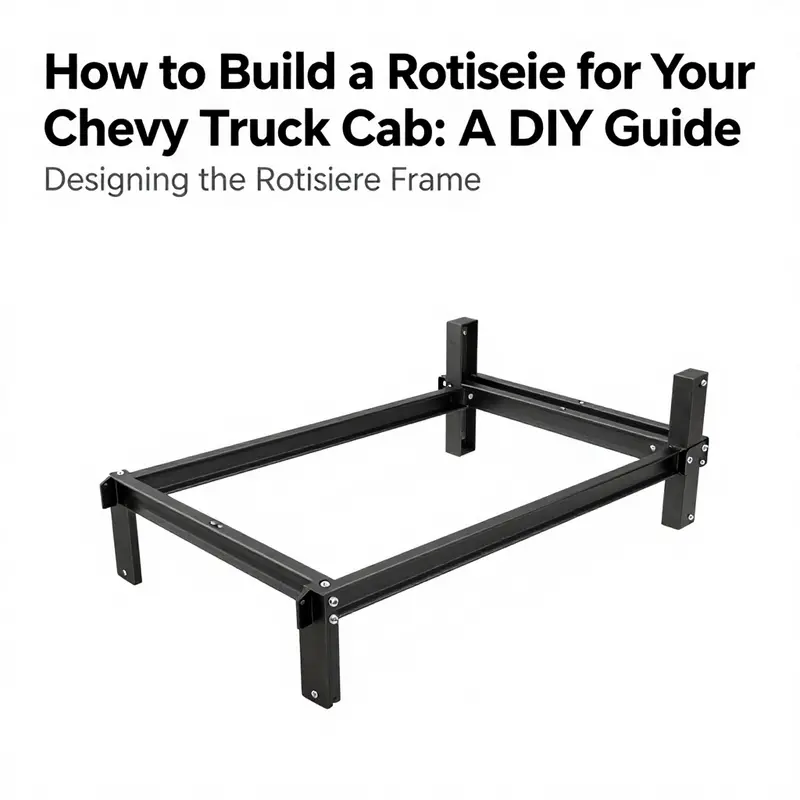
Design Principles and Key Decisions
Designing a rotisserie frame to suit a Chevy truck cab begins with a clear purpose and a strict safety-first mindset. Decide whether the rotisserie will be functional for cooking outdoors while mounted to the truck, or purely a display feature inside the cab. If the goal is to place heat or flames near the vehicle, plan for the unit to be used only outdoors and mounted to the truck bed, not inside the sealed cab. For a non-heating display or a motorized demonstration, a compact, secure frame inside the cab can work with low-voltage motors and non-heat lighting.
Every good frame begins with measurements. Remove floor mats and trim as necessary and measure the cab interior from multiple points. Record floor width, roof height at the center and at the doors, distance between B-pillars, and clearance between the seatback and rear wall. Measure with the parts you intend to keep installed. These numbers determine maximum skewer length, motor placement, and the height of cross-members. Allow extra clearance on all sides to prevent contact while the rotisserie turns.
Next, identify anchoring points you can safely use without compromising the truck’s structure or safety systems. Look for factory bolt points under the rear seats, threaded mounts under the carpet, seat-belt anchors, and the seat frame itself. Avoid drilling into or welding near fuel lines, airbag modules, wiring harnesses, and the vehicle’s structural seams. If you plan to bolt through the floor, confirm there are no hidden components between the cab and the fire wall or bed. When in doubt, use clamped framing that distributes load across multiple points rather than concentrating stress in one fastener.
Material choice sets the tone for strength and weight. For a cab-installed frame that must be light yet rigid, consider angle iron for cross-members and square tubing for vertical posts. Galvanized steel pipe works well where corrosion resistance matters, but keep components that will contact food and heat away from coated or galvanized surfaces. Use stainless-steel fasteners near food contact points. If portability is critical, design the frame with removable legs or quick-release pins so the whole assembly can be lifted out and stored.
Load calculations are simple but important. Estimate the combined weight of the motor, skewer, food load, and associated brackets. Add a safety factor of three. For example, if a full spit and motor weigh 30 pounds, design mounting and bearing points to handle 90 pounds. This helps prevent failure when the rotisserie hits a bump or the truck vibrates. Bearings sized for radial and axial loads will reduce friction and extend motor life. Use pillow-block bearings on the skewer shaft where you can, and ensure the motor mounts to a rigid bracket.
Motor selection depends on torque needs more than RPM. Low-speed, high-torque motors are best for heavy roasts. For a cab-friendly motor, a 12V DC motor in the 50–100 RPM range typically works. Pair it with a gearbox or chain reduction to increase torque and smooth rotation. Secure the motor to the frame with a vibration-damping mount to protect both motor and cab. Include a speed controller or PWM dimmer in the 12V supply so you can fine-tune rotation for different loads.
Electrical planning should assume vibration, moisture, and movement. Run all wiring in conduit or protective loom and anchor it with clips to fixed points. Fit an inline fuse close to the battery if you tap into the truck’s electrical system. Use a dedicated switch mounted within easy reach, or a remote switch with a weatherproof box if you plan to remove the frame often. Choose connectors rated for automotive use and confirm ground connections are clean and secure.
Decide whether to weld or bolt the frame together. Welding creates a compact, rigid structure that resists flexing. Bolting allows disassembly for storage or transport. Many builders combine approaches: weld the main joints for strength, then use bolted brackets where the unit must be removed. If you choose welding, ensure the welder understands thin automotive sheet and steel tubing to prevent warping or brittle joints.
For a clean installation, integrate features that manage movement and vibration. Use rubber grommets where metal meets interior panels. Fit anti-rotation blocks or straps to keep the rotisserie from shifting when the vehicle moves. If the frame crosses the cab floor, add wide footplates or a spreader bar beneath the floor to distribute loads. Where possible, anchor into the truck’s cross-members or body mounts; avoid relying solely on sheet-metal screw points.
A thoughtful rotisserie frame addresses accessibility and maintenance. Make the skewer easy to remove with quick-release pins or a splined connection that slides out of pillow-block bearings. Mount the motor on a hinged plate so you can access the gearbox and chain without dismantling the frame. Use thumbscrews or captive nuts to secure panels in place for rapid cleaning and inspection.
Portability and folding designs make the rotisserie more useful. Consider telescoping vertical posts with lock pins so you can stow the entire frame under the seat. Hinged cross-members let the frame collapse inward. If you expect to run the rotisserie outdoors on the truck bed, design the lower mounts to mate with a base plate that bolts to bed rails. A modular base allows you to transfer the rotisserie between vehicles without permanent modifications.
If the unit will ever see heat, keep all combustible or interior trim at least two feet away from heat sources. Use heat shields and non-combustible barriers where necessary. For cooking outdoors with the rotisserie mounted to the truck bed, position burners, charcoal trays, or electric elements below the skewer and away from the cab. Ventilation planning is crucial for any heat application—exhaust must flow away from the cab and passengers.
Testing is the final design phase. Run the rotisserie unloaded at various speeds and listen for bearing noise, motor strain, and frame resonances. Then test with a modest load and check for flex, slippage, and overheating. Tighten fasteners after the first trial run. Inspect wiring for heat build-up and connectors for movement. If you notice any unexpected movement, reinforce the frame and revisit mounting points.
Throughout the design process, document decisions and measurements. Sketch the frame with dimensions and label mounting points. Photograph anchor points in the cab for future reference. These records speed repairs, replacements, and upgrades.
For inspiration on motor and gear assemblies, and to see a practical example of a small rotisserie drive system you can scale or adapt, consult this external guide: https://www.instructables.com/DIY-Rotisserie-Grill/.
If you want to explore compatible mounting hardware and truck-specific accessories that help with secure installation, review a practical truck accessories guide for mounting solutions and anchoring ideas. truck accessories
By designing with measured dimensions, conservative load factors, and safety-first anchoring, you can create a rotisserie frame that fits your Chevy cab or installs cleanly in the truck bed. Keep high-heat applications outside, plan for removal and maintenance, and test thoroughly before regular use.
Powering the Spin: Wiring a Chevy Bed Rotisserie Without Compromise
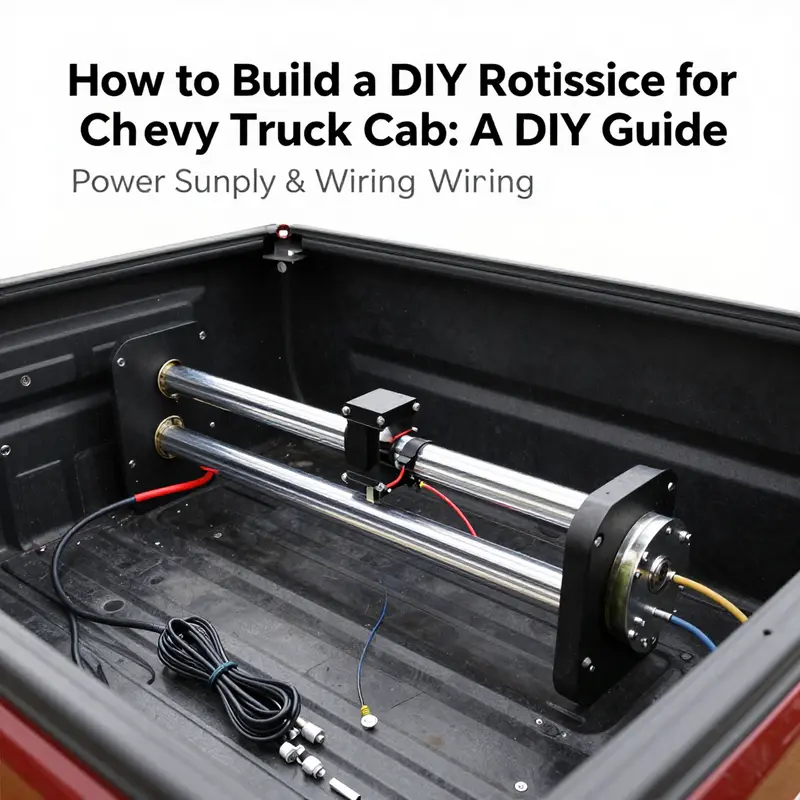
A rotisserie rig built for a Chevy truck demands more than a clever frame and a stubborn motor. It calls for a careful, audit-worthy approach to power that keeps the system reliable, safe, and ready for outdoor use where it belongs. In this chapter, we navigate the heart of that system: the power supply and the wiring. The goal is not to conjure a dramatic kitchen gadget inside the cab, but to design a robust, bed-mounted setup that leverages the vehicle’s electrical system without compromising start-up power, battery health, or safety. The path begins with honest power needs and ends with a practical, maintainable wiring plan that can withstand vibration, weather, and the rigors of real road life. Along the way, you’ll find practical details, from choosing a power source to securing cables, to smoothing control with a speed regulator that doesn’t turn your rotisserie into a popcorn popper when you shift into gear.
First, quantify the load. Even in the simplest rotisserie, the motor and any drive train you add will pull current steadily. Real-world projects typically settle around 500 watts to 1500 watts for the heating element and motor combination, depending on the weight of the load and the diameter of the skewer. For a truck-bed installation powered by a 12-volt system, that translates to a current draw somewhere in the neighborhood of 40 to 125 amps. In practice, a motor rated near 1000 watts is common for a compact, robust setup, with a current draw that sits in the 80 to 100 amp range under full load. Those numbers aren’t just numbers; they become your rulebook for wiring, fusing, and battery management. If you’re aiming for a quieter, cooler-running display or a non-heating prototype, you can scale down to lower power and a smaller drive train. But for any serious, outdoors-oriented rotisserie, plan for a 12-volt, high-current architecture.
With load in mind, choose a power strategy that respects the truck’s electrical system rather than overriding it. The simplest path is to run the rotisserie from a dedicated auxiliary battery bank. A deep-cycle or AGM-type battery bank configured specifically for high-draw loads helps protect the truck’s primary starting battery and keeps engine cranking reliable. A battery isolator or a smart dual-battery controller makes sure the engine’s battery maintains enough reserve for starting, even if the rotisserie is in a long, dry-run test. If you prefer to stay entirely self-contained, an appropriately sized portable inverter can feed an AC motor, but that approach demands careful attention to inverter efficiency, cooling, and the additional weight of a sizeable battery bank. In all cases, do not rely on the cab’s interior as a power chamber. The cab is not a ventilation-friendly or fuel-stable environment for hot motors or electrical chatter. The bed is the proper home for a powered turntable, heat source (when used outdoors), and all wiring harnesses that must survive vibration and shifting cargo.
Next, map the power distribution with clear boundaries. Use heavy-gauge conductors from the battery to the motor, but avoid running bare, unprotected cables across the truck’s moving parts or through the tight gaps of a cab interior. A practical rule is to keep the positive and negative leads as short as possible and route them through protective conduit or fabric-sleeving to minimize chafing and heat exposure. For current-dense runs, gauge matters as much as the fuse size. In a 12V system drawing up to 100 amps, a conductor in the realm of #4 AWG copper remains a comfortable choice. For lighter draws, #6 or #8 AWG can work, but you must recalculate for continuous duty and the total resistance you’re willing to tolerate. The NEC and local electrical codes provide context, but the real-world constraint is heat buildup and voltage drop. Long runs over chassis metal can also invite grounding noise and stray currents, so give each run a solid ground and a dedicated return path back to the battery.
Fusing and protection are non-negotiable when you’re running high-current devices in a vehicle. Install a fused block within inches of the battery and protect both the positive and the negative lines. Use a fuse rated to a safe margin above the maximum expected current draw—typically around 125 percent of the peak. An inline fuse on the positive line near the battery head is standard practice; a second protection near the motor can catch a surge caused by a short or a binding load. Grounding should be robust and local. Tie all components to a solid ground point near the battery with a thick strap or heavy copper bus to minimize resistance. In a truck bed environment, you’ll also want to route cables away from heat sources and moving parts, and you’ll protect connectors with weatherproof seals to cope with moisture, road spray, and temperature swings.
Controlling the rotation and the speed is the other half of the power story. A variable-speed controller, typically a PWM device, gives you the ability to adjust rotation to suit the weight and balance of the load. The PWM controller should be sized to comfortably handle at least 150 percent of the motor’s maximum current to avoid heat build-up in the controller itself. The control path can be simple—a switch in the cab linked to the PWM unit under the bed—or more elaborate, with a remote or wireless control that you can operate from the tailgate or a portable chair while monitoring the process. Either way, make sure the wiring for the controller is separate from the motor power lines to prevent voltage spikes from feeding back into your control circuit. A dedicated ground for the controller helps maintain a clean signal and reduces the risk of erratic speed changes when the vehicle hits rough pavement.
The mounting plan is the bridge between power and practicality. Frame the rotisserie so the motor sits on a rigid base that’s bolted to the truck bed rails or to a reinforced floor plate. The drive shaft, counterbalance, and skewers should align with a shaft-on-bearing setup that reduces wobble at higher speeds. A well-balanced system lowers the current required to rotate and distributes vibration more evenly, which in turn preserves the wiring insulation and reduces fatigue on fasteners. When thinking about the bed, consider the environment: the bed is a wind-blown, dusty, sometimes damp home for your system. Use weatherproof connectors and ensure all penetrations through any frame get grommets and sealing compounds to keep dust out of the motor housing and the PWM controller. If the load shifts or a gust catches the skewers, the system should stall gracefully, not yank the entire frame and the cab loose. In short, power and mounting must be considered as a single, cohesive system, not as a collection of parts tossed together.
From a reliability standpoint, the wiring plan must be practical for maintenance. Check the entire run with a multimeter to verify negligible resistance along the harness and confirm that all grounds are solid. When you test the rig, begin with an unloaded dry run to observe the motor’s behavior, voltage sag, and any hum or heat in the connections. A healthy system shows a stable voltage reading at the battery and no sharp dips when the motor starts or when you vary the speed. If you notice voltage drop, re-check the gauge, shorten any unnecessarily long runs, and confirm that all contact points are clean and tight. A loose terminal or a corroded connector can masquerade as a motor problem, but it’s really a wiring problem waiting to overheat a wire or fuse.
As you weave power and frame, remember to plan for future adjustments. A rotisserie often begins as a concept and becomes a regular feature at tailgates, camping trips, or show events. Leave ample space for an additional heat source or for a cooling fan if you choose to run a non-flaming heating element beneath the rack. If your aim leans toward a display model instead of a cooking device, you can swap in a low-draw motor and LEDs to simulate rotation while preserving safety and vehicle energy budgets. The design should be modular enough to allow a straightforward repair or upgrade, yet sturdy enough to survive being transported, charged, and set down in crowded parking lots.
If you want to widen your view beyond the technicalities of the cab or bed, consider how accessories and add-ons influence the broader vehicle setup. The way you integrate power, mounting hardware, and control logic with the truck’s overall system will shape how your rotisserie interacts with other devices and overall vehicle reliability. A well-considered power strategy doesn’t merely supply a motor; it builds resilience into your entire project. For more on how accessories can influence a truck setup, you can explore related topics at trucksdiy.com/blog/accessories/ which offers practical context on big-idea ideas and the kind of framing you’ll want to carry into your own build.
A last note on the safety and ethics of the project anchors the entire discussion. The body of this chapter takes to heart the imperative that open flames must never operate inside a sealed cab or any space without proper ventilation. Car cabins are not designed to support combustion or the carbon monoxide risk that accompanies indoor grilling. If a flame is part of the plan, relocate to a safe outdoor area and use the rotisserie in a purpose-built outdoor cooking setting. For any display-focused or lighting-based Rotisserie mock-up, use non-heating elements and a quiet motor that won’t raise temperature or humidity inside the cab. In every case, document your power plan and your safety checks so someone else can follow your path with confidence, avoiding the common missteps that come with high-current DIY electric projects.
The practical, hands-on work of wiring a Chevy bed rotisserie is a balancing act between power, control, grounding, and mechanical stability. The steps here are not a rigid recipe but a framework to guide your decisions. Start with the load you expect, plan for a reliable auxiliary power path, and then design your harness to be replaceable, inspectable, and safe. If you keep the cab free of heat and flames and your bed rigged for outdoor use with a robust control method, your rotisserie will spin with the kind of quiet confidence that makes DIY projects satisfying rather than hazardous. And when you’re ready to broaden your scope or look for further ideas about how to incorporate power and electrical safety into vehicle-based builds, the broader landscape of truck accessories provides a context that helps you think about how your rotisserie fits into a well-rounded, outdoor-ready truck setup.
External reference: SAE International – Automotive Electrical Systems provides foundational guidelines for power distribution, circuit protection, and safety standards essential to any high-current, vehicle-integrated project. See more at https://www.sae.org/standards/content/j2973_202204/.
Turning the Chevy: A Roadworthy Rotisserie System for the Truck Bed That Stays Safe and Solid
The Chevy’s cab often becomes a canvas for bold modifications, but a true rotisserie project needs discipline about safety, mounting, and the limits of what a vehicle is meant to do. This chapter envisions a cohesive, roadworthy rotisserie that lives in the truck bed rather than the cab, built to rotate meat or inspiration-worthy props while the truck is stationary. The design philosophy is simple: create a robust frame, a reliable drive system, and a heat approach that respects the workspace and the vehicle’s safety constraints. The goal isn’t to push the truck past its limits but to extend its usefulness for outdoor cooking, tailgates, and show sessions where you want motion, drama, and control without compromising the truck’s core function. If you plan to cook inside the cab, the guidance here strongly emphasizes that such use is hazardous and generally unsafe. Instead, mount the rotisserie securely in the bed, or use non-heating, display-oriented motion inside a properly ventilated, open-air setup. This distinction matters because the path to a functional, safe rotisserie begins with where and how heat is introduced and how motion is constrained in a moving vehicle.
From the outset, the project rests on a few guiding truths. The rotating mechanism must be compact enough to fit within a bed-length footprint yet sturdy enough to handle long skewers and heavy cuts of meat. The drive train should deliver slow, steady rotation—ideally in the range of 50 to 100 RPM—so the meat browns evenly without flinging itself from the spit. The frame must anchor to the truck bed without compromising payload, handling, or ride quality. And the heat source, if used outdoors, must be safe, controllable, and suited to continuous operation, with a reliable shutoff if something goes awry. When these pieces align, the rotisserie becomes less a spectacle and more a dependable tool for outdoor cooking or display that complements the Chevy’s rugged temperament.
Safety, as any veteran fabricator will tell you, starts with a clear boundary. Inside the cab—whether a Silverado, a Silverado-inspired build, or any Chevy family vehicle—the risk of carbon monoxide buildup, heat damage to interior panels, and compromised ventilation is too great for a live cooking setup. The recommended safe practice is to keep all heating and rotation apparatus out of the cab and to mount a compact, electrically powered system in the bed or on a portable stand that you can position away from drivers’ compartments and fuel lines. In practice, this means designing a modular frame that can bolt to the bed floor or side rails, with enough clearance to prevent interference with tools, cargo, or suspension travel. The last thing you want is a rotating spit trampling a toolbox or fighting with a tailgate. If your aim is a display that simulates motion without real heat, you can swap to LED elements and a low-power motor to spin a dummy spit, providing the visual effect without any danger. The boundary is simple but essential: rotation belongs in the bed or a separate stand, not inside the cab. It’s not just about safety; it’s about preserving the truck’s integrity for the long haul and keeping the build something you can rely on in the field.
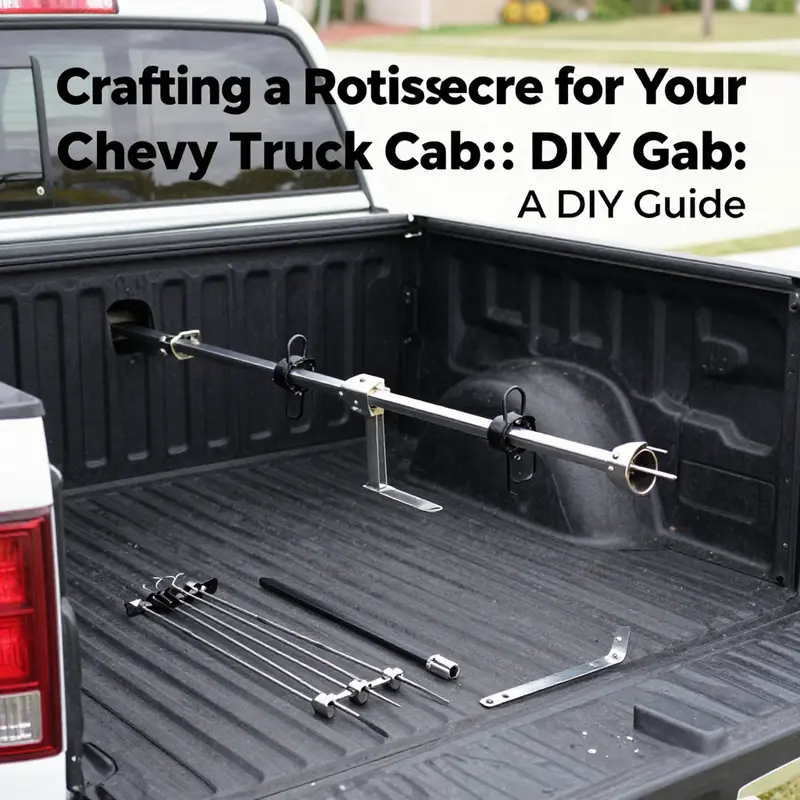
The core of the project lies in the rotating mechanism, and this is where the lessons from oil barrel rotisseries and compact turntable rigs translate cleanly into a vehicle-specific solution. The heart is a small, low-voltage DC motor that can be powered from the truck’s 12V system or an auxiliary power source. A purpose-built gear train or a simple chain-and-sprocket arrangement translates motor shaft rotation into uniform turning of the spit rod. The spit itself must be a robust, corrosion-resistant rod—stainless steel or heavy-duty aluminum—that can bear the weight of a sizeable roast without bending mid-rotation. End caps or locking collars at the rod’s ends prevent the meat from working loose as momentum and heat work on it. Aligning the rod precisely is critical; any wobble amplifies through the frame and can cause skewers to shift or tiles to crack when you’re rolling through neighborhoods or campgrounds.
To realize a stable, fixed axis in a moving frame, the mounting brackets deserve as much attention as the motor. The bed provides a solid substrate, but it’s not a free-floating platform. You’ll need brackets that bolt through the bed floor or onto the chassis rails, using thick steel stock or reinforced plates. Precision holes for the spit rod ends ensure the axis remains true over time. A two-point support system—one bracket near the front of the bed and another toward the rear—minimizes lateral movement and keeps the spit aligned with the driving direction. Vibration is a constant companion on the road, so damping mounts or rubber isolators beneath the motor and control electronics help keep everything tight and quiet. The frame should also account for weight distribution. If you’re turning a heavy roast, you want the mass balanced on the spit so the rotation is smooth; uneven loading can cause the entire platform to tilt and stress the mounting hardware. When you’re mounting, don’t center everything on a single floor point. Distribute the mass across multiple fasteners and ensure a symmetrical footprint that tracks with the vehicle’s CG as you move.
The heat source, a sensitive area of the build, takes careful handling. For outdoor use only, electric heating elements designed for continuous operation beat the hazards of indoor flames. A compact heat strip, fan-assisted halogen heater, or flat electric heating element installed behind or beneath the rotisserie provides a controlled heat gradient across the meat. The goal is even cooking, not scorching. The heating element should sit on a heat-resistant surface, with a shield to reflect heat toward the meat while protecting nearby components from radiant heat. A thermostat helps keep the cooking environment at a steady range, usually around 300 to 350 degrees Fahrenheit (150 to 175 Celsius). A simple control circuit can handle on-off cycling and a safety cutout if the temperature ventures beyond the safe zone. Above all, ensure the entire heat assembly is isolated from the vehicle’s wiring and protected from motion. The bed is a dynamic workspace; you don’t want the heat rail to shift and burn through a wire loom or a fuel line.
In terms of the actual cooking components, the spit rod needs secure holds that won’t loosen with vibration. A multi-point clamp or fork system at the end of the rod can grip the meat evenly without crushing it. The clamps should be designed to accommodate different thicknesses and weights while avoiding any slippage. If you intend to cook longer roasts, you may consider a simple, robust end-cap design that keeps the meat from sliding off as gravity tilts with road vibrations. The clamps can be matched with a spring-loaded tensioner to compensate for minor heat-induced expansion and contraction of the meat, ensuring consistent contact with heat without requiring constant adjustments.
Power and wiring are the nervous system of the machine. The 12V source from the truck is convenient but not always ideal for continuous, high-draw heating elements. A fuse block with a manual switch is essential, plus weatherproof connectors for the cab and bed. Run wires through conduit to shield them from heat, moisture, and movement. If you don’t want to tap directly into the battery, a sturdy portable battery pack or a compact inverter can supply the system, though you’ll want to weigh weight against reliability. Heat-resistant cable insulation, automotive-grade connectors, and strain relief at every junction prevent arc faults and wear from vibration. The motor should receive continuous but controlled current, with a PWM controller if possible to tweak the rotation speed without stressing the motor. Keep power routing clean, with the controller mounted away from the heat source and secured on vibration-damping mounts.
With the mechanical and electrical skeleton in place, the next layer is a thoughtful approach to mounting stability and testing. The entire assembly should bolt to the truck bed floor with metal brackets that are welded or bolted through the pan and onto structural members where feasible. Bolts should be high-strength, and all fasteners must be torqued to spec to avoid loosening at speed. Anti-slip pads under the base and rubber feet on the rotating components damp vibration and reduce noise. It’s wise to set up a simple test rig before the real thing, running the rotor at different speeds for several minutes with a mock load to observe any flex or binding. If any wobble emerges, reassess the alignment and perhaps add a secondary support bearing near the midpoint of the frame. A well-tuned system feels almost invisible during operation; the only audible cues are the subtle whirr of the motor and the soft cadence of rotation.
Finally, the build must respect space and responsibility. Avoid any design that obstructs tailgates, lights, or trailers hitch accessibility. Do not connect moving parts to fuel lines or electrical systems not designed for automotive use. If you lack experience in welding, electrical work, or structural engineering, consider consulting with a professional or choosing a commercially certified, mobile-use rotisserie product that’s designed for the rigors of road travel. Your safety and the vehicle’s integrity trump the quest for novelty. For those pursuing a display-oriented or hobbyist setup, LED-driven motion, simulated heat, and non-heating motors can create the same visual impact without carrying the risk of open flames or high, continuous heat inside or near the cab.
As you map the build, you’ll likely need a few practical references to guide mounting patterns and frame ideas. A close reference point is the suite of modular ideas found in truck accessory guides, which offer patterns for stable, vehicle-friendly mounting systems. For practical mounting ideas, the truck accessories guide provides approachable patterns for bolted, vibration-damped frames that won’t interfere with cargo or suspension. This can help you translate the concept into a layout that fits your specific Chevy model and bed length.
To close the loop, remember that the core promise of a Chevy-bed rotisserie is not just rotation but reliability in an environment that moves. The system must be able to withstand jolts, weather, and the daily rigors of life on the road. That demands solid geometry, careful material choice, precise alignment, and a power system that behaves when you need it most. If ever you’re tempted to push beyond these boundaries, pause and reassess. The best builds are conservative with risk and generous with safety margins. The rotisserie should feel like a natural extension of the truck, not a gadget strapped to it. When done this way, the project becomes a practical tribute to the Chevy’s rugged DNA—an apparatus that delivers consistent rotation, with heat introduced only where it belongs and never where it could do harm.
External resource for further depth is a classic DIY rotisserie guide that translates well to a truck-bed context, offering insights on motor selection, gear systems, and safe mounting techniques: https://www.instructables.com/DIY-Rotisserie-Grill/ . This resource can complement the practical, safety-first approach outlined here and help visualize a concrete, tested path to a roadworthy setup.
Final thoughts
In conclusion, building a DIY rotisserie for your Chevy truck cab presents an opportunity to elevate your outdoor cooking experience and showcase your ingenuity. By carefully considering safety, design, power setup, and cooking components, business owners can craft a highly functional and unique rotisserie that fits perfectly within their vehicle. Always prioritize safety measures to ensure that your cooking adventures remain enjoyable and hazard-free. With creativity and diligence, your truck can become the ideal mobile kitchen, paving the way for new culinary possibilities.