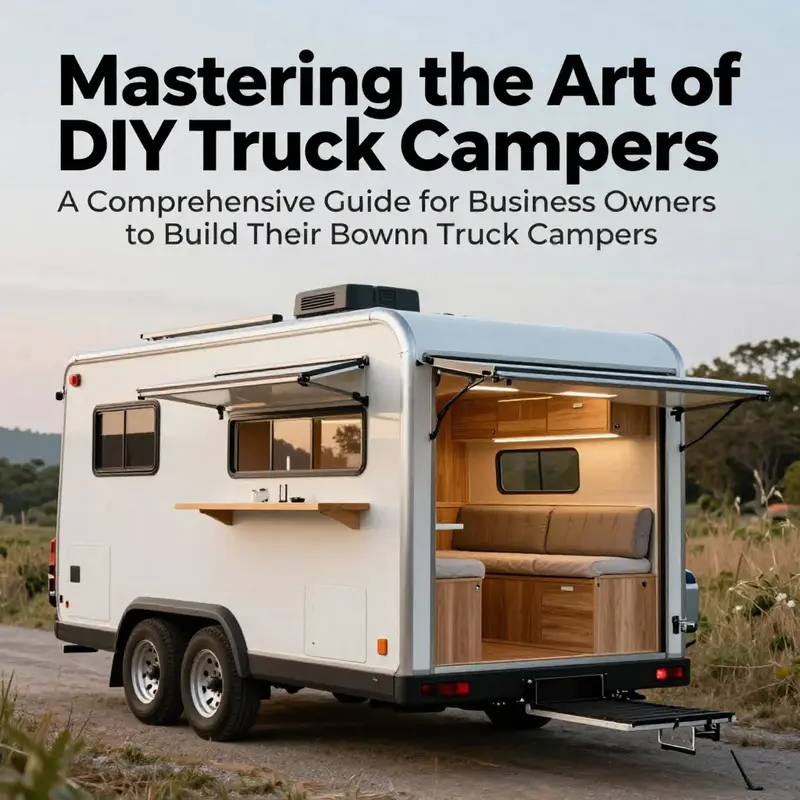
For business owners seeking a unique mobile solution, building a DIY truck camper can serve as both a cost-effective adventure vehicle and a versatile workspace. Whether you aim to venture into new markets with your mobile business or simply desire a creative outlet, constructing your own truck camper combines innovation with practical skills. This guide will explore essential steps to ensure your camper is efficient, functional, and perfectly customized to your needs. We will cover choosing the right vehicle, planning your layout, and gathering the necessary materials and tools, guiding you through a project that can enhance your business offerings.
Choosing Your Base: Match Truck Strength, Space, and Purpose for a DIY Camper

Choosing the right vehicle is the single biggest decision when building your own DIY truck camper. The chassis you pick becomes the foundation for everything that follows: layout, weight limits, comfort, and the kinds of places you can go. Treat this step like selecting the plot for a house. Every choice you make here narrows or widens the possibilities for the build itself. Think about strength, space, suspension, and day-to-day use, and measure each against the lifestyle you want to live on the road.
Start by thinking of the truck as a system, not just a box to mount a camper inside. The frame, bed, cab, axles, and braking system must work together to carry static and dynamic loads safely. Static loads include the camper weight, fixtures, and built-in systems like water tanks and batteries. Dynamic loads are passengers, gear, water sloshing in tanks, and shifting cargo when you drive over rough terrain. Respecting both is essential. Overloading a truck can damage the frame, reduce braking performance, and create an unsafe handling condition.
Payload capacity is the practical figure you will use most. It tells you how much weight the truck can carry in the bed and cab after accounting for the curb weight. Find the factory payload rating on the door frame or in the owner’s manual and compare it to the estimated fully loaded weight of your planned camper. Include every item: insulation, cabinetry, appliances, freshwater, gray water, batteries, tools, and personal gear. Err on the side of caution by adding a safety margin to your calculations. A common rule is to keep actual loaded weight at least ten percent below rated payload. This guards against surprises and leaves room for personal items and modifications later.
Closely related is GVWR, which is the total allowed mass of the vehicle and any payload. Think of GVWR as the ceiling you should never exceed. GVWR is split across axles. Pay attention to the gross axle weight ratings for the front and rear as well. Loading too much weight over a single axle will stress suspension components and tires. If you plan a heavier camper, search for trucks with higher GVWR or consider upgrading suspension components to better distribute the load.
Suspension and braking deserve early focus. A truck with stock suspension designed for commuting may sag under a camper’s weight, reducing ground clearance and affecting ride quality. Options include heavier-duty springs, helper air bags, or upgraded shocks. These changes tune your truck to the altered weight distribution and help preserve handling and braking. Better brakes, either as factory options or aftermarket upgrades, will shorten stopping distances. Replace tires with load-rated models appropriate for the total weight. The goal is not to make the truck feel like a truck again, but to make it safe and predictable when loaded.
Consider bed length and cab configuration. A longer bed gives you more footprint for camper mounting and often allows for a lower center of gravity. Short beds may require the camper to sit higher or extend into the cab, which can reduce usable interior space and shift weight forward. Cabin type matters too. Crew cabs provide more passenger space and seating, while smaller cabs can free up bed length. Think about how many people will regularly travel and sleep in the camper, and whether you need a full rear seat for daily use. A well-chosen cab can reduce the need for camper-built seating and storage, keeping the camper lighter.
Height is another practical consideration. A taller roofline on the truck or a higher cab clearance makes it easier to fit larger or taller campers. Standing height inside the camper transforms comfort but raises the overall center of gravity. A higher center of gravity affects handling, especially in crosswinds or when cornering. Balance comfort against stability. If you plan a tall, hard-sided camper, look for trucks with wider tracks and stronger suspensions to counteract the higher center of mass.
Frame strength and bed structure influence how you will mount the camper. Many DIYers opt for slide-in campers that transfer loads into the truck bed. For these builds, ensure the bed and frame are in good condition and free of corrosion. Reinforce mounting points if needed, using plates that spread the load across the bed floor and frame rails. Properly installed tie-downs and turnbuckles convert the bed into a secure platform. When mounting a custom hard-side unit, plan the interface between camper and bed carefully. Work with plates, bolts, and U-bolts sized for heavy loads and torque-rated to match your camper’s weight.
Mounting hardware selection is not glamorous but is critical for safety. Choose mounting hardware designed for vehicle applications and sized for your camper weight. U-bolts, anchor plates, and tie-down brackets must resist shear and tensile forces. Use lock nuts or thread-locking compounds where vibration might loosen fasteners. When in doubt, over-engineer mounting points rather than under-engineer them. These components are the last line of defense against camper movement during acceleration, braking, and cornering.
Weight distribution matters as much as gross totals. Place heavy systems—batteries, water tanks, propane—low and close to the truck’s centerline. This lowers the center of gravity and reduces pendulum effects during turns. If you plan to carry a heavy freshwater tank, position it near the axle centerline. Batteries are cleaner and safer when mounted low in sealed boxes with ventilation for maintenance. Keep frequently used items within easy reach and avoid stacking heavy gear at the top of cabinets.
Consider the difference between pop-up or folding campers and hard-side slide-ins. Lightweight pop-up systems are easier on smaller trucks and offer better fuel economy. They usually reduce wind drag and lower the rolling center of gravity when closed. Hard-side slide-ins provide better insulation, full-time standing height, and more durable fixtures, but they carry more weight. Match the camper type to the truck’s capacity and your intended climate. If you plan to spend long stretches in cold environments, the extra insulation and thermal mass of a hard-side camper may be worth the added load and complexity.
Think about how you will use the truck day to day. If the vehicle doubles as a commuter, prioritize fuel efficiency and maneuverability. A city-focused truck with a lighter camper may be a better fit. If you plan long off-road trips, prioritize ground clearance, underbody protection, and four-wheel capability. Off-road use adds stress to mounts, so consider reinforced mounting hardware and secondary retention systems. If you will tow a trailer occasionally, confirm hitch ratings and towing capacities. Towing changes weight distribution and impacts braking; design camper weight and placement with towing in mind.
Access to service and parts is a practical aspect often overlooked. Older or specialty trucks may offer attractive prices, but parts and knowledgeable technicians may be harder to find in remote areas. Factor in ease of maintenance and the availability of aftermarket upgrades when choosing your base. A vehicle that can be serviced easily will keep you on the road longer and reduce downtime.
Cab and bed sealing is an important comfort detail. If your camper will extend into the cab or use the cab for storage, ensure weather sealing between cab and camper. Moisture intrusion can damage wood, insulation, and electrical components. Use flexible seals and allow for differential movement between camper and cab. Soundproofing reduces road noise and improves sleep quality; add insulation and barriers where practical.
Perform dry runs and mockups before committing. Build a plywood mockup of your camper’s footprint and much of its interior to test fit in the bed. Use temporary ballast to simulate weight. Drive with the mockup in place to test handling, braking, and visibility. Check mirrors and sightlines to ensure safe lane changes and reversing. Mockups reveal issues you might not notice on paper, such as cab access, rear visibility, or the need for additional steps or rails.
Regularly weigh your vehicle during the build process. Visit a public scale to measure axle loads and gross weight as you add components. Weighing lets you identify overweight conditions early, before costly or dangerous mistakes accumulate. If an axle or the gross weight approaches limits, reassess layout and substitute lighter materials where possible. Lighter, stronger materials such as high-grade plywood, aluminum framing, and foam insulation can save significant weight without sacrificing durability.
Consider upgrades that make a heavier build feasible. Upgraded springs, helper air bags, and sway control devices can improve load handling. Heavy-duty tires with proper load ratings are a must for increased payloads. In some cases, a rebalance of the truck’s cargo and accessory layout will help keep the rear axle within safe limits. Retain documentation for any modifications to maintain resale value and ensure that insurance companies understand the upgrades.
Think about ventilation and wiring access from the start. Plan how you will route wires, plumbing, and vents through the bed and cab. Use removable panels or modular entry points so you can service systems without tearing apart furniture. Accessible routing reduces repair time and helps avoid ad hoc wiring that can cause faults and fire hazards.
Safety is a theme that should run through every decision. Maintain visibility with properly adjusted mirrors and add auxiliary lighting if needed. Ensure brake bias and stability remain acceptable with the camper installed. Secure loose items to prevent them from becoming projectiles in sudden stops. Use fire-resistant materials around cooking and heating appliances and install an accessible fire extinguisher.
Finally, match your choice to the life you want on the road. If you value long, comfortable trips and plan to live in your camper for extended periods, invest in a robust truck with higher payload and GVWR. If weekend getaways and fuel efficiency matter most, favor a lighter setup. If you crave remote trails and technical roads, pick ground clearance and protection first. The right base vehicle is not necessarily the biggest or most expensive, but the one that best balances strength, capacity, and the adventures you intend to take.
Planning carefully at this early stage saves time and money later. Measure twice and mock once. Choose a vehicle that supports your design goals, and design in serviceability, safety, and sensible weight placement. When the base is right, the rest of your DIY truck camper build becomes a practical, rewarding process that rewards thoughtful choices with reliability and freedom.
For guidance on accessories that expand cargo and storage options, consider resources about roof rack solutions such as roof racks for trucks.
Further technical reading on matching truck specifications to camper needs is available here: https://www.autocar.co.uk/article/truck-campers/choosing-right-truck-diy-camper
Mapping the Road Ahead: Designing a Smart, Space-Savvy DIY Truck Camper Layout
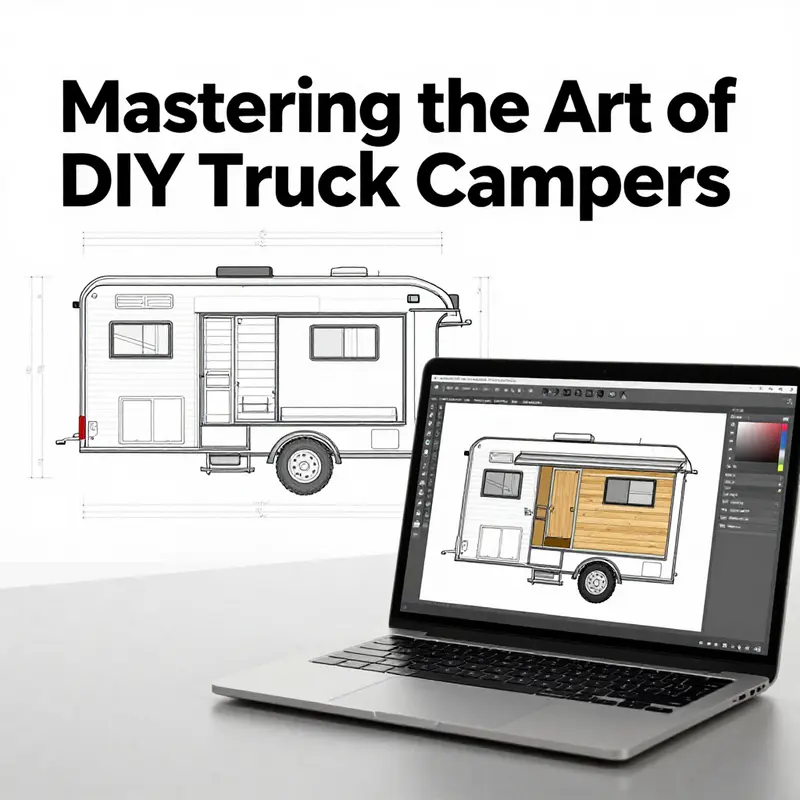
Designing a DIY truck camper starts with a practical reckoning of daily life on the road and a clear sense of how you want to move through space inside a compact shell. The layout you choose should breathe, flow, and reliably support your routines—sleep, food, work, and relaxation—while leaving room for the occasional off-grid moment. A well-conceived plan balances form and function with a modular mindset that accommodates future gear and needs.\n\nBegin by identifying core zones: a sleeping area, a kitchenette/work surface, and smart storage that keeps essentials within reach without crowding the aisles. Heavier systems should sit low and near the vehicle’s center to preserve stability. Think in modules: sleeping module, kitchenette module, storage module, and seating/dining module that can be reconfigured. A removable kitchen island or fold-down bed is a practical way to adapt for weather or trips. Use sketches, paper models, or simple CAD to test scale and traffic flow before cutting plywood.\n\nDesign for maintenance and safety by ensuring accessible service panels, cleanable surfaces, and clear routing for wiring and plumbing. Plan a continuous walking path from door to bed, bed to kitchenette, and kitchenette to seating, with adequate ventilation and insulation. Build around non-negotiables: easy-to-clean surfaces, reliable power and water layouts, and room to breathe in tight spaces.\n\nExterior expansions, like roof racks or external storage, should be integrated with the interior plan so you don’t overbuild the cabin and compromise driveability. A modular approach lets you upgrade gear and reconfigure layouts over time, turning the truck into a true home on wheels that evolves with your adventures.
Choosing Materials and Tools: The Practical Essentials for Your DIY Truck Camper
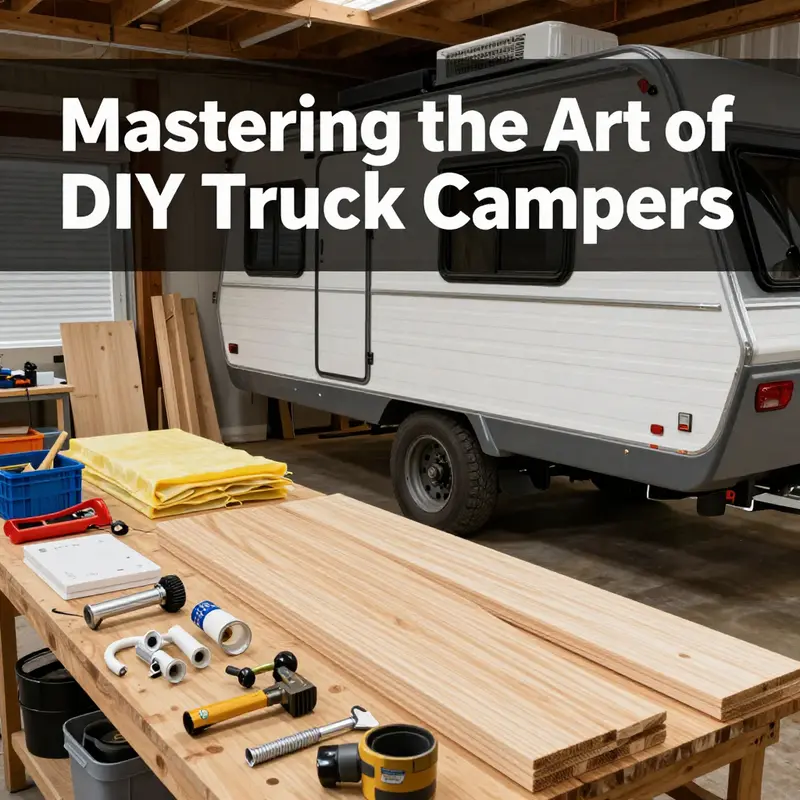
Materials, Tools, and Safety Essentials
Building a reliable, comfortable truck camper starts with smart choices about materials and tools. Pick options that balance weight, strength, and durability. Choose tools that save time and deliver consistent results. Above all, prioritize safety and serviceability so the camper lasts through seasons and miles.
Start with the bones. The structural framing supports everything above and inside. Lightweight metals such as corrosion-resistant aluminum or galvanized steel work best. They resist rust and offer predictable strength for mounting beds, cabinets, and roof systems. Use metal where loads concentrate: bed anchors, roof rack supports, hinge points, and external mounts. For less-stressed framing, use quality plywood or engineered wood. Plywood with a furniture-grade face gives clean edges for cabinetry and holds fasteners well. Match board thickness to span and load. Thicker panels are heavier but reduce flex and squeak.
Insulation is the next priority. The right insulation regulates temperature and limits condensation. Closed-cell foam boards resist moisture and provide high R-value per inch. Mineral wool and traditional fiberglass offer sound dampening but need vapor control. Spray foam creates an excellent air seal, yet may complicate future service access. For a build that stays maintainable, consider foam board in wall cavities and insulated removable panels for roof and floor. Combine foam with a thin reflective layer where space is tight.
Exterior sheathing protects framing from weather and road spray. Exterior-grade plywood or composite panels form a rugged skin. Choose marine-grade or exterior glue plywood for areas exposed to moisture. Composite panels offer lighter weight and often include an aluminum or polymer face. Seal panel joints and fastener penetrations with flexible sealant to prevent leaks. If you plan to add a roof rack or ladder, design tie-in points through the sheathing into the underlying metal frame.
Interior finishes define comfort and longevity. Lightweight wood veneer panels and thin plywood face sheets create a warm, livable cabin. Use E0 or low-VOC panels to limit odors and indoor air hazards. For high-wear surfaces such as counters and tables, use laminated plywood or thin hardwood facing to resist scratches and stains. For flooring, a marine-grade plywood subfloor with a durable top layer works well. Anti-slip vinyl or engineered wood are low-maintenance choices that add cushioning and resist moisture.
Fasteners, adhesives, and sealants deserve careful thought. Use stainless steel or coated screws and bolts where they meet the elements. Choose adhesives rated for marine or exterior use for bonding dissimilar materials. Structural adhesive can reduce reliance on mechanical fasteners and stop creaks. For sealing seams and roof penetrations, select a flexible, paintable sealant with good UV resistance. Tape designed for roofing and panel seams can work as a secondary barrier.
Plan for the big components early. The bed platform, cabinets, counters, and shelving determine weight distribution. Build the bed platform from plywood with metal supports under heavy points. Consider lift-up or fold-down bed designs to free space. Cabinets should be lightweight yet rigid. Use full-depth drawer slides on cabinets expected to hold heavy gear. Anchor cabinets into the truck frame or floor structure rather than only into thin paneling.
Metalwork belongs in high-stress areas. Use steel or aluminum plates for mounting heavy items. Plate the underside of the floor where bolts pass through. Weld or bolt mounting blocks into place and then fasten cabinetry to those points. For any fabricated metal brackets that attach to the truck body, ensure edges are rounded and painted or powder-coated to resist corrosion. When drilling into frame elements, protect cut edges with seam sealer and rust-inhibiting primer.
Electrical and plumbing materials integrate with your structural choices. For wiring, choose marine-grade, tinned-copper wire and appropriate insulation for the environment. Use ring terminals and heat-shrink tubing for reliable connections. Protect wiring runs with conduit or split loom and clip them firmly to prevent chafing. Fuse every circuit close to the battery with the correct amperage. A battery box and dedicated battery isolator or switch enhance safety. If you select lithium batteries, ensure a battery management system that balances cells and provides low-temperature protection.
Plumbing should follow the same logic. Use potable-grade tanks and hoses for drinkable water. A compact water pump between tank and fixture keeps pressure steady. For wastewater, pick a greywater container sized to your sink usage and routed away from heat sources. If you include a cassette or portable toilet, plan secure mount points and a ventilated cabinet to minimize odors. For showers, consider an outdoor shower or a wet-bath with water-resistant surfaces and a sealed drain.
Heating and cooling affect material choice. If you plan a small propane heater, ensure combustible clearance and use certified fittings for fuel lines. If you plan an electric heat source, size the inverter and battery bank accordingly and insulate to minimize demand. Air circulation prevents condensation and preserves finishes. Install ventilation fans in the roof with insulated surrounds. Insulated vent covers help retain heat when parked.
Turn to the tool list. Accurate, reliable tools make the build faster and cleaner. Basic cutting tools include a circular saw for long straight cuts and a jigsaw for curves and cutouts. A table saw gives precision for repeated cuts, but a circular saw with a guide performs well. For metal, an angle grinder and a cutoff wheel work for small brackets. A metal-cutting bandsaw or cold saw suits frequent metalwork.
Assembly tools include a drill/driver and impact driver. The drill/driver handles pilot holes, countersinks, and small bits. The impact driver excels at driving long screws into thick plywood and composite panels. A set of driver bits and socket attachments increases versatility. For heavy bolting, a torque wrench ensures fasteners reach the proper tightness. Keep a hand socket set for in-vehicle work.
Measuring and layout tools keep things square. A quality tape measure, a carpenter’s square, and a reliable level are indispensable. A straight edge and a marking knife produce cleaner plywood cuts. Consider a digital angle finder for odd roof slopes. For repeatable cabinet parts, a story pole or full-size template speeds work and prevents mistakes.
Finishing tools refine the result. A router shapes edges and cuts slots for hidden fasteners. A random-orbit sander smooths surfaces quickly. For small joinery and trim, a palm router or trim router works best. A portable workbench or folding sawhorses create a stable work surface inside or outside the truck.
When metal fabrication is needed, basic welding gear is useful. If you lack welding experience, outsource complex brackets to a local fabricator. Use mechanical fasteners where welding is impractical. A rivet gun works well for aluminum skins and thin panels.
Safety gear is non-negotiable. Eye protection prevents debris-related injuries during cutting and grinding. Hearing protection avoids long-term damage from power tools. Respiratory masks are essential when sanding, cutting foam, or working with adhesives. Heavy-duty gloves protect hands while handling rough materials or metal. Keep a first-aid kit and a fire extinguisher rated for electrical and fuel fires close at hand.
Tool organization improves workflow. Keep frequently used bits, drivers, and sandpaper in a small roll-up pouch. Store screws in labeled containers by type and length. Mobile toolboxes let you move equipment into the truck bed for on-vehicle work. A magnetic strip mounted in your shop or garage keeps metal tools in reach.
Select fasteners that match materials. Use coarse-thread wood screws in plywood and fine-thread machine screws with nuts in metal. For thin metals, use backing plates or weld-in nuts to spread load. Lock washers, thread-locking compounds, and nyloc nuts prevent vibration loosening. For cabinetry, use confirmat or pocket screws for quick, strong joints.
Think modular and serviceable. Design panels that remove with a few screws. Route wiring through conduit with junction boxes accessible behind removable panels. Mount water pumps and filters on isolation brackets that allow replacement without cutting panels. Label both ends of wiring runs so future troubleshooting is simple.
Weight management must guide material choices. Every pound matters for ride, braking, and fuel economy. Use lighter woods and composite panels where possible. Keep heavy items low and near the centerline to improve handling. Distribute storage so cargo weight sits over or close to the truck axle.
Corrosion protection extends life. Paint bare metal parts with rust-inhibiting primer and topcoat. Use sacrificial plates or zinc washers where dissimilar metals touch. Seal fastener holes with sealant after installation. For under-body mounts, consider rubber isolation pads to reduce metal fatigue and rattles.
Installation tips speed the process. Mock up major pieces with cardboard templates first. Fit and test a cabinet or bed frame in place before finishing edges. This reduces rework and preserves finish materials. Pre-drill mounting holes and use clamps to hold pieces steady while you fasten them.
Plan for testing and adjustment. After initial assembly, run a full electrical check, water pressure test, and leak assessment. Drive the vehicle on varied roads to listen for rattles and check for flex. Tighten hardware after the first few hundred miles and again after seasonal shifts.
For exterior load systems, plan your roof attachments carefully. Plate racks and ladder mounts into the structural frame rather than only attaching to sheathing. Reinforce roof tie-in points with metal plates under the sheathing. For inspiration and product ideas on secure rooftop systems, review resources on truck roof racks.
Finally, sourcing choices change cost and convenience. Salvage yards and reclaimed-material suppliers can provide quality plywood, cabinets, and hardware at low cost. Specialty suppliers offer marine-grade fittings and low-VOC finishes. Renting larger tools reduces upfront expense for one-off tasks. Keep a realistic parts list and buy spares for small items like screws and hose clamps before starting.
This chapter equips you to choose materials and tools wisely. The right combination of metals, woods, insulation, fasteners, and power tools produces a camper that feels solid, functions well, and lasts. Design for access, serviceability, and balance. Build with corrosion resistance and modular thinking in mind. With careful selection and disciplined work, your truck camper will become a durable, comfortable rolling shelter ready for exploration.
External resource for hands-on build reference: https://www.instructables.com/How-to-Build-a-Homemade-Pickup-Truck-Camper-A-Practical-Guide/
Internal resource: truck roof racks
Final thoughts
Building your own DIY truck camper is not only a fulfilling project but also an investment in a versatile vehicle for business and adventure. By selecting the right vehicle, meticulously planning your layout, and utilizing the correct materials and tools, you can create a personalized mobile space that enhances your business operations while enriching your lifestyle. This journey may require effort and creativity, but the end result—a unique camper tailored to your needs—will be well worth it.