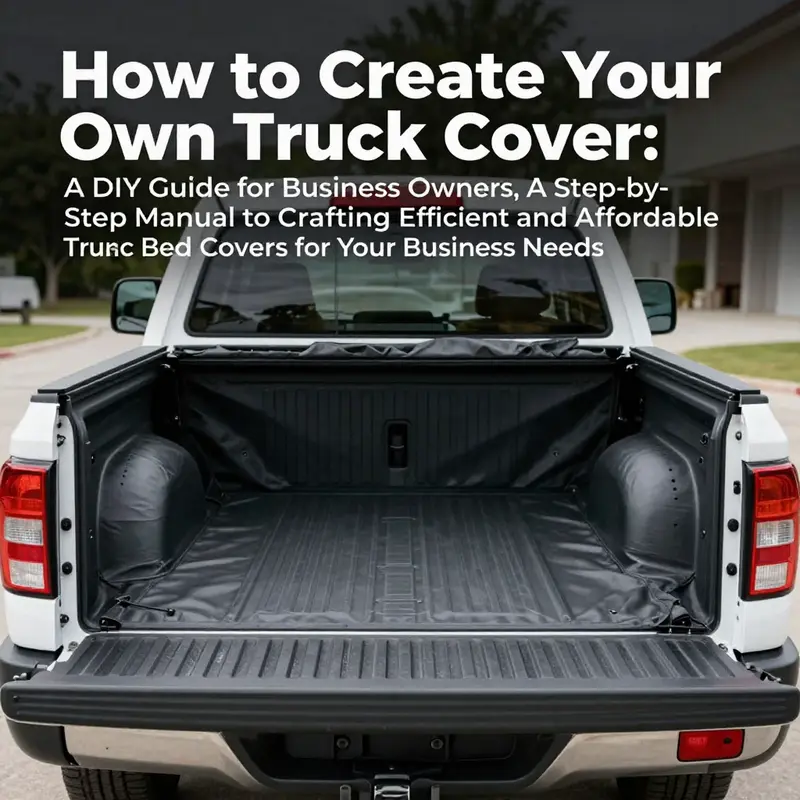
Creating a truck bed cover can not only enhance the functionality of your vehicle but also protect your cargo investment. For business owners, a customized truck bed cover may be the solution to efficiently managing transportation needs while promoting your brand. This guide will delve into the DIY process, covering the options available, the materials needed, and a step-by-step approach to making a durable cover. Additionally, we will explore some quick alternative solutions to cater to varying budgetary needs. Each chapter builds upon the last, equipping you with the knowledge required to construct a truck bed cover that suits your business.
Choosing the Right DIY Truck Bed Cover: Materials, Designs, and Practical Tradeoffs

When you decide to build your own truck bed cover, the first and most important step is to understand the options you have. Choices span materials, styles, attachment methods, and levels of permanence. Each choice affects protection, ease of access, security, aerodynamics, and the time and cost required. This chapter walks through those options in a single, coherent narrative. It helps you weigh tradeoffs so your final design fits your needs, budget, and skills.
Start by thinking about what you carry most often. Do you haul tools, camping gear, or fragile equipment? Do you need quick access during a day on the job? Is theft prevention a priority? Will the truck frequently travel at highway speeds or in windy conditions? Your answers inform the best material and design choices. A canvas roll-up might be perfect for casual hauling and light weather protection. A rigid, locking cover will work for valuable gear and long trips. Understanding how each choice maps to a real need helps avoid wasted effort.
Materials set the baseline for any cover. Fabric-based covers use marine-grade vinyl, heavy canvas, or PVC-coated polyester. These materials balance flexibility, weather resistance, and cost. Vinyl resists UV and moisture well. Canvas breathes better, which reduces condensation with wet gear inside. PVC-coated fabrics add extra durability and are easier to wipe clean. Fabric covers pair well with simple frame systems. They allow roll-up or snap-on styles and are easier to alter or replace.
Rigid options include aluminum panels, composite boards, and lightweight marine plywood with a coated finish. Metal panels give great impact resistance and weather sealing. Composites balance strength and weight and can be molded into sleek profiles. Rigid covers often accept locks and mounting hardware that make them more secure than soft covers. They also tend to reduce wind drag by offering a stable top surface, which can improve efficiency at speed. Rigid designs require stronger attachment points and more careful measurement, but they reward you with long-term durability.
Hybrid approaches combine a rigid frame with a flexible skin. A low-profile aluminum slat system covered by vinyl can offer a compromise. You gain a degree of rigidity and theft resistance while keeping lighter weight. Folding hard covers use hinged panels to grant partial access without full removal. Retractable systems slide into a canister near the cab for complete access. DIY versions of retractable covers are complex. They need precision and robust tracks. Folding systems are simpler to build and repair, and they allow staged access to the bed.
Consider the role of sealing. Weather-tight seals protect cargo and reduce the chance of water pooling around the tailgate. Soft covers often rely on straps, snaps, or rails with rubber seals. For heavy rain, add a waterproof backing or laminate between fabric layers and ensure seams are sealed. With rigid covers, plan continuous rubber gaskets along perimeter contact points. Pay attention to the tailgate area because many leaks start there. A well-sealed edge not only keeps water out but reduces wind noise.
Attachment and hardware are where DIY projects often succeed or fail. Light-duty users can rely on Velcro strips, snaps, or simple clamp systems. Tradespeople and long-distance drivers should use bolted rails, stainless steel hardware, and reinforced anchor points. Grommets and straps help with soft covers, but they must be anchored to secure tie-down points. For hard covers, design brackets that distribute load across the bed rails. Reinforce corners and stress points. If you plan to remove the cover frequently, make the fasteners user-friendly while keeping them tamper-resistant.
Security considerations shift your design toward harder materials and lockable features. A soft cover is easy to remove or cut. For thieves, a rigid, lockable lid is more discouraging. Consider integrating lock points for padlocks or built-in lid latches. Tool storage can be combined with the cover to prevent easy access. If your gear has high resale value, prioritize a solution that bolts to the bed and offers multiple locking points.
Aerodynamics is often overlooked by DIY builders. A poorly fitting cover creates drag and turbulence. This increases fuel consumption and can produce noise. A fitted cover that follows the truck’s profile smooths airflow over the bed. Seals at the tailgate and a low frontal edge reduce turbulence. Rigid covers usually perform better here because they maintain a steady surface at highway speeds. However, a taut, well-installed fabric cover can also reduce drag if it is tensioned properly.
Access methods shape your daily experience. A full removable lid offers total access but takes more time to remove and store. A roll-up or folding cover grants staged access and quick entry to partial areas. Retractable systems provide full, effortless access but they are the most complex. Think about how often you need full bed access and whether you regularly carry oversized items that require an open bed. Many builders prefer a folding design for its compromise between security and convenience.
Insulation and liner choices add another layer of utility. A double-layer cover with foam insulation provides thermal control for sensitive cargo. It also mutes noise and adds structural stiffness to fabric covers. If you frequently transport electronics or perishable goods, a lined and insulated cover makes sense. Alternatively, an inner liner can be removable for cleaning. Double walls can be sewn into a fabric cover and zipped open for washing or repairs.
Customization is a major DIY advantage. You can add compartments, pockets, and integrated storage rails. For tradespeople, building a cover that integrates a toolbox or side-mounted storage keeps essential gear organized. A secure internal shelf or modular dividers prevents items from shifting. Loading aids such as fold-out ramps can be attached to the underside of a lid. These details turn a simple cover into a highly functional workstation.
Budget and skill limitations matter. Soft covers and tarp solutions cost less and require fewer tools. Rigid and hybrid builds require power tools, metalworking skills, and accurate measurement. Time investment grows with complexity. Allow for prototyping and adjustments. Building a mock-up from cardboard or scrap wood helps identify fit issues before cutting expensive materials. Templating the bed with paper or plastic film gives a pattern to follow during fabrication.
Durability is partly material choice and partly maintenance. UV exposure, salt, and dirt wear materials down. Choose UV-stable fabrics and corrosion-resistant hardware. Seal seams and touch up exposed edges to limit moisture intrusion. Remove the cover for cleaning and storage during off-seasons. Small maintenance tasks extend life and prevent failures in the field.
Aesthetics matter too. A well-made cover can improve your truck’s appearance. Choose colors and finishes that complement the vehicle. Smooth profiles and hidden hardware give a factory look. If visual appeal is important, plan for neat seams, concealed fasteners, and consistent lines. A clean finish increases resale value and satisfaction with the build.
Before starting, gather visual references and build plans. Image boards, user photos, and step-by-step tutorials help you visualize a final product. They also reveal clever workarounds for common problems. For specific integrated storage ideas, consult a detailed guide about truck boxes to see how others attach and lock storage components. Use that resource as a reference point for combining a cover with secure storage.
Finally, test plans under realistic conditions. Install your prototype and drive both short and long distances. Check for leaks, noise, and stability in crosswinds. Load and unload typical cargo to ensure access works as intended. Adjust straps and seals, and reinforce weak points discovered during real use. This iterative approach turns a concept into a reliable, tailored solution.
Selecting the right DIY truck bed cover comes down to matching material and design to your needs. Soft fabrics are affordable and flexible. Rigid builds deliver security and longevity. Hybrid systems offer middle ground. Consider weather sealing, attachment methods, access, and aerodynamics. Plan for maintenance and customization upfront. With careful choices and realistic testing, your DIY cover will protect cargo and reflect thoughtful design.
External reference: For visual inspiration and user-built examples, see this Pinterest collection: https://www.pinterest.com/search/pins/?q=DIY%20truck%20bed%20cover&rs=typed&eq=diy%20truck%20bed%20cover
Internal reference: For ideas on integrating secure storage with your cover, review the truck box guide: https://trucksdiy.com/blog/truck-box/
Choosing Materials for a Durable DIY Truck Bed Cover: What to Buy and Why
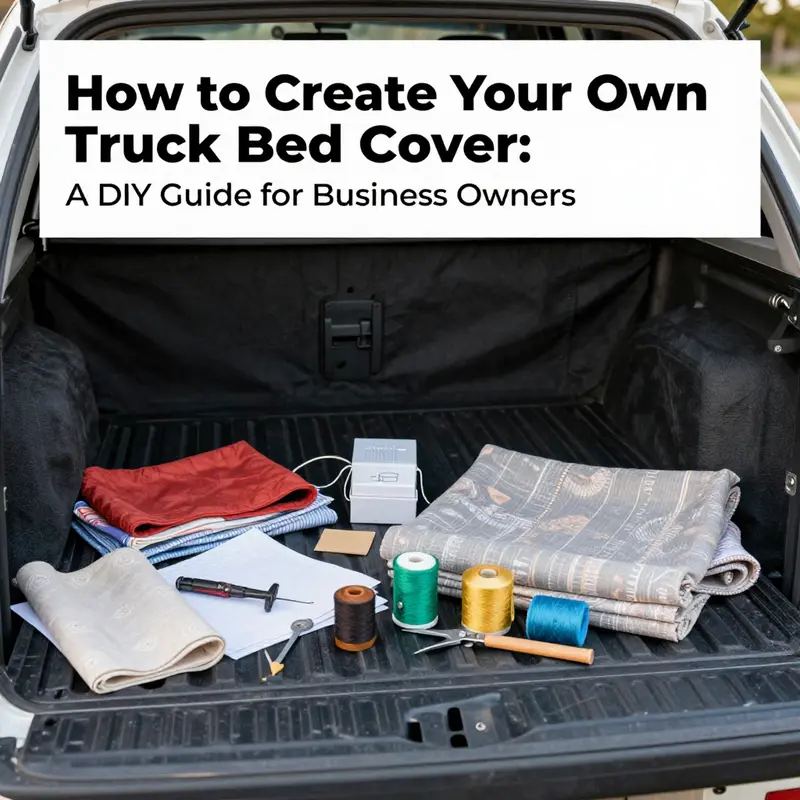
Materials and Why They Matter
Planning a DIY truck bed cover starts with choosing the right materials. The decisions you make here determine durability, weather protection, weight, ease of installation, and how much customization is possible. Some builds favor a soft, foldable cover that is lightweight and simple to store. Others call for a rigid, hard-top design that locks, secures cargo, and mounts like a factory tonneau. Either way, the same principles apply: pick materials that match the cover type, your climate, and how you use the truck.
A durable base is the first priority for most hard covers. Exterior-grade plywood, 3/4-inch thick, is a common, cost-effective option. It offers predictable strength and a surface you can trim, route, and seal. When cut into panels, plywood supports exterior finishes and hardware. If you plan a folding or hinged design, plywood panels paired with edge reinforcements hold up well under repeated use. Ensure you choose plywood rated for exterior use and treat it with a rust-proof sealant or paint. A single quart of marine or exterior sealant goes a long way to prevent delamination and moisture damage.
For a lighter, premium alternative, consider aluminum or composite panels for rigid covers. These materials weigh less than plywood and resist rot and corrosion. Aluminum panels can be finished or powder-coated and they work well with factory-style rails and mounting systems. Composite sheets are dimensionally stable and can hide screws and fasteners more cleanly. Both choices require different fasteners and a more careful approach to drilling and edge protection, but they result in a professional-looking hard cover that lasts.
Soft-cover builds call for weather-resistant fabric such as marine-grade vinyl, heavy-duty canvas, or PVC-coated polyester. These fabrics shed water and resist UV damage while staying flexible. Marine-grade vinyl is a practical middle ground—easy to sew or glue, and it bonds to backing materials. Canvas is breathable and rugged, but it usually needs a waterproof backing or laminate. If you want a padded, insulated cover, add closed-cell foam between fabric layers. Foam improves insulation and reduces noise, but it increases bulk and can complicate folding mechanisms.
Regardless of soft or hard approach, a waterproof backing or laminate provides secondary protection. Laminates stop water that bypasses seams and prevent moisture from reaching internal panels or insulation. Applying a seam sealer or a welded seam technique further improves weather resistance. For fabric covers, consider a bonded waterproof membrane adhered to the inside of the outer fabric. For plywood panels, a waterproof undercoat and edge tape help avoid water infiltration at cut edges.
Hardware choices influence reliability and security. Use rust-resistant or stainless steel screws and fasteners. Ordinary steel corrodes quickly in wet environments and undermines the cover’s integrity. Choose fasteners sized for the material thickness: countersunk screws for plywood, self-tapping screws for aluminum, and appropriate staples or heavy-duty thread for fabric attachments. Fastener placement matters—spread the load across the panel edges and avoid over-tightening near thin sections.
Rails and mounting hardware form the interface between cover and truck. If your truck already has bed rails, you may adapt the cover to those fixtures. If not, you will need custom rails or pre-fabricated rail kits that bolt or clamp to the bed. Pick rails rated for outdoor use with corrosion-resistant finishes. The rail should allow the cover panels to sit flush, close securely against the tailgate, and remain removable for maintenance. Consider how the rail and mounting brackets will affect the bed height and access to the tailgate.
For security and closure, install latches and locks designed for truck bed covers. Basic latches keep a cover sealed against wind and rain. Locking latches add theft deterrence for tools and equipment. Choose hardware that integrates with your truck’s tailgate or that clamps firmly to the rail system. Remember to account for the locking mechanism in your design phase so the cover closes and locks with minimal adjustment.
Grommets, straps, and fasteners keep soft covers secure. Heavy-duty grommets placed around the perimeter make anchoring via bungee cords, straps, or ratchet straps straightforward. Use stainless grommets that match the fabric thickness and reinforce the fabric with patches where the grommets sit. If you prefer a cleaner look, sewn-in straps or Velcro systems can fasten the cover to the rails without external tie-downs. Magnetic closures are an option for quick access but verify they hold under highway speed and exposure to elements.
Seam strength defines longevity in fabric builds. Use heavy-duty thread and a strong sewing machine, or invest in an industrial needle if you hand-stitch. Polyester or UV-resistant thread resists degradation. Reinforce high-stress areas—corners, center folds, and attachment points—with extra stitching or patches. For extra weatherproofing, apply seam tape or a seam sealer on the interior side of stitched joints to reduce water ingress.
Insulation and padding change how the cover performs in different roles. Closed-cell foam adds cushioning and thermal resistance, useful when hauling temperature-sensitive items. Foam also reduces noise from cargo shifting. If you add insulation, design removable panels or an access flap to keep the assembly serviceable. Use adhesives compatible with both the foam and the cover material. Avoid adhesives that break down in heat or cold.
Edge protection keeps panels from wearing at contact points. Install aluminum or rubber edge trim along exposed edges of plywood or composite panels. Edge trim protects the panels from chafing against rails and prevents moisture pockets from forming at cut edges. For fabric covers, use reinforced binding or folded-hem edges to resist fraying. Edge reinforcement is a small material cost that prevents premature failure.
Fastening systems differ by cover type. For a hinged plywood cover, use piano hinges or strap-style hinges rated for outdoor use. For folding hard panels, use slotted brackets and pivot pins sized to handle expected loads. For soft roll-up covers, purchase roll-up bars or use PVC tubing wrapped to form a roll bar. Each system has tradeoffs in simplicity, weight, and ease of repair, so choose hardware that matches your comfort with future adjustments.
Tools and consumables round out the material list. You will need measuring tape, straightedge, marker, heavy-duty scissors or a jigsaw for cutting panels, a drill with bits for the chosen fasteners, and files or sandpaper to finish edges. A heat gun helps with vinyl shaping and seam welding. If sewing, a heavy-duty sewing machine or a heavy needle kit will save time and yield stronger seams. Keep sandpaper, rust-proof sealant, silicone caulk, and adhesive on hand for finishing work.
Small details matter. Add weather stripping or EPDM foam tape along mating seams to keep water out. Use low-profile screws and countersink holes where panels meet rails. Apply a protective finish to any exposed wood, and touch up any raw cuts after assembly. Use color-coordinated fabric or paint for a clean look. If you expect to carry heavy loads on top of the cover occasionally, plan for reinforced zones or load-bearing rails.
Finally, stock up on replacement parts and maintenance items. A quart of rust-proof sealant, extra grommets, a small roll of seam tape, and a spare latch or two will keep the cover serviceable. Regularly inspect fasteners, seals, and seams for wear. While the right materials make a truck bed cover robust, routine upkeep preserves performance and prevents small issues from becoming major repairs.
If you’d like deeper examples and a step-by-step build that applies many of these material choices, check the practical accessories discussion at trucksdiy.com/blog/accessories. For a detailed step-by-step project that applies these materials in a complete build, see this external five-step guide: https://www.instructables.com/DIY-F150-Tonneau-Cover-5-Steps/.
This single-material planning approach helps you choose components that complement each other. Whether you lean toward a soft, sewn cover or a rigid, bolted-top design, use materials selected for outdoor use, corrosion resistance, and appropriate mechanical strength. The right mix simplifies installation, runs lighter, and lasts longer—so your DIY truck bed cover protects cargo and adds utility without frequent repairs.
From Template to Tight Seal: A Comprehensive Step-by-Step DIY Truck Bed Cover
When you decide to take on a DIY truck bed cover, you begin with a plan that respects the truck bed as a living, climate exposed space. The project rests on a simple truth: precision in the early stages yields a finish that looks professional and performs reliably in rain, sun, and road spray. The heart of this approach is not a single clever trick but a deliberate sequence that blends careful measurement, thoughtful material choices, and patient assembly. The goal is a cover that hugs the contours of the bed, seals the cargo from the elements, and remains easy to remove when the weekend calls for a different kind of transport. To understand this process well is to recognize that a strong DIY cover is not just a fabric sack thrown over a bed; it is a tailored system that includes a top layer, an under layer or liner, a supportive core, and secure fastenings that work with the truck rather than against it.
The journey starts with measurement and planning. You lay a large sheet of paper or a lightweight plastic film across the bed floor and trace the exact interior outline. Wheel wells, bed rails, tailgate hinges, and any dividers or features that might complicate a simple rectangle all deserve careful consideration. The trace becomes your pattern, the blueprint from which every piece will be cut. It is wise to add extra inches on all sides—roughly two to three inches—so there is ample overlap for fastening and for any minor misalignments that might occur during cutting or sewing. This extra margin is the buffer that turns a tentative fit into a reliable seal. As you trace, note any peculiarities of your specific truck model. If the bed has irregular contours or raised sections near the tailgate, these deserve a moment of extra attention; accommodating them at the outset saves frustration later.
With a clear pattern in hand, you move to the core material choice. The materials you select become the backbone of the cover. A two-layer approach often works well: a top fabric that is weather resistant and a bottom layer that can serve as a liner or insulation. The top fabric can be a sturdy, weatherproof material such as marine-grade vinyl, heavy-duty canvas, or a PVC-coated polyester. The bottom layer may be a matching fabric or a lighter liner that protects the interior while still allowing some flexibility and breathability. The optional addition of foam padding between layers adds a cushioned structure that can help the cover maintain its shape and resist sagging where the bed is widest or where the wheel wells intrude. If you choose insulation, you gain a secondary barrier that helps stabilize temperature and dampen sound, though it adds a layer of complexity to sewing and seam finishing.
Once the material selection is settled, the next step is to translate the pattern onto fabric with care. You lay the pattern onto the fabric and trace the outline, keeping in mind a seam allowance of roughly half an inch to a full inch depending on your pattern and sewing method. As you cut, you should produce two primary pieces: a top layer that will form the exterior face of the cover, and a bottom layer that will act as the liner or insulation. If you plan for additional durability, you may choose to cut an extra layer of foam padding that aligns with the pattern so it nests between the fabric pieces. The goal here is not simply to cover the bed but to create a sandwich that stays rigid enough to resist wind but flexible enough to conform to the bed’s edges.
Now comes the assembly, the moment when the pieces begin to take a three-dimensional form. Start with the top fabric laid face down on a clean, flat surface. Position the foam base on top of this fabric, aligning it carefully with the traced pattern. Place the bottom fabric piece on top, with the right side facing up so that the outer surface will show once the cover is turned. This sandwich of top fabric, foam, and bottom fabric must be aligned with the pattern margins. Use clothespins or clips to secure the layers along the edges. This step is more than a convenience; it is a safeguard against shifting that would ruin your seams. The goal is a stable, multi-layer structure that sews together in a single, continuous operation without shifting or curling at the edges.
Sewing through all three layers is where the cover starts to resemble a finished product. A heavy-duty sewing machine is ideal, paired with a robust thread that can resist abrasion and weather exposure. You sew along the perimeter in a steady, deliberate rhythm, moving from one corner around the entire edge. The stitching must bond all three layers—top fabric, foam, and bottom fabric—so the final assembly cannot easily delaminate under wind pressure or road spray. Leave a small opening along one edge, typically about six to eight inches, to allow for turning the cover right side out and, if desired, for inserting any additional hardware such as a locking strip or quick-access feature. The opening should be placed in a convenient spot that does not interfere with the cover’s final fit when it is in place on the bed.
Turning the cover right side out is a satisfying moment. You carefully pull the fabric through the opening, working the corners to create crisp, defined edges. As you turn, you may notice a few rough edges along the seams that require a touch-up. Hand stitching the opening shut with a ladder stitch provides a near-invisible finish and a clean, professional look. If you prefer a faster route that still yields a secure closure, you can opt for a Velcro strip or a small zipper at the edge of the opening. The choice you make should harmonize with how you plan to use the cover. If you would rather not sew the opening closed at all, a magnetic closure or a discreet button arrangement can offer a flexible, removable option.
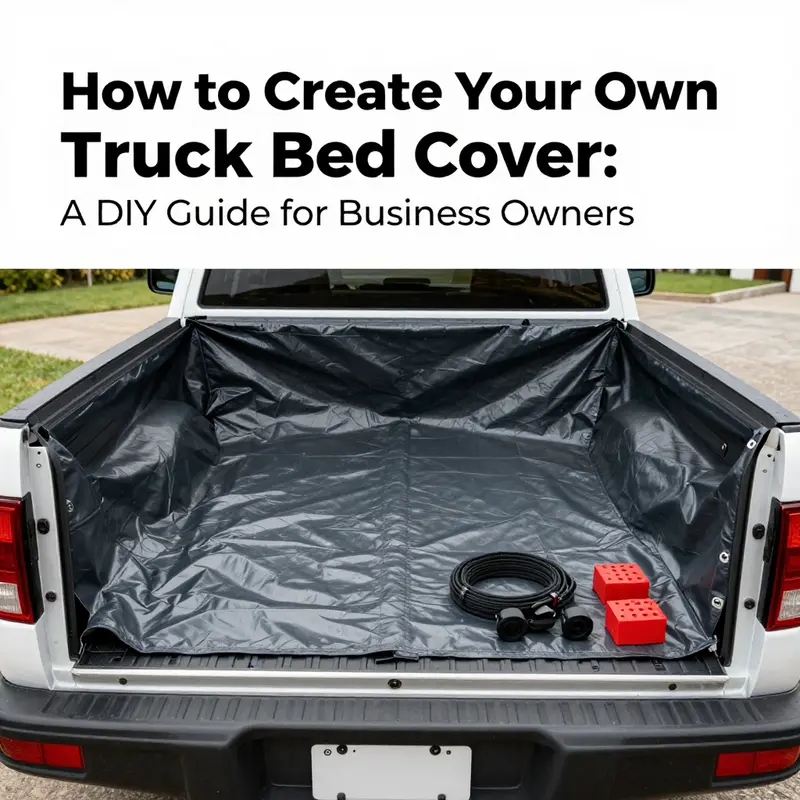
With the main body completed, you shift to final fittings and protective upgrades. Waterproofing is a practical upgrade that most builders consider after assembly. A dedicated outdoor fabric sealer or a waterproof coating can be applied along the surface of the top layer, ideally when the fabric is calm and dry. This extra layer of protection helps to repel rain and dew as well as to resist stubborn stains that come from road grime and tree sap. It is important to let the coating cure fully before exposing the cover to weather, which typically means following the product instructions for drying time and ventilation. If your climate features significant temperature swings, you may also want to add a few elasticized corners or grommets at strategic points along the perimeter. These features can make it easier to secure the cover to the bed rails and prevent wind uplift.
The practical details often decide how well a DIY cover holds up over time. Add tie-down straps or D-rings at the corners and along the sides where the fabric is most likely to pull or rub against metal edges. These fasteners can help you secure the cover tightly without distorting the fabric. If you expect frequent access to cargo, consider a design that incorporates a zipper or Velcro closure along one edge to permit quick access without removing the entire cover. The goal is a balance between weather resistance and daily usability. In a well-executed design, the top layer remains taut across the bed with a slight sag only around the wheel wells, while the bottom liner stays snug but not so tight that it restricts airflow or creates a stiff edge that could crack under cold conditions.
Testing the finished cover in real-world conditions is essential before declaring the project complete. Place the cover over the bed and secure all fasteners, then check for any interference with the tailgate or bed rails. If you notice any flapping at highway speeds, you may need to add additional grommets or adjust the strap tension so that the fabric remains taut across the width of the bed. A thorough test might include a controlled light rain, where you watch for any seepage at seams or along the edges. If moisture finds its way through the outer layer, you may explore refinements such as resealing seams, adding a secondary waterproof backing layer, or increasing the seam allowances in future iterations of the same pattern.
Even as you test, your mindset should be to design for longevity. After a season of use, you will likely refine a few details. Perhaps the fabric shows signs of wear at the edges or a few fasteners lose their bite after repeated use. In that case, you can reinforce corners with additional stitching or replace worn grommets with sturdier hardware. It is also wise to consider storage when the cover is not in use. A clean, dry space helps extend the life of the fabric and keeps the waterproof coating from breaking down due to constant exposure to heat and humidity. When the off-season arrives, inspect the seams for any micro-tears, wash away dirt with a mild solution, and reapply coating if necessary to preserve the fabric’s surface integrity.
The beauty of this approach lies in its balance of hands-on craftsmanship and practical know-how. The measure-trace-cut-sew-turn sequence can be comforting in its predictability, yet each truck and climate introduces subtle variations that require on-the-spot judgment. The thread that runs through the entire process is a commitment to precision from the very first measurement to the final test drive. A well-executed DIY cover does not merely shield cargo; it also enhances the appearance of the truck by offering clean lines that echo the vehicle’s design. The result is a project that pays for itself over time, saving money and offering a sense of accomplishment that only comes from building something functional with your own hands.
As with any substantial DIY project, resources and guidance make a difference. If you want to explore related accessories and ideas that complement a bed cover, you can start with the broader accessories guide on the site. It provides additional context about hardware, mounting options, and other protective solutions that pair well with a bed cover. Visit the Accessories page at https://trucksdiy.com/blog/accessories/. For a more visual walkthrough that mirrors many of the steps described here, a detailed video tutorial covers measuring, cutting, and assembling a weather-resistant truck bed cover using fabric and a sewing machine. The video helps you visualize how to align layers, how to manage seam allowances, and how to secure the finished product to the truck without compromising access to the tailgate or bed rails. This external resource offers a practical complement to the written method and can be especially helpful if you are a visual learner who benefits from seeing the process unfold in real time.
Even with a detailed plan, the true test of a DIY cover is its performance under pressure. Rain and wind will reveal any weaknesses, so the goal is to anticipate those weaknesses and address them through thoughtful design decisions. The layers, the seams, and the fastening system all work together to create a cohesive shell that protects cargo while remaining flexible enough to accommodate changes in cargo size and weather. If you approach the project with patience, you will end up with a cover that feels tailored to your truck rather than a generic overpack that barely fits. The sense of accomplishment that comes with turning outlines into a snug, weatherproof cover is not just about the savings on a professional install. It is about mastering a practical skill that blends measurement, material science, and handcraft. And when you step back to admire the finished product, you will see that the template you created at the beginning really did guide you toward a tight seal that lasts season after season.
In the broader context of DIY vehicle mods, this step-by-step approach to a truck bed cover can serve as a blueprint for other fabric-based projects. The discipline of tracing a precise outline, selecting appropriate materials, layering thoughtfully, and reinforcing stress points translates well to other protective enclosures and specialty covers. If you are curious to explore how this method can extend to related projects, consider looking into additional resources on the same site that discuss mounting racks, protective enclosures, and storage solutions for trucks. These pages can provide inspiration for customizing your rig while maintaining a coherent aesthetic and a robust, weather-ready build. The underlying principle remains the same: measure accurately, plan for the contours of the vehicle, use durable materials, and secure the assembly with thoughtful hardware.
As you close the chapter on the step-by-step process, you recognize that DIY truck bed covers are as much about approach as about technique. The method described here prioritizes alignment with the bed’s geometry, careful layering, and an incremental sewing process that yields a durable product you can count on. It is a reminder that good results come from deliberate repetition more than from quick improvisation. With a little patience and the right approach, you can transform a simple sheet of fabric and a pattern into a tailored cover that protects cargo, resists the weather, and adds a touch of personal craftsmanship to your truck. The result is not merely a functional accessory; it is a practical expression of how thoughtful, hands-on work can produce enduring value.
External resource note: For a practical walkthrough beyond text, a video tutorial demonstrates the core steps in a visual format, illustrating how to measure, cut, and assemble a weather-resistant truck bed cover. This can complement the written guide and help you visualize exact techniques and finishing details, especially if you are new to sewing multiple layers together and working with foam and waterproof fabric. Watch the video at https://www.youtube.com/watch?v=ZqyVjQv9oFw.
null
null
Final thoughts
A DIY truck bed cover not only extends the functionality and protection of your truck but also offers a unique opportunity to customize your vehicle to fit your business needs. By understanding your options, selecting the right materials, and following the step-by-step processes outlined, you can create a durable cover that enhances your operations. Additionally, knowing alternative quick solutions can be a valuable asset for temporary needs or budget constraints. Invest in a truck bed cover and see the difference it makes in your cargo management.