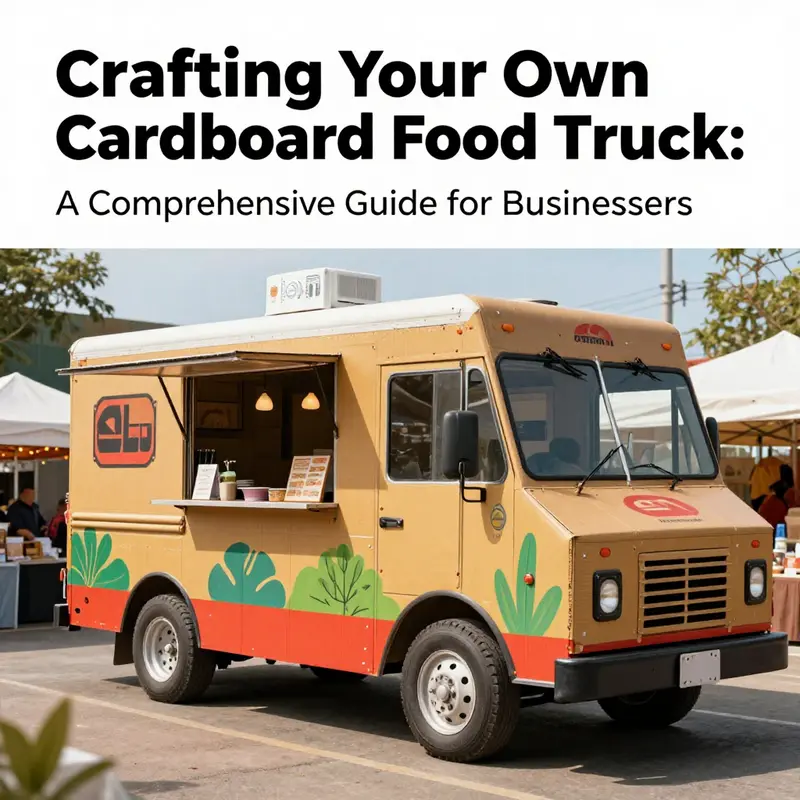
Creating a DIY cardboard food truck offers business owners an innovative way to engage with their brand while enhancing creativity. This hands-on project can serve as an excellent marketing tool or a fun creative outlet. The guide details the three pivotal steps to constructing a cardboard food truck: gathering materials, designing your custom truck, and constructing and decorating the final product. Each chapter provides specific insights that relate directly back to building this unique mobile business model, making it practical and relevant for entrepreneurs eager to stand out in the food truck industry.
Stock Your Workshop: Essential Materials and Smart Sourcing for a DIY Cardboard Food Truck
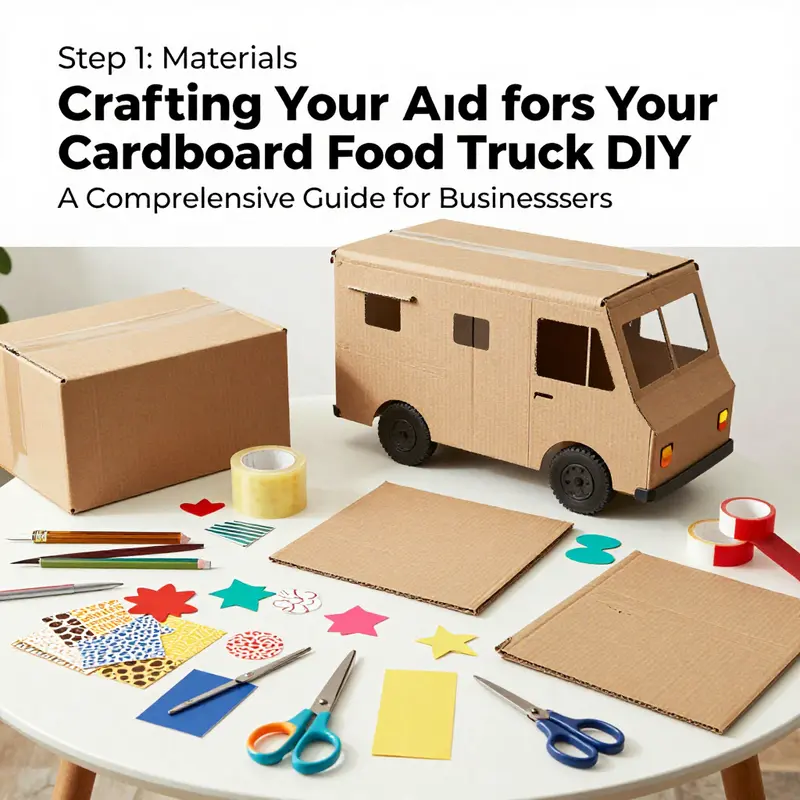
Materials and tools to collect
A successful cardboard food truck begins with the right materials and simple tools. Gather them before you cut a single line. Having everything at hand keeps the build moving and reduces mistakes. At the center of your kit is a large, sturdy cardboard box to become the truck’s main body. Aim for a box at least two feet long with strong corrugated layers. Boxes used for appliances, furniture, or larger electronics usually have the strength you need. Add several smaller cardboard sheets for windows, counters, and signage. Keep a stack of flattened boxes; they are your raw supply for panels, reinforcements, and decorative pieces.
Cutting and measuring tools are next. Use a sharp utility knife or heavy-duty scissors. A straight edge and a metal ruler will keep cuts clean and accurate. If young hands join the project, add a pair of safety scissors and a cutting mat to protect surfaces. A measuring tape or a long ruler helps when you scale doors, windows, and counters to comfortable sizes. Marking tools matter too: a soft pencil for layout lines and a marker for darker, visible guides make the work neater.
Adhesives and fasteners determine how durable the truck becomes. Heavy-duty tape—masking tape, paper tape, or cloth-reinforced duct tape—secures joints quickly. Use it liberally on internal seams and corners. For detail work, choose a reliable craft glue or a hot glue gun. Hot glue sets quickly and holds layered cardboard well, but it can warp thin corrugation if applied too hot. Craft glue offers cleaner seams for decorative parts, but wait time is longer. Keep a small roll of double-sided tape for attaching lightweight signage and trim.
For structure, reinforcement materials are essential. Thin wooden skewers, bamboo sticks, or dowels make excellent axles for wheels and rigid supports for counters. Cardboard tubes from paper towels or wrapping paper can form rounded shapes like wheelbacks or exhaust pipes. If you expect the truck to be moved or played with, add a few strips of thicker cardboard or foam board to reinforce load-bearing areas like the base and counter edges.
Decoration requires paints, markers, and finishing supplies. Choose water-based acrylic paints for color; they adhere well to cardboard and dry quickly. Matte finishes hide seam lines and fingerprints better than gloss. For finer details, markers or paint pens help with lettering, logos, and menu boards. Keep a few small brushes, a sponge for texture effects, and a container for water. Sealers are optional. A water-based varnish or matte sealer will protect paint from scuffing, but use lightly so the cardboard does not soak and wrinkle.
Small extras elevate the result. Thin ribbon, colored paper, stickers, or corrugated craft strips create awnings, trim, and menus. Clear plastic from packaging is perfect for windows. If you want a functional counter flap, cloth or sturdy paper can form an awning. Magnets or Velcro let you attach removable signs and menu panels. If the truck is for long-term play, consider lightweight hinges or cloth fasteners to make doors operational.
Workspace and safety supplies keep the build comfortable and hazard-free. Clear a table or flatten a box on the floor to protect surfaces. Wear safety gloves when cutting thick cardboard. Keep a first-aid kit handy for small nicks. A box cutter and a retractable blade require a safe place for storage when not in use. Good lighting and a comfortable chair make long sessions productive.
Sourcing tips save time and money. Ask local stores for discarded boxes. Many retailers keep flattened boxes for pickup. Community groups, local recycling centers, and online classifieds often list free boxes. Flatten and store them in a dry place. Cardboard softens with moisture, so keep it away from damp locations. Save paper towel and wrapping paper tubes; they are perfect for wheels and round details. Buying a small set of paints and glue is inexpensive compared to the value they add.
Plan for quantities. A single large appliance box can form the truck shell, but you will need multiple smaller panels for the counter, roof, and interior fittings. For a toddler-sized truck, one large box plus two or three flattened boxes and several tubes suffice. For a larger, play-scale truck, collect three to five large boxes. Keep extras for mistakes; cardboard is forgiving, but errors happen.
Choose the right cardboard. Not all boxes are equal. Double-walled corrugated cardboard is rigid and supports weight. Single-wall corrugation is lighter and easier to cut. Avoid wet or crushed boxes. Test a short bend to measure springiness. A box that returns to shape quickly has good integrity. When you reinforce corners and seams, tape must bond to clean surfaces. Remove labels, tape, and debris before gluing.
Consider the finished scale and its function. Will the truck be a stationary display, a toy with wheels, or a portable prop? If mobility matters, you need sturdier axles and reinforced wheel mounts. If it’s a decorative piece, focus on finish and detail. Decide early, because this choice changes the materials list. For wheels, cut circles from thick cardboard or use cardboard tubes flattened and layered. Wooden skewers or dowels make axles. If the truck must roll smoothly, sand the wheel edges for roundness and use spacer rings to prevent wobble.
Think about tools for shaping. Curves look professional but take planning. Use a utility knife to score curved edges before folding. For rounded roof cones or awnings, bend thin corrugated sheets slowly to avoid cracking the liner. A rolling pin or a dowel can help form consistent curves. If you plan to add cut-out windows, trace shapes with a stencil first. Work from the inside out to maintain straight outer edges.
Reinforce stress points. The counter area where hands push or lean needs extra strength. Layer strips of cardboard to form ribs under counters. Tape seams inside the main body to spread stress over a larger area. If you attach doors or flaps, use a thin strip of cloth or flexible tape as a hinge; this prevents tear-out. When mounting wheels, sandwich the axle within layers of cardboard and tape, creating a box axle. This distributes load across a wider surface.
Organize materials before assembly. Group tools in a tray and keep all adhesives close by. Cut commonly used parts in batches. For example, pre-cut wheel circles and reinforcement strips before starting the main shell. Label panels with pencil marks so assembly goes faster. When painting, use a spare cardboard sheet beneath your work to catch drips. Allow painted parts to dry fully before joining them to avoid warping.
Small accessories add authenticity. For service counters, use a thin shelf or a folded cardboard flap. Create a menu board from a small flat panel painted in chalkboard color or dark paint. Use cardstock to make menus and attach them with Velcro for interchangeability. LED tealights inside create a warm glow and highlight windows. Do not place battery packs directly on cardboard for prolonged periods; provide a small pocket of additional cardboard beneath to protect it.
Sustainable practices matter. Reuse and repurpose whenever possible. Keep a box labeled “cardboard scraps” to collect useful pieces. Cut off waste in uniform strips for reinforcements. Upcycle old wrapping paper for vibrant finishes. Avoid unnecessary single-use plastics. When parts wear out, repair with tape or glue rather than discarding the whole truck.
Safety and non-toxic choices are important, especially with children. Choose low-VOC paints and non-toxic glue. Avoid solvents and harsh adhesives. Keep small fasteners and magnets away from very young children. If using a hot glue gun, supervise closely and use a low-temperature setting if possible.
Planning ahead reduces frustration. Sketch your truck on paper before you begin. A simple front elevation and side view help you scale doors and counters. Mark where windows, menu boards, and serving flaps will sit. Transfer those measurements onto the cardboard before cutting. Templates help; cut a paper template first and tape it to the cardboard to trace the shape. This prevents repeated cuts in expensive corrugated sheets.
Smart labeling speeds assembly and keeps the design cohesive. Number panels to indicate their position. Use arrows to show which side faces out. When gluing, line up edges and clamp with heavy books until the adhesive sets. For hot glue, press pieces together for a strong bond and hold until the glue cools. For craft glue, use clothespins or binder clips to keep parts aligned while drying.
Decoration choices can be made while materials are gathered. Decide on colors, a theme, and menu text. Lettering can be freehanded with markers or cut from colored paper. If you want a vintage look, choose muted hues and distressed edges. Bright, bold colors suit a child-focused truck. Plan logo placement and decide if any elements will be removable for play.
If you want inspiration for construction techniques, refer to a useful step-by-step guide for durable cardboard vehicles. It covers many reinforcing strategies and scaling tips that transfer directly to a food truck build. See the step-by-step guide for additional techniques and templates: https://www.instructables.com/Step-by-Step-Guide-to-Building-a-Durable-Cardboard-Car-for-Creative-Play/.
Finally, think about storage and reuse. Design the truck to be partially disassembled, if possible. Use removable signs and Velcro attachments. Store small pieces in labeled bags. A collapsible design saves space and lets you reuse major panels for other projects. Keep a small repair kit with extra tape, glue, and spare panels for quick fixes.
A single well-planned gathering session transforms the build. With the right cardboard, adhesives, tools, and finishing supplies, you create a food truck that looks great and endures play. Organize, reinforce stress points, and plan the scale early. When materials are sorted and templates are ready, cutting and assembly become confident steps rather than experiments.
If you want ideas for add-ons and embellishments to make your truck feel complete, explore related resources on truck accessories to spark creativity and functional ideas. This can help you plan storage, counters, or display areas that mimic real concessions and add practical play value. truck accessories
Designing with Imagination: Crafting a One-of-a-Kind Cardboard Food Truck that Drives a Story
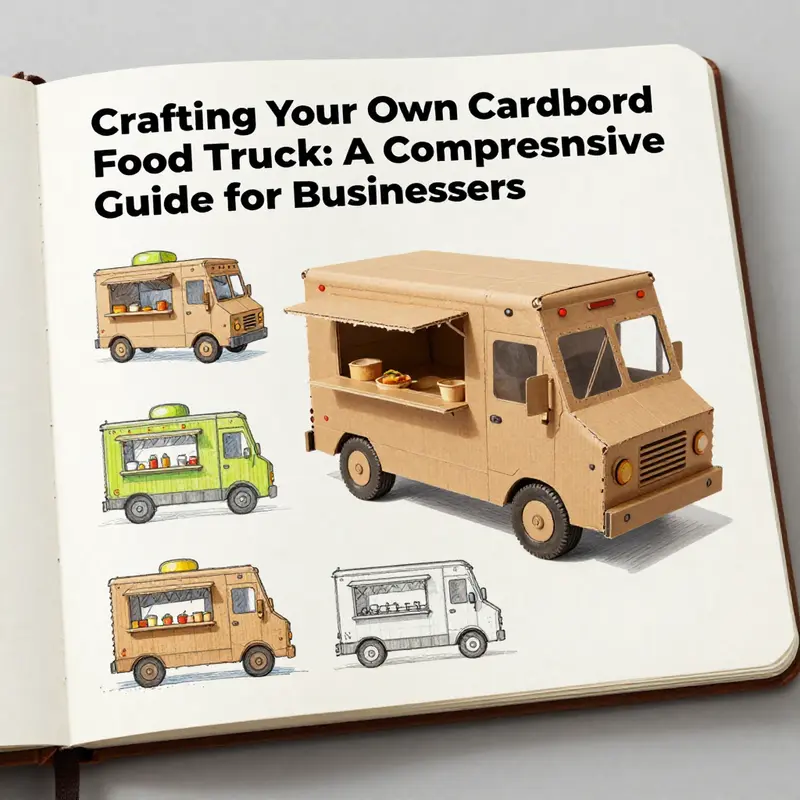
Designing a cardboard food truck is less about plotting a precise blueprint and more about inviting a story to roll forward on a chassis of cardboard. It’s a craft where imagination leads and engineering supports the vision, a playful blend of art and structure that yields something sturdy enough to admire and kids can safely play with. The process starts long before the first cut. It begins with a shared idea—a theme or concept that will give color to the whole build. Will your truck be a taco wagon that puffs with scent and spice in the imagination? Or a futuristic space food truck that glows with imagined neon and glossy panels? Perhaps it echoes a classroom moment, like a Shakespeare-inspired caravan where the menus list lines from a play instead of items. These seeds of concept do more than spark decoration; they steer the geometry of the build. The theme informs the shape of the body, the placement of windows, and the rhythm of the features that will turn a flat sheet of cardboard into something that looks ready to roll, even if it’s motion is limited to a child’s careful push across the kitchen floor. In this sense, design is storytelling through form, and the cardboard truck becomes a stage for a small, approachable drama about food, service, and community.
Once a concept has taken root, the next move is to sketch. A rough drawing on paper helps translate ideas into a plan your hands can follow. Sketch the main silhouette—do you prefer a classic van silhouette with a long, slick profile, or a retro trailer with rounded edges that hints at a friendly nostalgia? Consider the proportions: how tall should the truck feel next to a child’s height, how wide must the display counter be to hold pretend menus and sample treats, and how deep should the vehicle be to keep it stable when children lean in to “serve” customers? Sketching lets you lock in a scale that makes sense for your space and your participants. It also clarifies where to place the essential components: the serving window, the display counter, the roof sign, and the wheel supports. It’s perfectly fine to sketch with a pencil and then refine with measurements, because the point of the plan is clarity, not perfection.
Planning the structure becomes a conversation between design and durability. Start with the main body, the largest and most visible element. Use sturdy cardboard boxes—think appliance or furniture boxes that yield enough width and height to create a convincing form. Cut shapes with care, then join them with strong tape, reinforcing every joint. The goal is a frame that can hold its shape under gentle handling, especially if younger builders want to pretend to run the stand or push the truck across the floor. Think about the internal support: a crosspiece or two inside the body can prevent sagging, especially at the corners or where panels meet. Reinforcement at critical joints is not a afterthought; it’s an integral part of turning a playful model into a lasting keepsake. The wheels, though simple in concept, deserve deliberate placement. Circular cardboard blanks can serve as wheels, mounted on skewers or wooden dowels to give the illusion of motion. Attach these with a dab of tape on each end and a touch of extra cardboard to create a hub that won’t wobble with a gentle push. This setup is not about precision mechanics; it’s about a believable sense of mobility that invites touch and exploration.
A prominent feature of the design is the counter display area at the front. This element anchors the truck in function as well as form. It should be cut with precision so the opening looks tidy and inviting, while the edges are reinforced to withstand repeated use. A sturdy ledge or lip can prevent pretend utensils or paper menus from tumbling off. The counter is where the design language of the whole project crystallizes: it carries the color scheme, the logo-like markings, and the sense of hospitality that characterizes a friendly street food stand. The front counter can also double as a small stage for the imaginary kitchen. Inside, cutouts or tabs can suggest shelves for toy cups, paper plates, or signals that indicate what’s on the menu. If the build involves a lightweight roof, the counter edge becomes a natural transition line where the roof meets the body, and a small awning can extend this sense of space into a shaded, welcoming storefront.
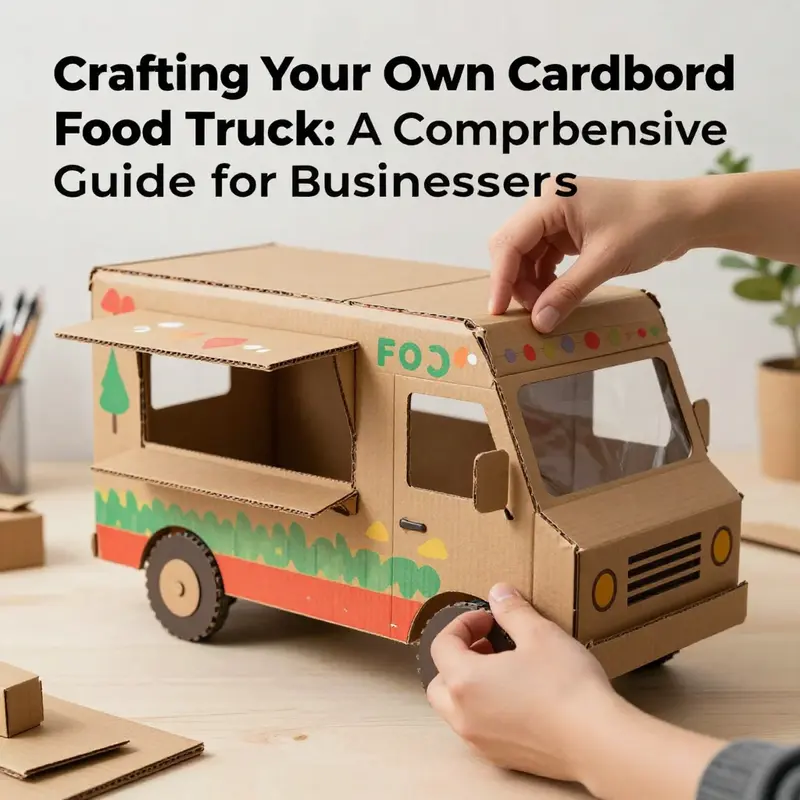
Decoration plays a starring role in transforming cardboard into character. After you lay the foundational structure, start with a wash of color. Acrylics, markers, or crayons can establish the primary palette, but texture matters too. Consider painting the body in a bold base color and using secondary colors for accents—trim along the edges, a bright bumper, and window frames that give the truck its personality. Texture can be added with fabric scraps for awnings or faux metal panels created with careful cross-hatching on cardboard. The detailing is where the design comes alive: a neon-style sign drawn with bright neon-like outlines, a menu board that looks handwritten in chalk, or a mascot perched on the roof. Small decals or stickers can be improvised with paper or tape, offering a way to narrate the story without needing expensive supplies.
Windows and doors are more than just cut-outs. They are playful opportunities to incorporate light and shadow. A window can be represented by a simple opening that kids pretend to look through, or you can mount a clear plastic sheet behind the cut to imitate glass. If you choose, you can create a small door that opens to reveal a pretend kitchen, which adds an extra layer of interactivity. Detail inside the truck matters too. A tiny cut-out space for utensils, a paper menu, or framed pictures of pretend dishes turns the truck into a micro-kitchen. The interior doesn’t need to be perfectly scaled; it needs to feel proportionate and inviting. A thoughtful interior helps keep the project cohesive from every angle, whether someone is viewing it from the front, the side, or from above during display.
Interactivity elevates the project from a static display to a playful instrument of imagination. Fold-out menus, spinning wheels, or a pretend cash register can all be crafted from simple cardboard and recycled materials. A fold-out menu is particularly effective: a thin flap attached to a corner of the counter can lift to reveal a list of pretend offerings, while a tab can allow a child to switch items as if taking orders. A small spinning wheel that selects a “dish of the day” can be created with a circular piece of cardboard mounted on a brad or a paper fastener, allowing a child to rotate the wheel and land on a different option each time. These elements not only entertain; they invite narration. When a child chooses a dish, they narrate it aloud, adding a layer of storytelling that makes the build feel meaningful and alive. The design should invite interaction from many angles, so think about what features will be accessible from the front and from the sides.
As the design evolves, it’s wise to keep safety at the center of every decision. This is particularly important when children are involved in the project. Smooth edges are essential; edges can be sanded or trimmed and then sealed with a light coat of paint to prevent sharp corners from snagging clothing or skin. Scissors should be supervised, and glue or tape should be child-friendly and non-toxic. The structural layers should remain light but durable, balancing the need for resilience with the desire to keep the build approachable and manageable for families or classrooms. Remember that safety isn’t a constraint but a design constraint that scholars and makers alike can respect as the truck grows from idea to tangible object.
The feel of the design’s final stage often hinges on a small but deliberate decision: how the roof is shaped. A distinctive roof—not too heavy, but clearly branded—can dramatically change the truck’s silhouette. A short, curved roof can imply a classic street-food vibe, while a square or wedge roof can suggest a more modern or futuristic identity. The roof can host a sign or a flag, or even a tiny rooftop garden if you want to push the whimsy further. The roof’s color should harmonize with the body but offer enough contrast to draw the eye. In many ways, the roof is the capstone of the narrative; it signals that this is a complete little world, a place where pretend cooks and customers meet in a moment of shared play.
With the layout mapped, structural integrity comes from a simple discipline: plan, cut, tape, reinforce, and test. Test early and test often. Lightly press on corners, gently push the wheels, open the counter, and see where flex appears. If you detect any sag or wobble, add a cross-brace or a small internal panel to stiffen the form. This iterative mindset—design, test, reinforce—keeps the project on track and turns a sprawling concept into a coherent, durable object that can withstand enthusiastic play or careful classroom display. The balance between bold design and practical durability is the heartbeat of this build, a reminder that creativity thrives when it meets the constraints of cardboard, tape, and a patient hand.
As you near the final touches, bring the design language together with a unified color story and cohesive detailing. The aim is for a truck that feels intentional rather than improvised, a machine that tells a story with its shape and its surface. The front counter becomes not just a functional feature but a stage for color, typography, and texture. The windows, the roof, the sign, and the decorative flourishes reinforce the chosen theme and invite viewers to walk around the truck and discover new angles and textures with each viewing. When space allows, display the truck near a short row of treats or props that echo the menu’s imaginary offers. A simple roster of pretend dishes, drawn or cut from colored paper, can be arranged on the counter or tacked to the side panels as if the truck is actively serving customers right now. The combined effect is a portable, tactile story that invites hands-on exploration.
If you’re looking for inspiration that translates well to this medium, reflect on how a classroom project might conceptualize a food truck in a way that blends theater and construction. You’ll see how a team might converge on a shared theme and then distribute tasks that still respect the integrity of the final piece. A project that begins with a theme often ends with a display that reads as a complete scene—customers, cooks, signs, and menus all coexisting within a single cardboard skyline. In this journey from concept to display, the cardboard truck becomes more than a toy or a model. It becomes a tiny, tangible sculpture that communicates imagination, collaboration, and the joy of making with simple materials. When you’re ready to consult more examples or push your design further, you can explore related guidance on the truckDIY ecosystem, which offers a gallery of ideas and practical notes that align with the spirit of this project, including resources for refining a truck’s details and enhancing its structural stability. For a quick reference to a similar strategy, explore the truckbox guide, which recasts these ideas in a compact, actionable format. truckbox
As a final invitation, remember that the beauty of a cardboard food truck lies not in architectural perfection but in the confidence to experiment, rework, and experiment again. The design stage is not a barrier but a doorway to more playful problem-solving: how to arrange panels for a believable profile, how to place a serving window so it’s both inviting and sturdy, and how to craft decorative touches that spark delight without overwhelming the frame. The process rewards curiosity and patience. With every cut and fold, you’re practicing a craft that values tactile learning, spatial reasoning, and storytelling through form. The result is not just a model; it is a shared space where children, families, and educators come together to imagine, to build, and to celebrate simple, inventive living. For those who want to trace the steps more closely and see what a complete project timeline might resemble, a detailed, step-by-step external guide can offer deeper technique and visuals. This external resource presents a thorough walkthrough of turning cardboard into a durable, visually engaging food-truck sculpture, complementing the ideas explored here. You’ll find practical tips on planning, cutting, and reinforcing that can help refine your technique and broaden your creative palette.
External reference: https://www.thesprucecrafts.com/cardboard-food-truck-4148709
From Blueprint to Boulevard: Building a Cardboard Food Truck
A cardboard food truck is more than a craft project; it’s a portable stage for imagination. With a plan, daylight, and a few everyday materials, the boxy chassis becomes a vehicle for color, motion, and stories. This chapter guides you from the first sketch to the final decorative flourish, keeping the spirit of eco-friendly, hands-on play at heart. The core idea rests on three pillars: planning, sturdy construction, and expressive decoration. By weaving these together, you’ll create a truck that feels solid and playful and ready for pretend streets or party displays.
Begin with a plan. Start with a simple sketch that maps the main body, the counter front, the serving opening, and the roof profile. A rough schematic on scrap paper guides your cuts and folds. Consider scale in relation to the players who will interact with the truck. If kids will push and slide pieces, add extra tabs and reinforcement along corners. If it’s for display, lean into color, texture, and signage. The plan anchors you to the materials you’ll use. Large cardboard boxes from appliances or shipping can provide reliable panels, but design around what you have. Aim to cut large pieces for the sides, front, back, and bottom, then reinforce seams with tape and internal braces.
With materials ready, begin cutting the main body pieces. Create tall sides to cradle the roof and a wide base for stability. Cut a front face with a gently curved top to suggest a service window, a back panel, and a bottom piece for a foothold. Clean edges make assembly easier and stronger. When assembling, secure connections with tape, and reinforce seams with an internal brace. Cross braces along the length add stiffness where weight and handling meet the structure.
The counter display should be wide enough for menus, receipts, and pretend food. Cut a window into the front panel to define the service area. Reinforce with a small lip or frame. A simple sliding door or tiny drawer can add playful function using a cardboard hinge or a folded strip as a track. If the counter is top-heavy, add internal counterweights or a broader base to keep the truck level during play.
Wheels and axles can be created from repurposed lids, plates, or rolled cardboard. Attach with a light through-axle so wheels rotate. Ensure wheels are the same height and parallel to the ground. For extra stability, consider a second set of rear wheels if you expect heavier loads on the counter.
Detailing brings the truck to life. Add flaps for a serving window, a hatch for a pretend kitchen, or an awning strip along the counter. Small modulations build a narrative and invite interaction. For movement, simple tabs and cardboard hinges offer reliable, kid-friendly functionality.
Painting and decoration tell the story. Use acrylic paints to lay a solid base coat, then add details with markers or crayons. Keep a cohesive color palette—two to three dominant colors plus one or two accents helps the eye travel across the truck. Apply decals or stickers sparingly to convey branding. Craft a name and logo on paper, then paste or tape as a decal. Allow the truck to reflect your theme rather than imitate a real business.
The roof is a canvas for character. A flat, curved, or peaked roof changes the silhouette, and a small canopy or sign can amplify personality. Attach a lightweight sign or a flag to the top with a dowel or skewer to add height and whimsy. This is an opportunity to involve others in decorating, tracing shapes, and choosing color keys.
Final assembly. Inspect seams and edges, reinforce as needed with tabs or cross braces, and consider a non-slip base for display or photos. If you’re using the truck in a classroom or party, props like a paper menu, pretend foods, or a mock money stack help set the scene and invite participation. The project becomes a shared experience, a small theater on wheels for storytelling and role play.
For quick reference, a practical overview of building methods and decorative options can guide you without dictating a single path. The heart of the method remains simple: plan, build with sturdy materials, and decorate with color and detail. If you enjoy the journey, you’ll discover your own best practices as you handle cardboard, paint, and tape.
Final thoughts
In conclusion, the DIY cardboard food truck project allows business owners to express creativity while promoting their brand in engaging ways. By gathering the right materials, designing a unique structure, and skillfully assembling it, you not only create a captivating model but also a promotional tool that can attract attention to your business. Whether for events, marketing purposes, or simply a fun crafting project, this cardboard food truck can represent your business’s personality and vision. Embrace the process, get creative, and let your cardboard food truck tell your brand’s story!