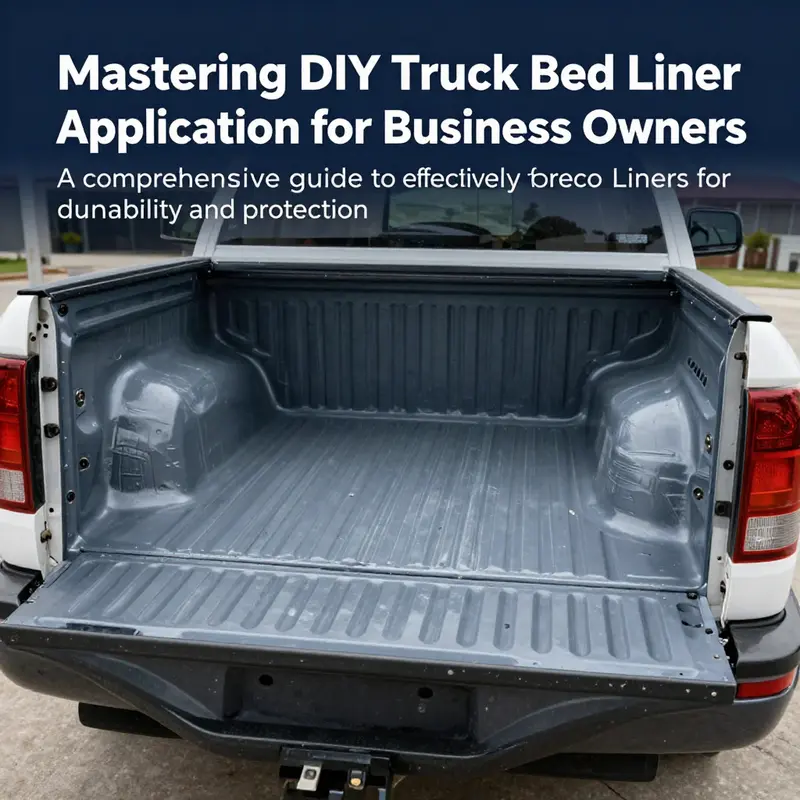
Applying a truck bed liner can significantly improve your vehicle’s longevity, particularly for business owners who rely on their trucks for heavy loads and rough conditions. Understanding how to spray truck bed liner DIY not only enhances the aesthetics of your truck but also protects it from rust and damage. This guide will walk you through the critical preparation techniques, selecting the right liner type, engaging in the application process, managing curing and drying times, and maintaining safety while ensuring quality control. Get ready to transform your truck into a more resilient asset for your business.
From Dust to Durability: Mastering Prep for DIY Truck Bed Liner Spraying
From Dust to Durability: Mastering Prep for DIY Truck Bed Liner Spraying
Preparation is not the flashy part of spraying a truck bed liner. It is the quiet, relentless work that determines whether the coating will cling, level, and endure. A bed that looks clean but harbors hidden oils or a surface that feels rough to the touch but hasn’t been properly treated will betray you the moment you start to apply color or texture. The bed is, after all, a high-use surface. It endures hauling rocks, gravel, gear, and spray-downs with road salt. If you want a finish that resists peeling, bubbling, and early wear, you must treat prep as a promise you intend to keep with the next couple of days. The payoff is a durable, even finish that stands up to weather, daily use, and the occasional careless loading decision.
Begin with a thorough assessment of the bed’s condition. The goal is not to polish a rough surface but to create a clean, uniformly receptive canvas. This means removing contaminants that would otherwise trap solvents, promote poor adhesion, or create an uneven film once the liner is applied. A simple rule guides every choice: the cleaner the bed, the better the bond and the longer the coating will last. The first act is cleaning, not coating. A robust cleaning routine uses a heavy-duty automotive degreaser designed to cut through oil, grease, and brake dust. Work methodically, starting at one corner and moving toward the tailgate. Scrub the bed floor, the vertical walls, and the concave corners where grime hides. Pay special attention to the wheel wells and any textured ridges where debris tends to accumulate. A stiff brush is essential for dislodging caked material; a pressure washer can speed things up, but it must be used with care. Direct high-pressure streams at seams, gaskets, or hinges can force water into places you’d rather keep dry. A thorough rinse follows, and then the real wait begins: the surface must dry completely before you move on. At least 24 hours in a warm, dry environment is the standard, with longer drying in cooler climates. If the surface isn’t fully dry, the solvent in the liner can vaporize unevenly, trapping moisture beneath the coating and sabotaging adhesion.
After the bed is dry, the surface needs a mechanical key—purposeful roughness that the liner can bite into. This is not sanding for aesthetics; it’s texture creation. An 80–120 grit approach achieves the balance between enough roughness to grip the coating and not so much material removal that you weaken the bed’s structural integrity. You can accomplish this with a coarse sheet of sandpaper or, for larger areas, a wire wheel attachment on an angle grinder. The texture should be uniform across the bed floor and up the sides where the liner will be exposed. The goal is not to strip down to bare metal but to remove gloss, rust, and sealants that resist bonding. If you encounter rust or oxidation, address it with controlled passes that clean away oxidation without creating pits or gouges.
Once the roughness is achieved, wipe down again. Dust from sanding must be removed completely because fine metal particles can migrate into the coating as it cures, leaving a sandy or mottled finish. A tack cloth or lint-free rag lightly dampened with isopropyl alcohol is ideal for this final wipe. This moment—wiping away dust—feels almost ceremonial, but it’s where the film’s first true contact with the surface occurs. Any lingering particles here will appear as tiny specks later, undermining the evenness and smoothness of the final coat. The masking phase then follows. Surfaces you don’t want coated—the cab, the inside of wheel wells, hinges, trim edges, and any rubber seals—need protection. Use high-quality painter’s tape and plastic sheeting. Run the tape smoothly along curves and ensure there are no bubbles or lifts that could trap spray underneath. If you’re masking chrome or painted bumpers, consider a protective masking film for extra protection. The idea is to create a crisp boundary between coated and uncoated areas so the finish reads as a deliberate, professional job rather than a rushed DIY panel.
With the bed clean, textured, and protected, it’s time to choose your coating approach. The two most common DIY options are polyurethane (PU) coatings and elastomeric formulations. PU coatings are the workhorse of the bed-liner world: they’re tough, flexible enough to absorb impacts, and resistant to a broad range of chemicals. Elastomeric coatings share similar resilience but are often formulated to be more forgiving when extreme flexing or impact occurs, making them a good choice for high-use bed areas. The common pitfall is to reach for a standard paint or a generic “bed liner” spray that lacks the durability and chemical resistance of true polyurethane or elastomeric systems. If you’ve ever painted a bed liner only to see it peel or chalk after a few weeks, you’ve likely learned this lesson the hard way. The investment in a proper DIY kit or a PU-based spray, while greater upfront, pays off in reliability and longevity.
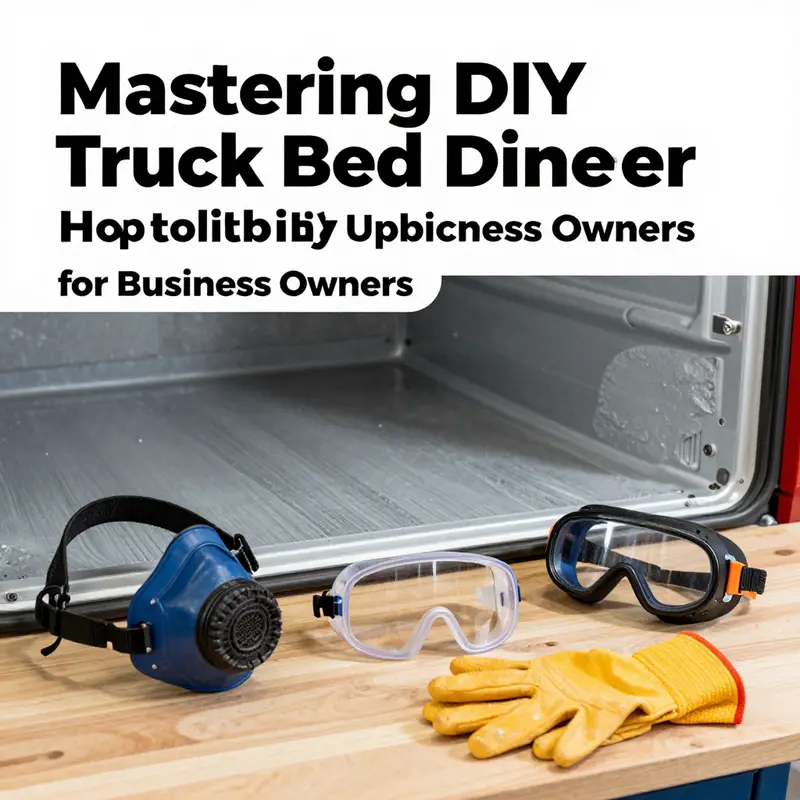
Safety and environment are inseparable from prep. Work in a well-ventilated space; outdoors is ideal. Always wear a respirator rated for VOCs, along with gloves, eye protection, and appropriate clothing. The solvents and isocyanates in many coatings can irritate skin and airways, and the risk increases in enclosed or stagnant air. If you must work indoors, set up mechanical ventilation and avoid crowded, unprotected areas. Keep children and pets away. The working environment should be stable, free of gusts that can carry dust onto a fresh coat, and kept at a temperature within the recommended range. Temperature is a critical factor because it governs drying and curing rates. Ambient conditions around 50–90°F (10–32°C) are generally suitable, but each product has its own sweet spot. Temperatures too low can slow drying and cause tackiness; temperatures that are too hot can drive off solvents too quickly, creating bubbles or an uneven film.
Now comes the application mindset. In a DIY setting, you’ll typically apply multiple thin coats rather than one thick splash. This reduces runs, sags, and solvent entrapment. If you’re using a spray can, shake vigorously for at least a minute before opening. For larger DIY kits, follow the manufacturer’s mixing and priming instructions to ensure the resin and curing agents are properly balanced. The spraying technique matters as much as the materials themselves. Keep the can or gun at a steady distance—commonly 12–18 inches from the surface— and move with long, even strokes. Overlapping passes by about 50% helps create a uniform film and avoids gaps. The first coat should set up quickly enough to handle a light touch but should not be allowed to form a skin that blocks subsequent layers. Typically, 15–30 minutes of dry time between coats is sufficient, but always conform to the product’s times. The recommended total is two to three thin coats, each one building on the last to a smooth, consistent final layer that reads as a single, cohesive sheet rather than a patchwork of imperfect rounds.
Drying and curing follow application. Allow the liner to dry for at least 24 hours in a warm, dry space before loading or exposing it to abrasion. Full chemical curing can take up to 72 hours, during which you should avoid heavy loads or abrasive contact. The difference between a good result and a great one often reveals itself in this window: a properly dried surface underneath a protective film handles unknown future loads much better than one that cures too quickly and brittlely or remains tacky for days. It’s worth noting where your process may diverge from the ideal: too little ventilation, a strong breeze that carries dust, or a sudden temperature swing can compromise the final result. If you plan the climate around the project and keep a steady environment, you’ll arrive at a much more durable finish.
Beyond the practical steps, a few quality principles guide every decision. Always prioritize the manufacturer’s instructions; they tailor the prep, the mixing, and the curing to the exact chemistry of the product you’ve chosen. The product’s temperamental traits—how it reacts to temperature swings, humidity, and surface contaminants—dictate how carefully you should follow the steps above. In practice, that means resisting the urge to improvise too aggressively, especially when it comes to mixing ratios or film-thickness targets. The temptation to shorten drying times by speeding the environment or thinning coats is one of the most common missteps; patience here pays dividends later in the coating’s durability and appearance. If you ever need to compare outcomes, consider the difference between a DIY finish that looks even and consistent under close inspection and one that looks good at a distance but reveals a seam or edge on closer view. The former is the result of methodical prep and disciplined application; the latter often traces back to corners cut in the surface stage.
For readers seeking broader context on how prep supports the final outcome, a practical internal resource offers a concise overview of bed setup accessories and related tweaks. This can help you think about masking, ventilation, or even future maintenance as part of a holistic approach to bed care. See the Accessories guide for more on gear and setups that complement your liner project: Accessories guide.
As you move from preparation into actual coating work, you’ll carry with you a mindset shaped by careful cleaning, deliberate texturing, precise masking, and disciplined layering. Prep is not merely a prelude; it is the foundation on which every coat rests. When the surface is clean, textured, and properly protected, the layer that follows will adhere with confidence and cure into a durable, resilient skin that looks and performs as if it were factory-grade rather than DIY. The bridge to better application—movement, technique, and patience—rests on this sturdy groundwork. And the next chapter will take you deeper into the application stage itself, where technique and product choice finally meet to deliver the finish you’ve planned for long-term bed protection.
External resource for deeper safety and prep practices: https://www.instructables.com/DIY-Bed-Lining-Your-Vehicle/
Choosing the Perfect Armor: How to Select a Liner for a DIY Truck Bed Coating That Lasts
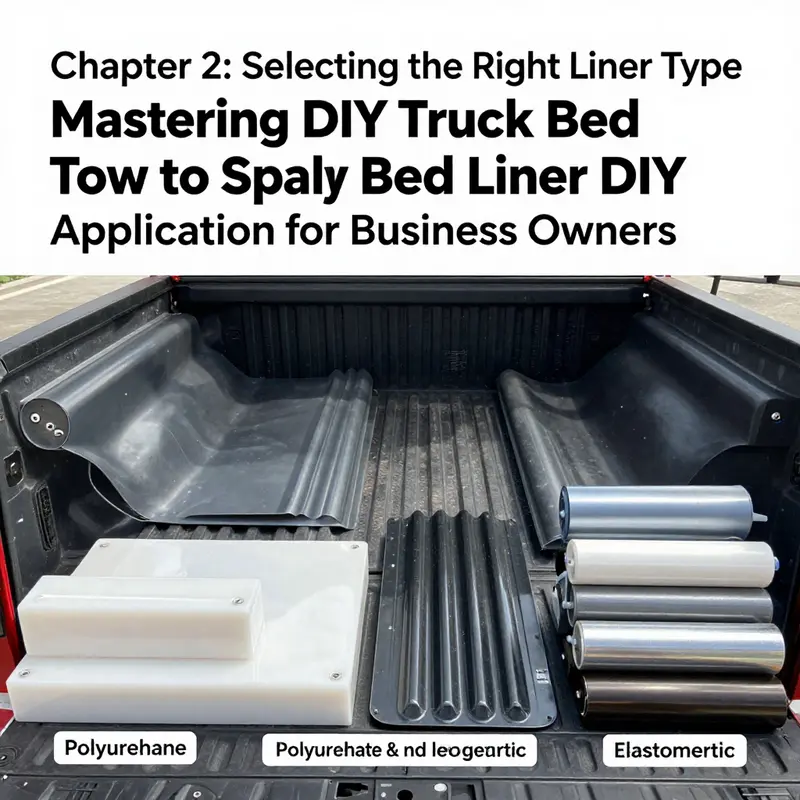
When you stand at the edge of a DIY truck bed liner project, the choice of liner type becomes the defining decision. It isn’t simply about picking a color or a finish; it’s about selecting a protective armor that will wear with your bed under load, vibration, weather, and time. The bed of a pickup endures constant movement, shifting payloads, and exposure to moisture, chemicals, and abrasion. In that light, the material you choose should address three core requirements: lasting adhesion to metal, resistance to impact and wear, and a predictable, user-friendly cure that suits a home shop. The most common and dependable path for DIY projects is polyurethane, particularly in its spray-on form. Polyurethane stands out because of its combination of flexibility and toughness. The metal bed’s life can hinge on this balance: too stiff a coating can crack as the bed flexes, too soft a coating may gouge or wear away quickly. A well-applied polyurethane liner forms a seamless, continuous shield over the bed’s contours, ensuring there are no gaps where moisture can seep in or debris can work its way beneath a mat. That seamless bond is what keeps rust at bay and helps preserve resale value, which is a practical motivation for the effort you put into surface preparation and careful application. Yet polyurethane is not a one-size-fits-all cure, and the decision to use it—or to consider alternatives—depends on how you use the truck and what you expect from the finished surface. In the DIY world, trade-offs matter as much as performance. If your goal is a permanent, durable, long-term solution and you’re prepared to invest time in preparation, masking, and patient layering, spray-on polyurethane is the gold standard for many owners. It behaves like a true cap over the metal, resisting dents and chemical attack, and it does a better job of keeping water from creeping into crevices than pre-cut mats or drop-in liners. This is not to say that other options are irrelevant. Elastomeric coatings, for example, share the polyurethane’s durable nature but tend to be more flexible in some formulations. They can absorb impacts in high-use zones such as the bed floor, and they adapt well to temperature swings without becoming brittle. For budget-conscious DIYers who want a quick, non-permanent shield, or for those who only need to park a bed liner for a season, rubber mats or other flexible inserts can be a simple, replaceable solution. These options provide skid resistance and basic protection, but they don’t deliver the same level of moisture control, corrosion resistance, or long-term adhesion as a sprayed-on system. The decision comes down to expected use and tolerance for maintenance. If you regularly haul damp or corrosive cargo, or you operate in off-road or harsh environments, a spray-on polyurethane or a robust elastomeric system is usually worth the extra time and investment. For light-duty use, occasional transport tasks, or a temporary protective layer while you evaluate needs, mats or peel-and-stick liners can be sufficient for a while and easier to swap when plans change.
The practical route into a DIY liner is to match the material to your bed’s imperfections and to the level of preparation you are willing to commit to. Surface preparation is not optional; it is the foundation that makes any liner type work well. A bed that is dirty, oily, or contaminated by old coatings will fail to bond, regardless of the liner’s inherent toughness. Thorough cleaning, degreasing, and a careful sanding to create a micro-rough surface give the coating something to grip. The simple step of sanding the metal lightly—just enough to create a tooth without removing metal—can dramatically improve adhesion. Once the surface is abrasive and clean, you must mask everything you do not want coated. The mask acts as a safeguard against overspray and ensures you do not complicate hinges, structural components, or the inside of wheel wells with unintended finish. Patience here pays off later in the process; a clean, well-prepared bed helps your chosen liner perform as intended for years.
Choosing the right liner type also means recognizing how different products cure and perform under real-world conditions. For most DIYers aiming for a professional-looking result, spray-on polyurethane coatings provide a robust, durable finish that resists impact and chemical exposure. They form a single, continuous layer bonded to the metal, which helps guard against moisture ingress and corrosion—a key advantage over mats or sheets that can trap moisture beneath them. The absence of seams in a spray-on system eliminates the kind of weak points where wear and rust typically begin. This is especially important for off-road drivers who frequently encounter wet, muddy, or sandy conditions that can hold and corrode pinholes or scratches at the surface if water seeps in under a mat. In the long term, the coatings that display the best balance of hardness, flexibility, and bonding tend to be polyurethane-based.
However, the choice is not always strictly about the material’s chemistry. The execution—how you apply the liner, how evenly you lay down coats, and how you manage cure times—determines the ultimate result as much as the chemistry itself. For DIY projects, the guidance of the packaging or kit guidelines matters. The best results come from applying multiple light coats rather than a single heavy one. A thin, even first pass helps build a durable base that won’t sag or run. The second and third passes fill in imperfections and deliver a uniform thickness. The distance from the surface while spraying, typically 12 to 18 inches, and the overlap between passes, around 50 percent, are practical metrics to adopt. Each coat should dry before the next begins, with final curing times that allow the coating to set without disturbances or loads on the bed. Temperature plays a decisive role here. Ambient conditions between roughly 50 and 90 degrees Fahrenheit support reasonable drying and curing; outside this band, you risk slow cures or bubbling from rapid drying, which can ruin the smooth, uniform appearance you want. In a DIY workspace, controlling the environment by working in a well-ventilated area that is shielded from direct sun and wind can be as important as choosing the right liner.
Beyond polyurethane and elastomeric coatings, it is useful to consider non-spray options in the context of your plans. Drop-in mats, rubber bed liners, or thermoplastic elastomer sheets are easier to install—often simply laid in place and trimmed to fit—but they are not pristine barriers against moisture and corrosion in the same way as a sprayed-on layer. They can shift or bunch with movement and temperature changes, creating gaps where water can pool and rust can begin to form. For a vehicle that is used regularly in corrosive environments or stored outdoors, the long-term protection offered by a truly bonded, spray-on coating is frequently worth the extra effort and learning curve. Yet not everyone needs or wants the permanency of a spray-on system. If the project is a temporary measure, or if you are evaluating future needs, a high-quality rubber or elastomer mat can provide useful protection without committing to a full spray regimen. The key is to match the liner type to the truck’s duties and your long-term goals for the bed.
The process also benefits from acknowledging the realities of a home shop. Some DIY kits come with consumer-friendly spray equipment, while others require more robust hardware and technique. Professional airless spray systems used in dealership settings can deliver a smoother, more uniform finish, but they introduce complexity and cost that may be daunting for a first-timer. In such cases, a well-chosen DIY kit with clear instructions can still yield excellent results if you follow a disciplined preparation and application routine. If you are uncertain about the best approach, a careful cost–benefit analysis can help. A spray-on polyurethane system may require a bigger upfront investment, but its durability and seamless finish often justify the price for a vehicle you depend on daily. Alternatively, a well-maintained rubber mat can be swapped without the downtime associated with curing, making it an easy option for temporary protection or early-stage testing of a new setup.
As you weigh the options, it helps to picture the bed as a region that needs a tailored solution rather than a single, one-size-fits-all coat. If your routine involves heavy and frequent loading, exposure to chemicals or moisture, or long periods of time spent in muddy environments, a liner that bonds directly to the metal and maintains its integrity under stress will outperform most alternatives. If your tasks are lighter and you want a straightforward, removable solution with simple maintenance, you may lean toward a mat-based approach. Either path can yield satisfying results, provided you remain faithful to surface preparation, coat-by-coat discipline, and environment control. The chapter on choosing a liner type is not just about selecting a material; it’s about envisioning how the finished surface will ride with the day-to-day life of your truck and planning the steps that will bring you to a durable, cosmetically pleasing result.
For readers who want to explore how accessories and additional gear can complement a liner installation, there is value in examining the broader ecosystem of modification and protection. The lawn of options includes edge guards, spray-on finishes that extend to wheel wells, and finishing touches that enhance grip and cargo management. These considerations tie back to the core choice you make about liner type. The right pairings can simplify maintenance and improve long-term performance, allowing you to enjoy a bed that looks clean, protects its metal, and handles every job with less worry about damage or rust. If you want to delve into related topics and see how other DIY enthusiasts approach the broader spectrum of truck bed protection, you can explore accessories and gear in the community resources available at this dedicated hub:
In closing, the decision to use spray-on polyurethane, elastomeric coatings, or a simpler mat-based solution hinges on how you weigh durability, permanence, environment, and budget. A polyurethane spray-on liner offers the strongest case for a permanent, seamless shield that resists water intrusion and abrasion. Elastomeric coatings provide flexibility with robust protection in high-impact zones, and mats offer a practical, lower-cost path for temporary or evaluative use. Regardless of the choice, success in the DIY bed liner journey rests on meticulous preparation, controlled application, and patient curing. The bed is about to become the most resilient part of your truck, and your careful pick of liner type will shape its fate for years to come.
Coat by Coat: Mastering the Application Process for a DIY Spray-On Truck Bed Liner
The moment you commit to spray-on bed liner in a DIY setup is the moment you switch from planning to performance. The application process isn’t a single move but a careful sequence that translates clean metal into a durable, textured shield. In practice, success rests on a disciplined routine that begins with the bed’s surface and ends with a fully cured, non-slip finish that can stand up to gravel, cargo, and the occasional misstep. The journey from bare metal to a sealed surface unfolds through surface preparation, masking, controlled deposition, and patient curing. Each step compounds the previous one, so rushing any part of the chain risks adhesion failures, uneven texture, or premature wear. Keeping that in mind, approach the job like building a foundation—with precision in the prep and restraint in the spray—and you’ll find the result both resilient and visually consistent across the entire bed.
Surface preparation is the foundation of success, and it needs to be thorough but measured. Start by giving the bed a thorough cleaning with a degreaser to strip away dirt, oil, wax, and roadway residue. A stiff brush helps dislodge stubborn grime, and a good rinse follows to flush everything away. The key is to dry completely before any sanding begins. Moisture trapped under a coating invites clouding, bubbles, and poor adhesion, so the bed should be dry to the point of showing no dampness when you wipe it down with a clean cloth. This drying period can take a day or more in cooler conditions, but it’s worth the wait to ensure the film has an even base to grip. Once dry, profiled adhesion becomes the next objective. Lightly abrading the surface with 80–120 grit sandpaper creates the roughness often described as “tooth” that helps the coating bite into the metal. The goal isn’t to gouge or rough up the bed beyond recognition but to introduce a micro-scratch pattern that guides the coating as it sets. After sanding, wipe away all dust with a tack cloth or damp rag until the surface looks clean and free of grit. Skipping this step is one of the most common mistakes, because any residual dust or oil will be carried into each coat and show up as texture irregularities or pinholes after curing.
Masking off areas that should stay uncoated is equally critical. The tailgate, hinge points, cab edges, and the inside of wheel wells are typical targets for protection, and it’s worth taking extra care around these zones. Good masking isn’t just about laying tape; it’s about sealing edges so overspray can’t creep into tight gaps. While you mask, keep in mind that exposure to spray linings involves hazardous chemicals, especially isocyanate-based systems in many formulations. Protective gear becomes part of the preparation too. A respirator equipped for organic vapors, chemical-resistant gloves, eye protection, and appropriate clothing aren’t optional add-ons here; they’re a baseline for safe work. Ventilation matters as well. If you can work outdoors, that’s ideal, but a well-ventilated shop with exhaust can help manage fumes when you’re indoors. The masking stage isn’t glamorous, but it’s where a clean, well-defined boundary is created, and that boundary helps deliver a uniform, professional-looking finish.
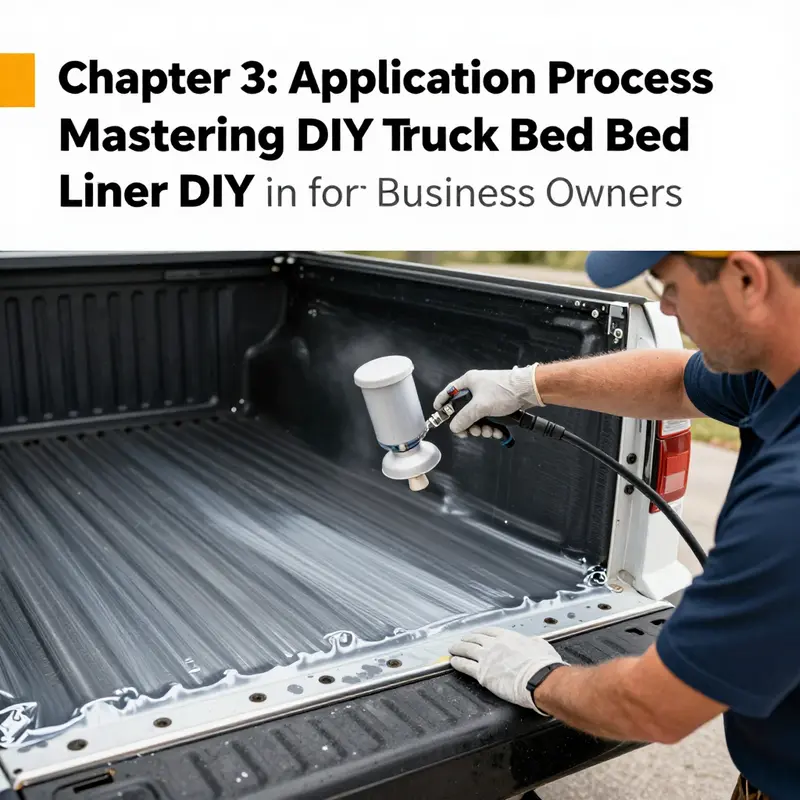
With the bed prepped and protected, attention shifts to choosing and preparing the right coating system, and that decision guides every later move. For most DIY projects, polyurethane-based coatings and elastomeric formulations are favored for their durability and flexibility. Polyurethanes deliver strong abrasion resistance and chemical tolerance, while elastomeric coatings often offer enhanced impact absorption and higher elasticity under load. The common pitfall here is opting for a standard paint or a low-cost “bed liner” spray that lacks the structural resilience of a true polyurethane or elastomeric system. In practice, the choice of coating also dictates the application method, mixing protocol, and the required flash times between coats. Two-part kits demand careful measuring and thorough mixing according to the manufacturer’s directions, and it’s essential to test the spray pattern on a scrap metal piece. This test piece confirms nozzle size, pattern, and spray pressure before you touch the actual bed. It’s a small investment of time that pays off in even coverage and reduces waste.
The actual deposition of the coating is where the technique becomes the difference between a tub of texture and a durable bed liner. Begin by ensuring the work area is within the recommended temperature range—somewhere around 50 to 90 degrees Fahrenheit (10 to 32 degrees Celsius)—and not overly humid. Temperature swings can derail curing, and humidity can introduce pinholes or splotches if moisture interferes with the film formation. When you’re ready to spray, maintain a steady stance and a consistent distance from the surface, typically around 12 to 18 inches. Move the spray with even, overlapping passes, and aim for a light, consistent film thickness rather than a heavy, single-pass coating. The rule of thumb is to apply multiple thin coats rather than one thick layer; this approach reduces runs, sags, and texture irregularities that can mar the bed’s appearance. A practical cadence is to apply two to three coats, allowing the recommended flash time, usually 15 to 30 minutes, between coats. This pause gives the solvent in the previous layer a chance to flash off without dragging into the next layer, which helps your final finish stay smooth and uniform.
Coating the entire bed isn’t the final act; it’s the beginning of a controlled curing process that ultimately locks in the performance. After the last coat, give the surface a final, careful inspection for coverage and texture. The goal is a uniform, non-slip finish with a consistent texture across the entire bed and into the wheel wells, corners, and any recesses that might trap moisture or debris. Drying and curing are separate phases, and each has its own delicacy. A film that looks dry to the touch may still be curing chemically, and complete cure can require up to 72 hours under optimal conditions. It’s wise to avoid heavy loads or abrasive cargo during this period to prevent marring or prematurely stressing the film as it hardens. Even when the surface feels firm to touch, the chemical cure continues beneath the film layers, so patience here saves you from undoing hours of careful work.
In practice, you will inevitably encounter small issues along the way. Runs or sags can appear if a coat is too thick or if your passes linger too long in one spot. The cure for this is usually to let the affected area firm up, lightly sand with a very fine grit if necessary, and apply a touch-up coat—again in thin layers—to blend with the surrounding area. Orange peel texture is common in DIY jobs and is often a byproduct of spray pressure, distance, or the viscosity of the coating. The fix isn’t a heavy-handed recoat; it’s a controlled rework with a light mist over the area until the texture evens out. For missed spots or uneven edges near masking lines, removing masking carefully to recoat precise zones can restore uniformity. The practical takeaway is simple: meticulous masking, measured coats, and controlled timing reduce the need for corrective work later. If preventive steps fail, approach repairs conservatively, favoring small, incremental touch-ups rather than large patch jobs that stand out visually.
Beyond the mechanics of spraying, the chapter’s core wisdom remains practical and restrained. Respect the product’s chemistry, follow manufacturer guidance for mixing, thinning (if required), and recommended exposure times, and never rush the cure. The environment matters as much as the technique; a stable, clean workspace with controlled temperature and airflow often yields the most consistent results. The surface’s texture—rough enough to provide grip but smooth enough to resist debris clinging to crevices—emerges from the interplay of coat thickness and flash times. If you’re aiming for a durable, practical finish, think of the process as building a shield layer by layer, where each coat blends visually with the last and physically adds a measure of protection for whatever cargo the bed will support.
As the project concludes, a careful post-application assessment ensures you’ve achieved a robust, uniform result. Inspect for coverage gaps, edge sharpness along masking lines, and any gloss variations that might signify inconsistent film formation. If everything looks even, the bed transitions into its curing phase with minimal disruption to the truck’s daily use. The final non-slip texture, the absence of drips, and the absence of exposed metal at vulnerable edges are the fingerprints of a job done with patience and precision. The drive home after the cure is not merely a test of the finished surface but a small, quiet validation of your work: a bed liner that can bear the weight of tools, stray gravel, and routine loading with integrity.
External resource: for a deeper dive into the considerations that separate DIY application from professional options, and to explore nuanced guidance on tool choice, safety, and best practices, see this external guide on spray-on bedliner application. https://www.thesprayliners.com/diy-bedliner-application-guide
Chapter 4: The Quiet Cure—Timing, Temperature, and Patience in DIY Truck Bed Liner Drying
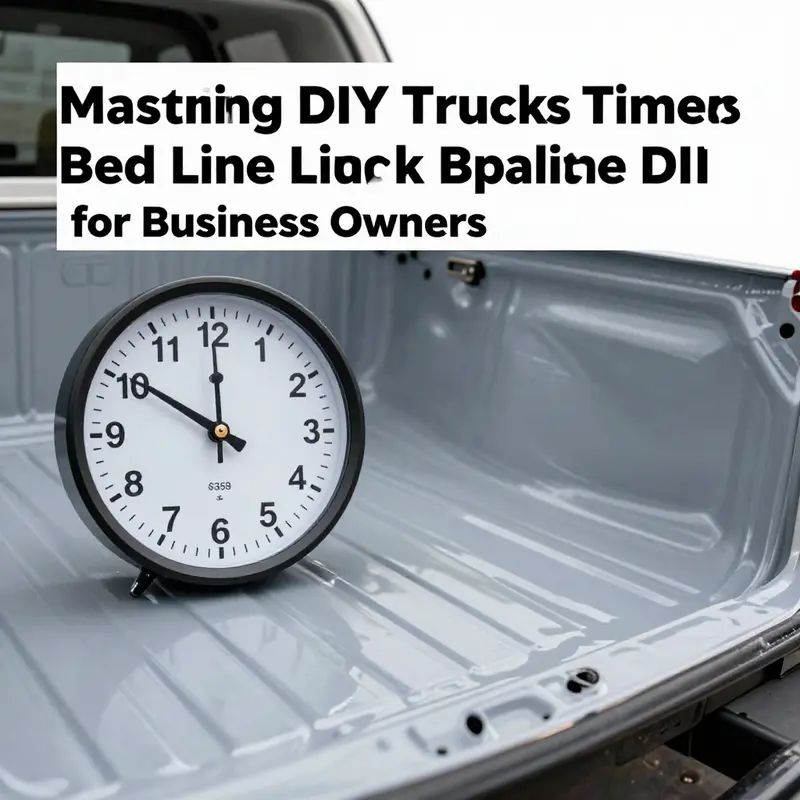
When the final spray coats have brushed themselves onto the bed, the visible work is far from finished. The true power of a spray-in bed liner—and the true test of a homeowner’s workmanship—lies in what happens after the surface looks dry. Curing and drying are not interchangeable terms for a DIY job; they describe two distinct phases of the same chemical process. Drying is mostly about solvents evaporating and the film setting up enough to touch without leaving smudges. Curing is the lasting hardening, crosslinking, and sealing that build a watertight, abrasion-resistant barrier. In a DIY installation, understanding this difference changes the way you approach the project, the way you plan your weekends, and how you interpret that creeping patience a finishing job deserves.
The practical effect of this distinction is simple but crucial: a bed liner can feel dry to the touch within a few hours, yet still be chemically far from full strength. For most coatings, the initial cure progresses steadily over 24 hours, during which the liner gains enough hardness to handle light use. But full chemical cure—the point at which the coating reaches its maximum abrasion resistance and waterproof integrity—can take up to 72 hours. That window is not a suggestion; it’s a performance requirement. If you load the bed or slide heavy, sharp cargo into it too soon, you risk micro-tears in the film, micro-damage that may propagate under stress and compromise the protective layer over time. This is not merely about appearing finished; it is about achieving the protective chemistry that keeps moisture, chemicals, and corrosion at bay.
Weather is the quiet arbiter of curing. Ambient temperature exerts a strong, predictable influence. In a room climate where the air sits between 50 and 90 degrees Fahrenheit (about 10 to 32 degrees Celsius), curing proceeds at a healthy pace. When the temperature climbs toward the upper end of that range, molecular movement within the coating accelerates, and the material can reach its cure milestones a bit sooner. Conversely, cooler days slow the entire process, sometimes noticeably extending the 72-hour horizon. Temperature interacts with humidity, air flow, and even the thickness of the coats you applied. A steady, moderate environment is ideal; erratic shifts in temperature can create uneven curing, which in turn affects the final feel and performance of the liner.
Humidity plays the opposite tune to temperature. High humidity can slow solvent evaporation and interfere with film formation. In regions with muggy air, you may notice a longer cure timeline, a slightly tacky touch in the afternoons, or a need for more careful handling between coats. Low humidity can speed up the early drying phase, but it can also promote surface tension effects that cause minor micro-bubbles if the surface experiences a rapid shift in temperature or airflow. The art is in maintaining a calm, steady environment for the entire cure window. If you can, keep the bed area in a sheltered space with good airflow but minimal direct gusts that could disturb the surface. In a garage or outdoor setup, a simple tent or shade with a gentle, controlled breeze can help.
Beyond environmental factors, product selection and coat strategy shape your curing timeline in meaningful ways. A polyurethane-based bed liner, whether delivered in spray cans or a multi-part kit, follows a similar washing of solvent and subsequent hardening. Elastomeric coatings, which can offer additional flexibility and impact absorption, also cure through a chemical process that benefits from a consistent climate. The exact cure timing your manufacturer specifies should be treated as gospel for your particular product. Some kits advertise faster touch-dry times, which can create the impression that cure is complete; in truth, those “touch-dry” labels describe surface dryness and initial handling readiness, not the full strength you’ll only reach after the full cure period. Rushing beyond the recommended schedule risks a durable-looking bed liner that remains vulnerable to early abrasion, chemical attack, or moisture intrusion.
The practical routine for a typical DIY job is twofold. First, you apply thin, even coats in a controlled manner, allowing each coat to dry as directed—usually 15 to 30 minutes between passes, with final coats forming a smooth, uniform finish. Then comes the long game: you protect the bed during the cure window and resist the impulse to test the boundaries. After the last coat has cured, you should avoid loading or dragging heavy items into the bed for at least 24 hours. This first stage is the initial cure—when the coating begins to reach its hardened state and its surface becomes stable enough to handle routine use. During this phase, it’s perfectly normal to see minor surface imperfections or subtle changes in gloss as the film continues to settle. These variations are not signs of failure; they signal that the chemistry is still at work beneath the surface.
The next 48 hours matter just as much. This is when the coating’s tougher properties—abrasion resistance, impact withstanding capability, and waterproof integrity—develop toward their maximum. If you anticipate hauling rough materials or heavy loads, extend caution accordingly. Think of the 72-hour mark as the real finish line for structural performance. Each additional hour of patient waiting reduces the likelihood of micro-motions during use that could compromise the coating’s integrity. For people who live in cooler or more humid environments, this means embracing the extra time and not forcing a “full cure” by cranking up heat or accelerating airflow in ways that could cause uneven drying or bubbling. The physiology of the coating rewards restraint and steady conditions.
In practice, you’ll know you’re on track when the bed surface becomes uniformly hard to the touch and no longer shows any tack, even under a careful thumb press with a gloved hand. A quick, gentle hand test can be informative, but never press so hard that you gouge or crease the film. If the surface remains slightly soft or returns to its pre-test texture, you’re not yet at full cure. A common pitfall is to interpret a surface that looks dry as a finished cure. The right approach is to respect the time your coating needs to cross from a set film to a fully crosslinked, waterproof barrier. In this way, curing becomes not a guess but a measured, repeatable phase in your DIY project.
There is a narrative of patience that runs through every successful bed-liner job. People who rush cure often end up with a finish that looks good up close but falters under real-world use. Cochlear-like in its precision, curing requires you to balance your daily schedule with the bed’s needs. Time becomes an ally when you plan around mild, stable conditions and give the coating the space to mature. If you need to work on adjacent surfaces or prepare the bed for other additions, the cure window offers an opportunity to step back, assess, and adjust. You can use the interim period to check masking integrity, confirm that nearby parts remain shielded from drips, and ensure the environment remains free of dust that could settle into a still-soft finish.
As you reflect on this stage of the project, consider the broader picture of your DIY journey. The bed liner is not just a single spray; it’s a system designed to shield the bed from moisture, abrasion, and chemical attack. The curing window embodies the principles of discipline and foresight that underpin every successful home improvement effort. By respecting the 24-hour initial cure and the longer 72-hour full cure, you safeguard the investment you’ve made in tools, time, and materials. You also protect the bed’s future performance, which will reveal itself not in a moment of triumph after the last spray but in the quiet, everyday resilience of the coated surface as you load gear, haul dirt, and drive down dusty roads.
If you’re curious how other bed-related upgrades intersect with this process, there’s a broader landscape of DIY knowledge to explore. For example, you can delve into bed-accessory considerations and framing options that complement protective coatings, such as mounting hardware and heavy-duty accessories that stay compatible with a cured surface. A good reference point is a guide that discusses bed-accessory planning and installation, which helps you see how protective coatings harmonize with other truck-bed enhancements. Visit the Truck Bed Lift Gate guide to broaden your understanding of how different bed configurations and protective layers work together in the long term.
For readers who want to compare DIY and professional approaches and understand how curing timelines translate into real-world performance, a broader external perspective is helpful. See the CarGurus analysis that contrasts the DIY route with professional options for spray-in bed liners, including how curing expectations map to finished results. This external resource complements the practical timeline you’ve learned here and helps frame your decisions within real-world expectations. CarGurus explains how the DIY pathway stacks up against more advanced, professionally applied systems, including considerations of cure time, finish quality, and long-term durability. For a deeper dive, refer to the external article titled How to Apply Spray-In Bedliner: DIY vs Professional Options.
External resource: How to Apply Spray-In Bedliner: DIY vs Professional Options – CarGurus (Published: February 10, 2026): https://www.cargurus.com/insights/how-to-apply-spray-in-bedliner-diy-vs-professional-options
null
null
Final thoughts
Successfully applying a truck bed liner through DIY methods can significantly enhance your truck’s durability and marketability. By following the steps outlined in this guide, business owners can ensure effective preparation, select appropriate materials, carry out the application proficiently, and adhere to safety measures. With a little diligence and know-how, you’ll be providing your truck with the protection it deserves, thereby safeguarding your investment and optimizing your business operations.