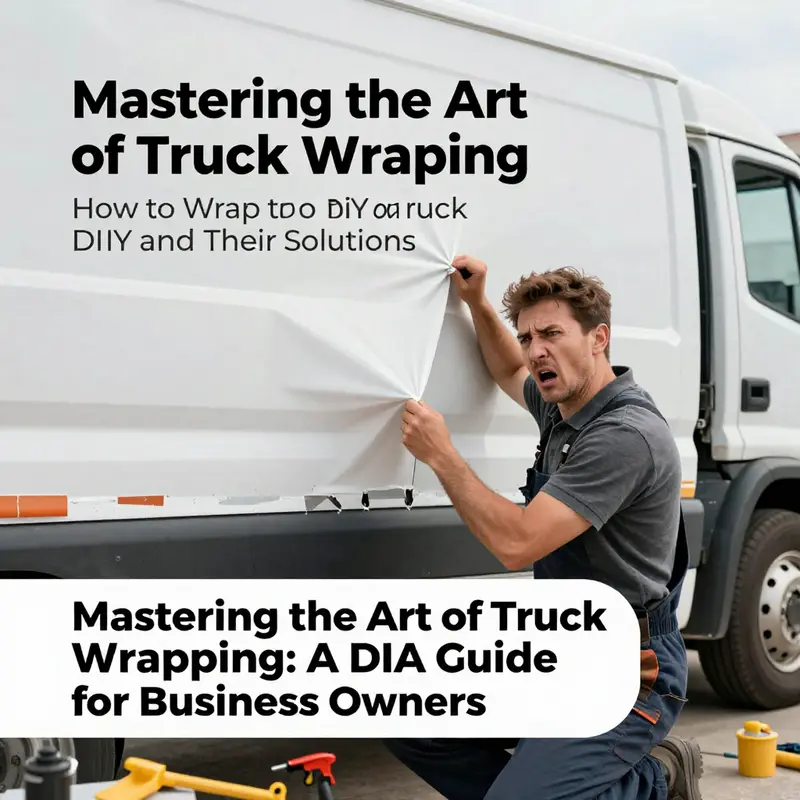
In a world where visibility is vital for any business owner, the art of DIY truck wrapping offers a unique avenue for branding and creativity. Crafting a striking truck model can serve as a powerful marketing tool, capturing attention and fostering brand recognition. This guide provides an in-depth exploration of how to create and wrap a cardboard truck model, perfect for demonstrations or promotional activities. Each chapter builds upon the previous one, covering essential materials, step-by-step crafting techniques, and solutions to common challenges, ensuring you have the comprehensive knowledge to wrap like a pro.
From Box to Brilliance: Wrapping a Cardboard Truck as a Creative DIY Model
Wrapping a truck in a diy sense does not mean tinting a real vehicle with vinyl or paint. It means taking a humble cardboard body and giving it a finished exterior that reads as bold, polished, and transport ready in miniature. This chapter guides you through a cohesive journey from choosing the right cardboard to adding a final protective finish, all while embracing the idea that the wrapping process is not just decoration but a chance to practice planning, proportion, and craftsmanship. The cardboard truck becomes a canvas for color, texture, and texture play, transforming waste into a small sculpture that can roam a desk, a shelf, or a classroom display. It is a hands on reminder that creative wrapping starts with intent and ends with confidence in the details that show you cared enough to finish well.
Begin with the philosophy of wrapping as a craft rather than a mere wrap. The exterior layer you apply is not simply a coat; it defines the truck s personality and strength. A wrapped surface can be airtight to the air of imagination and practical for a kid friendly build. Because the project uses cardboard, the wrap should be light enough to contour across curves while being sturdy enough to resist wrinkling and tearing. The goal is to create a surface that feels seamless, even if the truck is made from a patchwork of boxes. To achieve this, you will be mindful of how each stripe of color, each panel seam, and each edge aligns with the overall silhouette. In other words, the wrap becomes a map of the design decisions you have to make as you cut, fold, and glue.
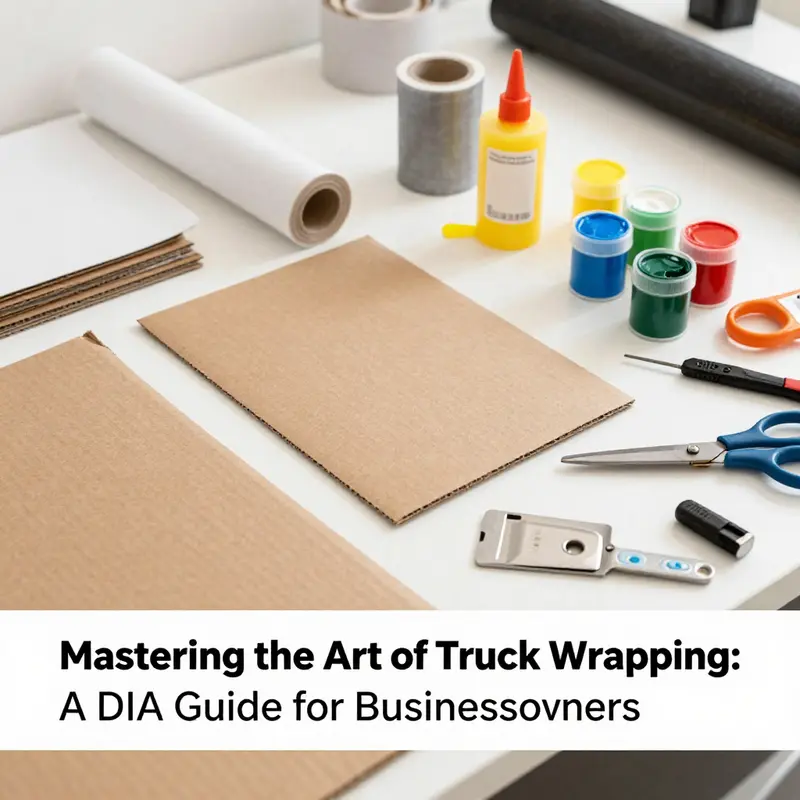
The materials you choose set the tone for how far you can push the wrapping concept. A large sturdy box forms the main body, supporting the cab and the cargo space with enough thickness to stand up on a shelf. Scissors or a craft knife will handle the cuts, while glue serves to assemble the pieces with a permanent hold. Markers come into play for fine lines and tiny details that would be impractical to cut out of cardboard. If you want more texture or color at low cost, colored paper, cardstock, wallpaper remnants, or simple fabric scraps can wrap the exterior in patterns that pop. The layering technique matters here; thin sheets build up a richer surface, and you should press edges smooth to avoid creases that read as sloppy rather than intentional.
The first stage is preparation and planning. Open the box carefully, remove any inner flaps, and flatten it enough to gauge the width and height of the truck you intend to model. A larger surface gives you more room to experiment with the wrap, while a compact form keeps the project manageable. Sketch the outline of a truck directly onto the flattened surface or onto a separate sheet of paper to use as a cutting guide. Include the cab, the cargo area, and the chassis as distinct parts so you can fold and join them with clean lines. The key is to imagine the wrap in three dimensions even before you cut, so the final result reads as a coherent vehicle rather than a jumble of shapes.
With a clear plan in hand, the cutting begins. Cut out the main body shape along the outline you sketched. For a strong wrap, cut additional strips that can form the roof and the fenders as separate panels. If you are new to this, start with simpler shapes and gradually add more complexity as your confidence grows. The folding stage then turns those flat panels into a compact three dimensional form. Use light folds to mimic the subtle angles you would see on a real truck. A small cardboard chassis can be created from a sturdy strip cut to the length of the truck, then folded to provide a base and a place to mount wheels later on. The 3D assembly is the real test of your wrapping discipline because it determines how well subsequent layers will sit and how smooth the final surface can be.
The wrapping itself starts with the base layer. Choose a primary color that will cover most of the truck. This base should be a little larger than each panel to allow for a neat seam and to avoid looks of rough edges. Smooth the wrap over each panel, taking care to press out air pockets and avoid wrinkles that will show through in the final finish. If you are using colored paper or wallpaper remnants, the grain or pattern should align with the truck s lines so the flow looks intentional. For added depth, wrap the cargo area with a different color or texture than the cab. This not only creates visual interest but also helps emphasize the vehicle’s functional sections. Wrapping with fabric scraps can introduce a tactile surface that invites a closer look. The trick here is to glue securely but not so aggressively that the surface wrinkles or warps under pressure.
After the base wrap is secure, the details begin to tell the story. Windows and doors become little windows of opportunity to customize your truck s personality. Create windows by cutting clear or white paper or leaving small openings in the base wrap and adding markers to sketch the glass and frames. For doors, you can draw the seams or cut simple pieces of cardstock to simulate panels. The wheels are essential; even a cardboard model feels more complete when you attach wheels. You can fashion wheels from button sized circles cut from cardstock, foam discs, or recovered plastic lids. Attach them with simple axles such as skewer pieces or straws, ensuring they can rotate or at least sit square to the surface to prevent wobble.
Decorative touches come next. You can add a logo, stripes, or a decorative motif using markers, stickers, or cutouts that you glue onto the wrap. A simple stripe along the side can evoke speed and motion, while small squares or dots can simulate cargo details or reflective tape patterns that truck models often carry. If you want a more polished finish, consider a final layer of clear glue or a light coat of paint to seal the wrap. Sealants must be applied gently to avoid lifting the edges of the paper wrap. The result is a surface that looks durable enough to withstand toy play yet elegant enough to sit on a shelf as a small crafted sculpture.
One of the most important aspects of wrapping a cardboard model is the attention to edge management. Seams should land at natural joints of the truck so they become part of the design language rather than obvious mistakes. If a seam is running across a visible body panel, consider adjusting the wrap in that area so the seam aligns with a panel edge or folds inward to hide behind a corner of the box. Premium results emerge when the seams feel deliberate rather than accidental. Wrapping is as much about sight lines as it is about materials. Your eye will quickly notice when a seam is off or when a panel is misaligned, so pause as you work to recheck angles and get the geometry right.
As the project progresses, the wrap should reveal a sense of pace and scale. Even though this is a tiny cardboard truck, the visible wrap can suggest a real world finish. This illusion comes from keeping the lines consistent and the textures convincing. If you choose a glossy paper for the body, the surface will catch light and give the truck an energetic shimmer. A matte finish can convey a rugged, utilitarian feel, which may be more suitable for a cargo hauler model. The decorative choices you make should reflect your intent for the piece—whether it is a playful toy, a study of form, or a tiny tribute to a specific vehicle silhouette imagined by the maker.
The final touches are about presentation and durability. Ensure all glue is dry and any loose edges are pressed flat. If a piece of wrap lifts, re glue and press with a clean cloth until the surface looks seamless again. A touch of paint helps define edges and strengthen the impression of a finished product. When the truck stands upright, it should hold its shape with confidence, and the wrap should resist minor handling without tearing.
For those who want to explore wrapping as a broader cognitive exercise, this cardboard method translates into many other similar projects. The practice of mapping a three dimensional form onto a flat material and then applying a protective, decorative exterior is universal. It teaches not only craft technique but also problem solving: how to adapt a plan when a panel is mismeasured, how to swap a color to improve contrast, and how to balance details so the design does not overwhelm the scale. The cardboard truck becomes a template for thinking through design decisions in a tactile way, reinforcing the idea that wrapping is both art and engineering in miniature. If you are curious about more advanced structural components that can be added to a cardboard vehicle, a related resource on truck construction offers practical ideas that align with the wrapped aesthetic and can inspire further experiments in your own craft space.
For readers who want a visual guide while you work, one internal reference that aligns with construction minded wrapping ideas can be found in the community blog on truck projects. It provides additional perspectives on building robust, scalable boxes and then wrapping them with thoughtful finishes. You can explore that reference here: truckbox.
In the end, the wrap is more than color and texture. It is a statement about how to repurpose everyday materials into something that feels intentional and complete. Wrapping a cardboard truck invites you to think in layers: the base structure, the outer finish, and the details that give the model character. It invites patience, precision, and play. The project does not require expensive tools or elaborate machinery. It rewards careful planning and a steady hand, and it offers a satisfying sense of accomplishment when the assembled model finally sits on a shelf with a crisp finish that invites a closer look. The finished cardboard truck, wrapped with care, becomes an accessible reminder that materials at hand can be transformed into meaningful, durable art. For those who want a broader sense of how to approach similar cardboard or box based builds, exploring additional guides on related projects can further illuminate the wrapping discipline and ignite new ideas for future models.
External resource for further inspiration: https://www.instructables.com/DIY-Cardboard-Box-Evans-Truck/
From Cardboard to Aluminum: Essential Materials for DIY Truck-Wrapping Projects
Materials and Tools You’ll Need for DIY Truck-Wrapping Projects
When you set out to wrap a DIY truck model, the right materials matter more than you might expect. Whether you are covering a cardboard delivery truck, building a small motorized tank from ice cream sticks, forming a foam-hulled electric boat, or fabricating an aluminum roof rack for a scale model, choosing proper supplies simplifies work. This chapter lists the core items, explains why each matters, and offers practical alternatives. The aim is to help you gather everything before you start. That keeps the build smooth and the finish clean.
Start with the building block: the structural material. For most toy truck projects, sturdy cardboard is the easiest choice. Use corrugated cardboard for bodies and single-wall boxes for smaller parts. Thicker sheets resist warping and hold glue well. For precision cuts, cardstock works for panels and details. Foam plastic sheets serve well for buoyant hulls and lightweight body panels. If you need rigid metal parts, thin industrial aluminum profiles work for frames and racks. Choose thickness by the scale of your project. Thicker stock adds durability but increases weight.
Cutting and measuring tools are essential. A sharp box cutter or craft knife makes cleaner cuts than scissors. Keep spare blades for crisp edges. A metal ruler or a straightedge prevents slipping. A measuring tape is useful for larger pieces. For rounded cuts, use scissors suitable for thick paper or a rotary cutter. Sandpaper helps smooth cut cardboard edges and preps aluminum for paint or adhesive.
Adhesives come next. White PVA glue bonds cardboard and paper well. Hot glue provides fast tack and added strength, especially for bulky assemblies. Use a hot glue gun with adjustable temperature to avoid burning thin foam or paper. For metal-to-metal or metal-to-foam joins, choose a construction adhesive suited for both surfaces. Double-sided tape is useful for temporary holds and clean interior panels. Reinforce stress points with packaging tape or cloth tape. If you plan to seal seams, a clear sealant helps waterproof foam or cardboard.
Wheels, axles, and hardware bring models to life. You can make wheels from black or white cardstock, foam discs, or recycled bottle caps. For a more durable solution, small plastic wheels or purchased toy wheels work well. Axles can be simple wooden skewers, bamboo sticks, or thin metal rods. For motorized projects, use gears and a metal thin rod as shafts. Straws or hollow plastic tubes can serve as bearings for wooden axles. Fasteners like small screws or nuts add security, but glue and tape often suffice for toys.
If your project includes motion, gather basic electrical parts. Small DC motors, a matching battery and connector, and a simple switch are the fundamentals. For compact projects, use a 9V battery with a small motor and a battery clip. Wire and basic soldering tools allow secure electrical joins. Gears and pulleys transmit motion from motors to wheels. Secure the motor in a bracket or glued compartment to avoid misalignment. For any wiring, plan a neat route and secure wires with tape or clips.
For surface wrapping and decoration, stock up on the right covering materials. Colored paper, wallpaper scraps, or adhesive vinyl imitate painted panels without solvents. Wallpaper can add texture and color in large sheets with fewer seams. Use spray paint or acrylic paint for durable color on cardboard and foam. Markers work well for small details and outlines. Wallpaper paste or heavy-duty spray adhesive can bond large decorative sheets. For premium finishes, consider sealant coats or clear varnish to protect paint and paper.
Tools for finishing matter too. A cutting mat protects work surfaces and keeps blades sharp. Clips and clamps hold glued joints while they dry. Small saws or metal files shape aluminum. Needle-nose pliers bend small metal parts and hold fasteners. A small drill can make axle holes cleanly in wood, plastic, or aluminum. Keep a pushpin or awl for pilot holes in cardboard.
Don’t overlook packing and protection materials. When transporting a model or protecting fragile sections during assembly, bubble wrap and soft cloths cushion parts. Foam board or wooden strips help reinforce long bodies. Rope or straps can secure parts during storage. Clear plastic film or shrink wrap protects a finished model from dust and moisture. If you are prototyping, scrap cardboard and masking tape let you test fits before final assembly.
Safety supplies complete the kit. Safety goggles are essential when cutting or using power tools. Gloves protect hands from hot glue and sharp metal edges. Work in a well-ventilated area when using adhesives or spray paint. Keep a first aid kit nearby for minor cuts and burns.
Choosing the right materials depends on the project scope. For a simple cardboard truck, focus on sturdy corrugated cardboard, PVA glue, tape, cardstock wheels, and paint or wallpaper for the wrap. For a crawling tank made from ice cream sticks, the list expands to include a small motor, gears, a battery, a switch, wires, and thin rods for axles. An electric boat requires foam sheets, a small motor, a makeshift propeller from metal cans, a shaft made from an old pen refill, and waterproofing considerations. An aluminum roof rack needs industrial profiles, angle brackets, sealant, sandpaper, and rust-proof paint if you plan to weatherproof it.
Sourcing materials need not be expensive. Recycled boxes and bottle caps come from household waste. Craft stores carry cardstock, glue, and hobby tools cheaply. Salvaged electronics provide motors, wires, and switches. Hardware stores sell small metal rods and fasteners. For specialty parts like small gears and wheels, hobby shops or online marketplaces are quick sources. Buying small quantities avoids waste and keeps budgets low.
Think about alternatives and substitutes. If you lack aluminum, thick cardboard reinforced with wooden strips can simulate a rack. If you cannot find a small motor, consider converting a toy motor from an old device. Bottle caps can become wheels when glued to a small hub made from cardboard or foam. Use bamboo skewers as axles when metal rods are unavailable. For adhesives, if hot glue is not an option, use a strong tack adhesive or heavy-duty tape for temporary assembly.
Planning quantities saves frustration. Estimate the size of your truck body and add 20 percent to account for mistakes. For wheels, prepare extras in case cuts go wrong. Keep spare blades, glue sticks, and batteries on hand. Small projects often use minimal materials but require precision and patience.
Finally, prepare a simple workspace layout. Group structural materials in one area. Keep paints and adhesives separate to avoid spills. Set up a drying zone with clips and a flat surface. A tidy station lets you focus on wrapping and finishing details.
For accessories, fittings, and further model-enhancement ideas, explore resources on truck accessories.
Reference: DIY Cardboard Box Evans Truck – https://www.instructables.com/DIY-Cardboard-Box-Evans-Truck/
Wrapped in Whimsy: A Cardboard Truck Wrap Guide
A cardboard truck becomes a storytelling object when you add a thoughtful exterior wrap. The wrap should be treated as the design language for the model, not a quick cover. Start with a sturdy base box cut into a long rectangular body with a distinct cab, then fold and glue the sides to form a stable frame. A hub-like balance helps the wheels stay aligned as you work.
When you wrap, choose a material that fits your styling goal. Paper wraps reveal patterns and colors; fabric wraps offer a tactile feel; wallpaper can add pattern and depth. Cut the material slightly larger than each panel, glue down smoothly, and smooth out air bubbles. Align seams so patterns continue across panels for a cohesive look. Consider a themed motif—retro signage, space-age graphics, or playful stripes—to unify the wrap.
Color and details bring the truck to life. Paint window frames and accents with acrylics or markers, and add hand-drawn details or decals. Drying time gives you a moment to assess balance and fix gaps. For texture, a dry brush or subtle weathering adds character without overpowering the wrap.
Wheels anchor the model. Create wheels from foam board, thick cardboard, or bottle caps, and mount them on a simple axle. The wheels can rotate, letting light catch the wrapped surface and inviting interaction.
Finish with a protective seal. A clear spray or brush-on sealant safeguards the surface and lets you choose a matte or gloss finish. The seal unifies the wrap and protects your hard work, especially for active play.
The wrapped cardboard truck is more than a craft project; it’s a portable canvas for storytelling that you can revise over time as interests evolve.
Wrapping a Cardboard Truck DIY: Overcoming Structural, Motion, and Aesthetic Hurdles to Create a Durable Play Model
The appeal of wrapping a truck in a DIY cardboard project stems from a simple idea: transform a humble box into a miniature truck that feels substantial in hand and satisfying to look at. The process resembles painting a miniature stage set more than applying a gloss coating to a real vehicle. Yet the craft presents real challenges that can derail a project if not anticipated. The heart of a successful cardboard truck wrapping lies in treating the wrap as both a design layer and a structural ally. When you approach the build with this dual purpose in mind, you begin to see that the exterior decoration and the internal framework are not separate tasks but two halves of a single, integrated process. The result is a model that not only looks finished but also endures the rough handling of playtime or classroom demonstrations. In practice, this means starting with a thoughtful plan for how the cab and cargo box connect, how the wheels will rotate smoothly, and how the surface treatment will hold up to repeated use. It means balancing creativity with craft, color with stability, and whimsy with discipline. The path to a polished wrap begins with recognizing common stumbling blocks that show up across many tutorials, especially when the goal is a full-scale, tactile model rather than a fleeting paper vehicle. The most reliable way to navigate these obstacles is to weave reinforcement into the design from the outset. For instance, rather than letting the cargo area hang on a single layer of cardboard, one can insert internal braces along the undercarriage and along key joints where stress concentrates. Thin cardboard shrinks and warps under heat or moisture, so stiff strips tucked inside—think of them as skeletal ribs—help maintain squared lines and prevent collapse when the truck is stood on end or gently bumped during play. In practice, this reinforcement does not have to complicate the build; it can be as simple as sliding a few narrow cardboard slats or light wooden skewers into the frame before the glue has fully cured. As the joints dry, these internal supports become invisible guardians of the truck’s shape, allowing the outer shell to do its decorative work without being asked to bear load it cannot handle. When you reinforce, you also set yourself up for a more forgiving surface to wrap. A wrap is a decoration, yes, but it also serves as a protective layer. A well-sealed exterior resists moisture and wear, helping the finish last longer between sessions of coloring, tagging, or sticker placement. The wrap itself can be rich with texture and tone, achieved through layered papers, colored cardstock, or even a textured wallpaper peel that adheres smoothly to the cardboard surface. The design choices matter not only for look but for resilience. The more robust the exterior, the less likely small tears will emerge under the light stress of a child’s hands. The next set of challenges concerns wheels, a deceptively simple component that often reveals the most visible flaws in a cardboard project. Wheels made from bottle caps, foam discs, or cut-out discs of paper can spin smoothly in early testing, but they reveal misalignment or insufficient support after a few uses. A common pitfall is relying on a single, brittle axle that cannot bear uneven loads. The remedy is to treat the wheel system as a small rolling machine rather than a surface decoration. Small dowels, plastic straws, or slender rods can serve as axles, passing through carefully drilled holes or slots in the truck’s body. The wheels should sit on these axles with a little clearance to spin without rubbing the chassis at any point. The placement of the axles matters as much as their material. If the wheels sit too close to the body, friction will sap speed and create resistance; if they sit too far out, the truck becomes unstable and wobbly. Prototyping is key here: after attaching each wheel, gently rotate to feel for drag, listen for rubbing sounds, and observe whether the wheel returns to a centered position after release. The size and proportion of wheels also influence performance. Oversized wheels can overwhelm a small truck, while tiny wheels can trap the model in a perpetual wobble. Selecting a wheel size that corresponds to the scale of the model ensures not only smoother rolling but also a more cohesive overall look. This is where the decorative element and engineering sense converge. A well-chosen wheel system rewards both playability and visual balance, and it is worth pausing to test fit before final adhesion. Beyond mechanics, the wrapping process itself offers opportunities—and hazards—that affect aesthetics. A striking wrap can elevate a cardboard truck from a simple model to a display piece. Decorating with color and texture is not merely about making the vehicle pop; it is about creating a believable surface that wears well. The wrap can be achieved through a range of materials: bold pigment on cardstock, printed wallpaper, fabric scraps sealed with clear glue, or even layers of paint for a durable finish. The important part is consistency. A patchwork of mismatched textures can appear playful but chaotic, whereas a thoughtful combination creates a cohesive identity for the truck. When children participate in decoration, the project becomes a canvas for imagination. Let them color the body, outline windows, and sketch details such as headlights, grills, or license plates. The act of personalizing the truck reinforces care for the craft and helps sustain interest through multiple sessions. The decision to texture or pattern the wrap also affects durability. A glossy paint layer can resist scuffs better than a plain paper surface, yet it may trap fingerprints or show scratching more readily. In contrast, a matte finish combined with a protective sealant can offer a forgiving surface that hides minor blemishes and remains easy to clean. A practical compromise is to apply a clear protective coat after the wrapping and decorating are complete. This sealant acts as a shield against moisture, dust, and the occasional spill, extending the life of the project while preserving the look of the wrap. And while durability is important, one must also plan for assembly accuracy. The order in which parts come together—cutting, assembling, decorating, and then testing—governs the end result. Beginning with templates or precise outlines helps avoid misalignment that can plague later stages. Marking alignment points with a light pencil line or small notches can guide pieces to fit exactly as intended. This attention to alignment reduces the risk of gaps at joins, which can weaken the structure and interrupt the wrap’s continuity. The sequence matters as well: cut the main shapes first, assemble the cab to the chassis in a steady, logical progression, then attach the cargo box, and finally add the wheels. This method minimizes errors and creates a rhythm that keeps the project manageable, even for first-time builders. For those who want a performance-oriented finish, a version of the wrap can be designed with two modes: a sturdy, play-ready version and a lighter, display-only variant. The play-ready version uses thicker cardboard and reinforced joints, while the display version might rely on thinner layers and a higher emphasis on decorative elements. This dual-path approach acknowledges that the project can have multiple purposes and supports makers who intend to share or display their work after enthusiastic testing. The broader context of wrapping a cardboard truck highlights how accessible, low-cost materials can yield surprisingly durable results when used with method and care. The real skill lies in translating a decorative idea into a practical build that stands up to repeated handling. In this light, the “wrap” becomes more than a surface treatment; it becomes a framework that defines structural integrity and tactile satisfaction. If readers want a practical, step-by-step visual reference, there are model-building guides that map out the process with clear diagrams and demonstrations. For a deeper dive into construction steps, consider the truck-box guide as a focused companion resource. truck-box offers a concise overview of how to pair outer decoration with sturdy internal structure, ensuring that the wrap does not become a cosmetic shell over a fragile frame. For a more illustrative, hands-on experience that aligns with the cardboard-box approach, a comprehensive, image-driven walkthrough is also available in external tutorials. These resources reinforce the idea that wrapping a cardboard truck is as much about careful planning as it is about creativity. They emphasize testing early and iterating on both the design and the mechanics, so that by the time the wrap is complete, the model is not only visually engaging but also robust enough to withstand ongoing manipulation. The interplay of decoration and durability is the core lesson here. The wrapping process is a conversation between aesthetics and engineering, where the materials themselves respond to how you shape and reinforce them. The most satisfying outcomes arise when a builder treats the exterior finish as a shaped extension of the internal skeleton, rather than as a veneer slapped onto a flimsy frame. In that spirit, you can approach your next cardboard truck project with a mindset that values preparation, testing, and thoughtful detailing as much as color and pattern. The wrap becomes a story told across every seam and joint, with each reinforcement detail subtly contributing to both form and function. To support ongoing experimentation, keep a small toolkit ready: extra sheets of thick cardboard, a supply of strong adhesive, a few decorative papers, and a simple sealant for protection. As you gain experience, you’ll notice patterns in what works best for your hands, your space, and your preferred play or display setting. The path from concept to a wrapped cardboard truck is rarely a straight line, but the detours teach you valuable lessons about how to balance structural soundness with visual charm. And while this chapter centers on the cardboard model, the underlying principle—wrap as a dual tool for beauty and sturdiness—remains applicable across many DIY wrapping projects. For readers who want to explore further, the online community around cardboard models offers a wealth of ideas and troubleshooting tips. A concrete reference point is the online project ecosystem that showcases full, scalable truck models, including detailed steps for cutting, assembling, and decorating. For additional inspiration and guidance, consider visiting related resources and planning spaces that feature similar craft-focused approaches. external resources provide additional context and real-world examples that can spark new design directions and troubleshooting strategies. https://www.instructables.com/DIY-Cardboard-Box-Evans-Truck/
Final thoughts
Wrapping a cardboard truck model is more than just a fun craft—it’s a strategic tool that can enhance your visibility, engage potential customers, and foster creativity. By utilizing the right materials and following a structured approach, you can create striking displays that resonate with your audience. Additionally, understanding common challenges will equip you with the insights needed to tackle any issues efficiently. Dive into this creative process, embrace the artistic journey, and let your wrapped truck be a testament to your brand’s identity.